Send WhatsApp Message From Google Sheets - Easy Guide
Discuss with AI
Get instant insights and ask questions about this topic with AI assistants.
💡 Pro tip: All options include context about this blog post. Feel free to modify the prompt to ask more specific questions!
Everyone maintains their databases on Google sheets. You'd be happy to know that now you can send WhatsApp messages to users by changing value on Google sheets itself! Let's Dive in
- A Spur account, you can sign up here.
- A Google Sheets account. Link to our template here.
- A Zapier paid account. To minimize the steps on Zapier, I have created a template of the Zap we're going to build. Link here.
That's it, now let's setup things on the Spur & WhatsApp side first.
This is the simplest part. Just clone this Google Sheets template.
At the end of this tutorial
- You just add a row to this sheet
- Change the "Send Now?" column to "Yes"
- Wait 2 minutes
- As soon as the message is sent, the column value will change to Done
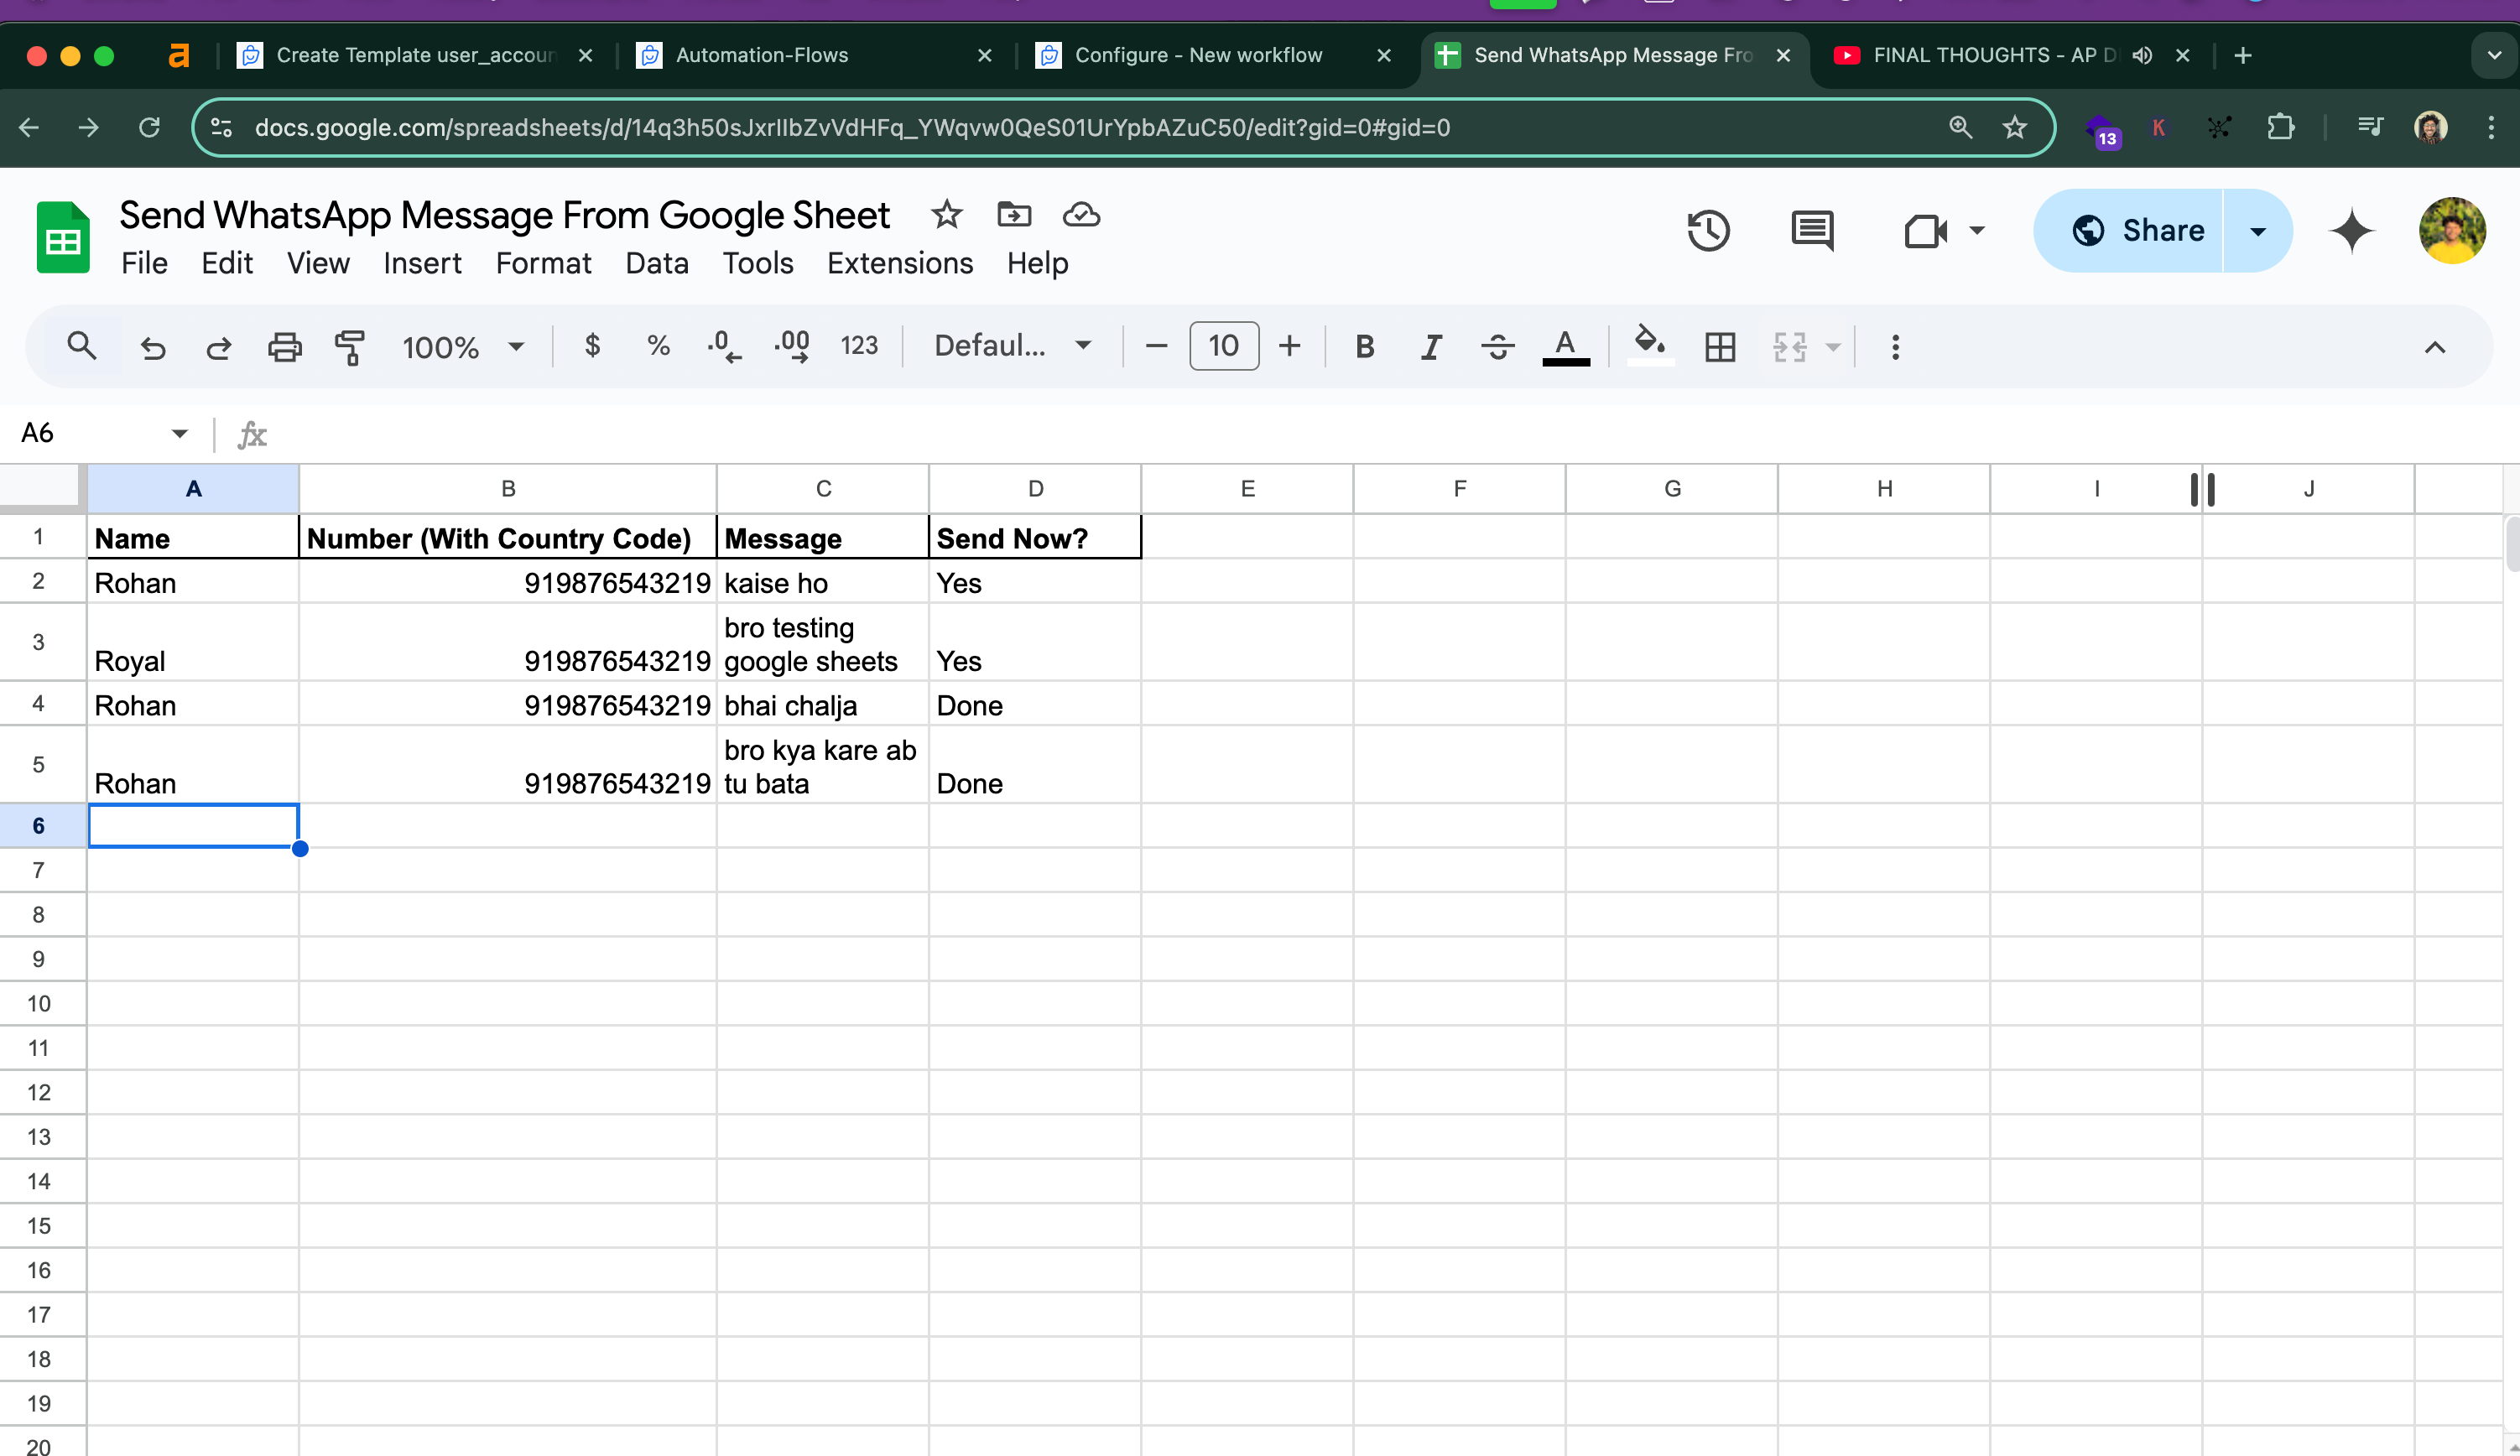
The message column can get quite long, so don't forget to wrap the text, here's a guide for that. As simple as that! Now let's set up the other stuff.
On WhatsApp, there is a concept of a conversation window. Meaning, you cannot message a person any free form message, like you can do with the normal WhatsApp Business App, unless they message you first.
So how do you overcome this? You can however send template messages outside the conversation window. Templates can be of three types, majorly
- Utility
- Marketing
- Authentication
Depending on your use case, you should build the template type, for this tutorial, we'll create a simple Utility template.
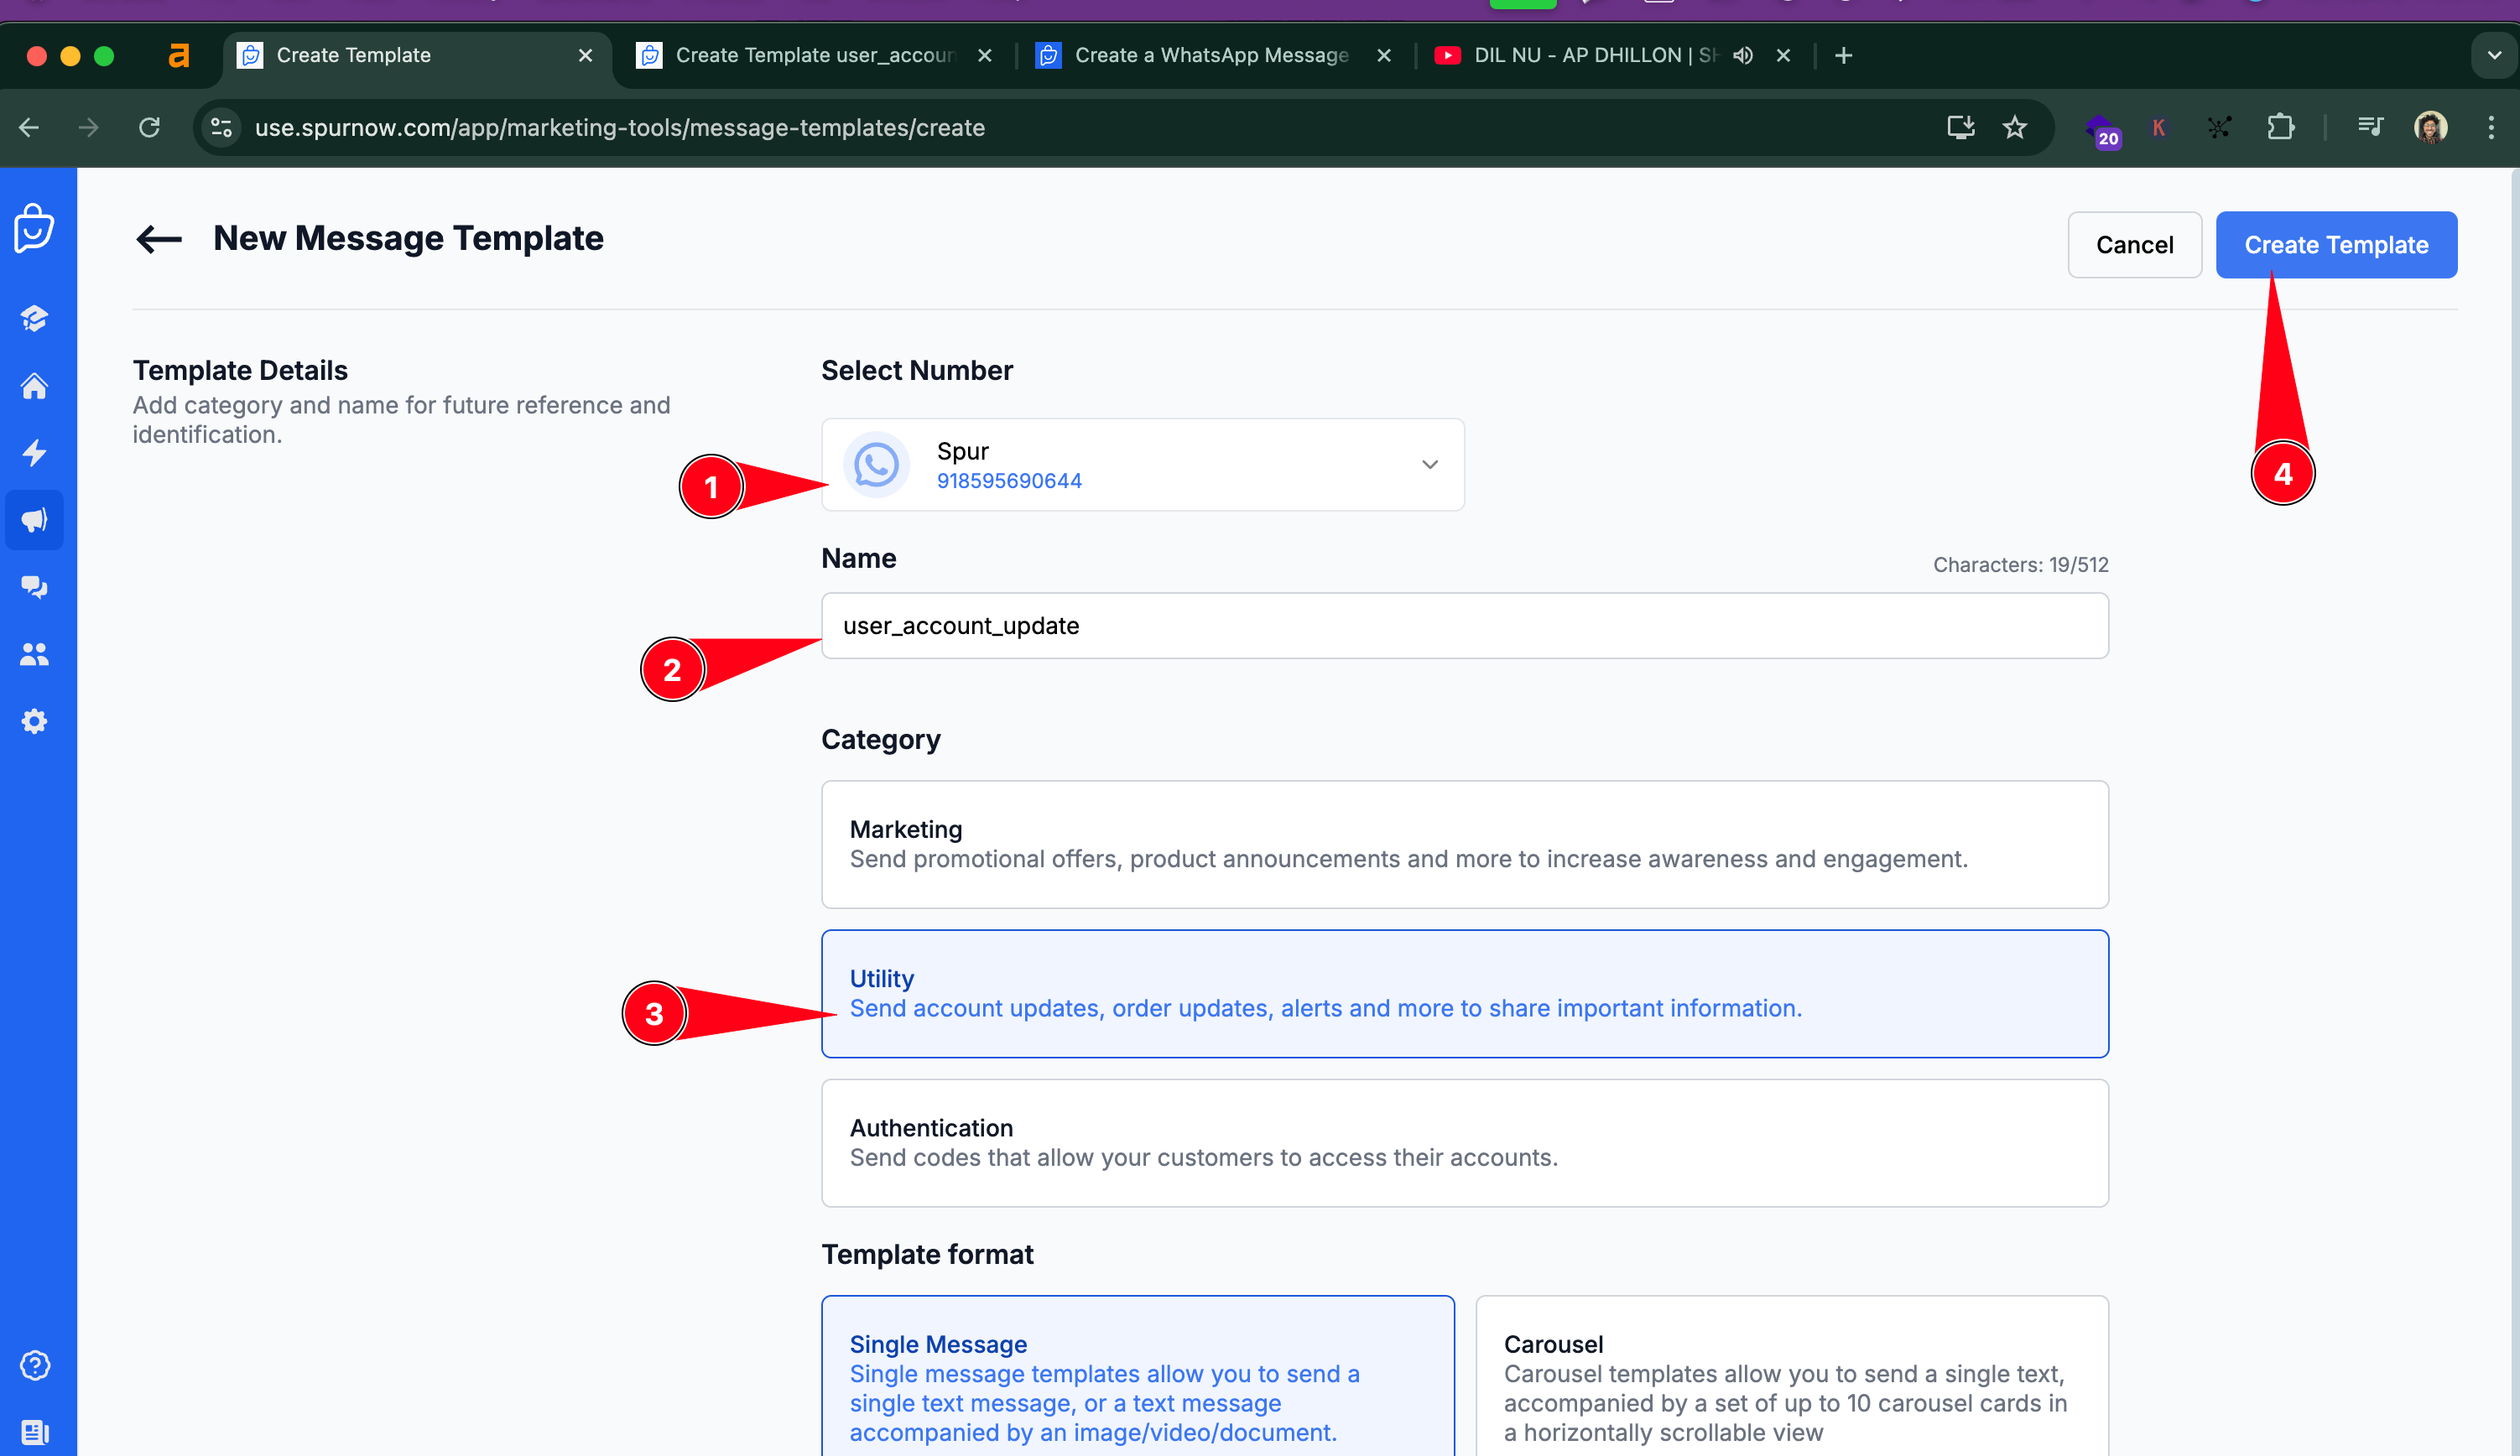
We have a detailed guide and video on how to create WhatsApp template. For brevity, I'll mention the steps required for this guide
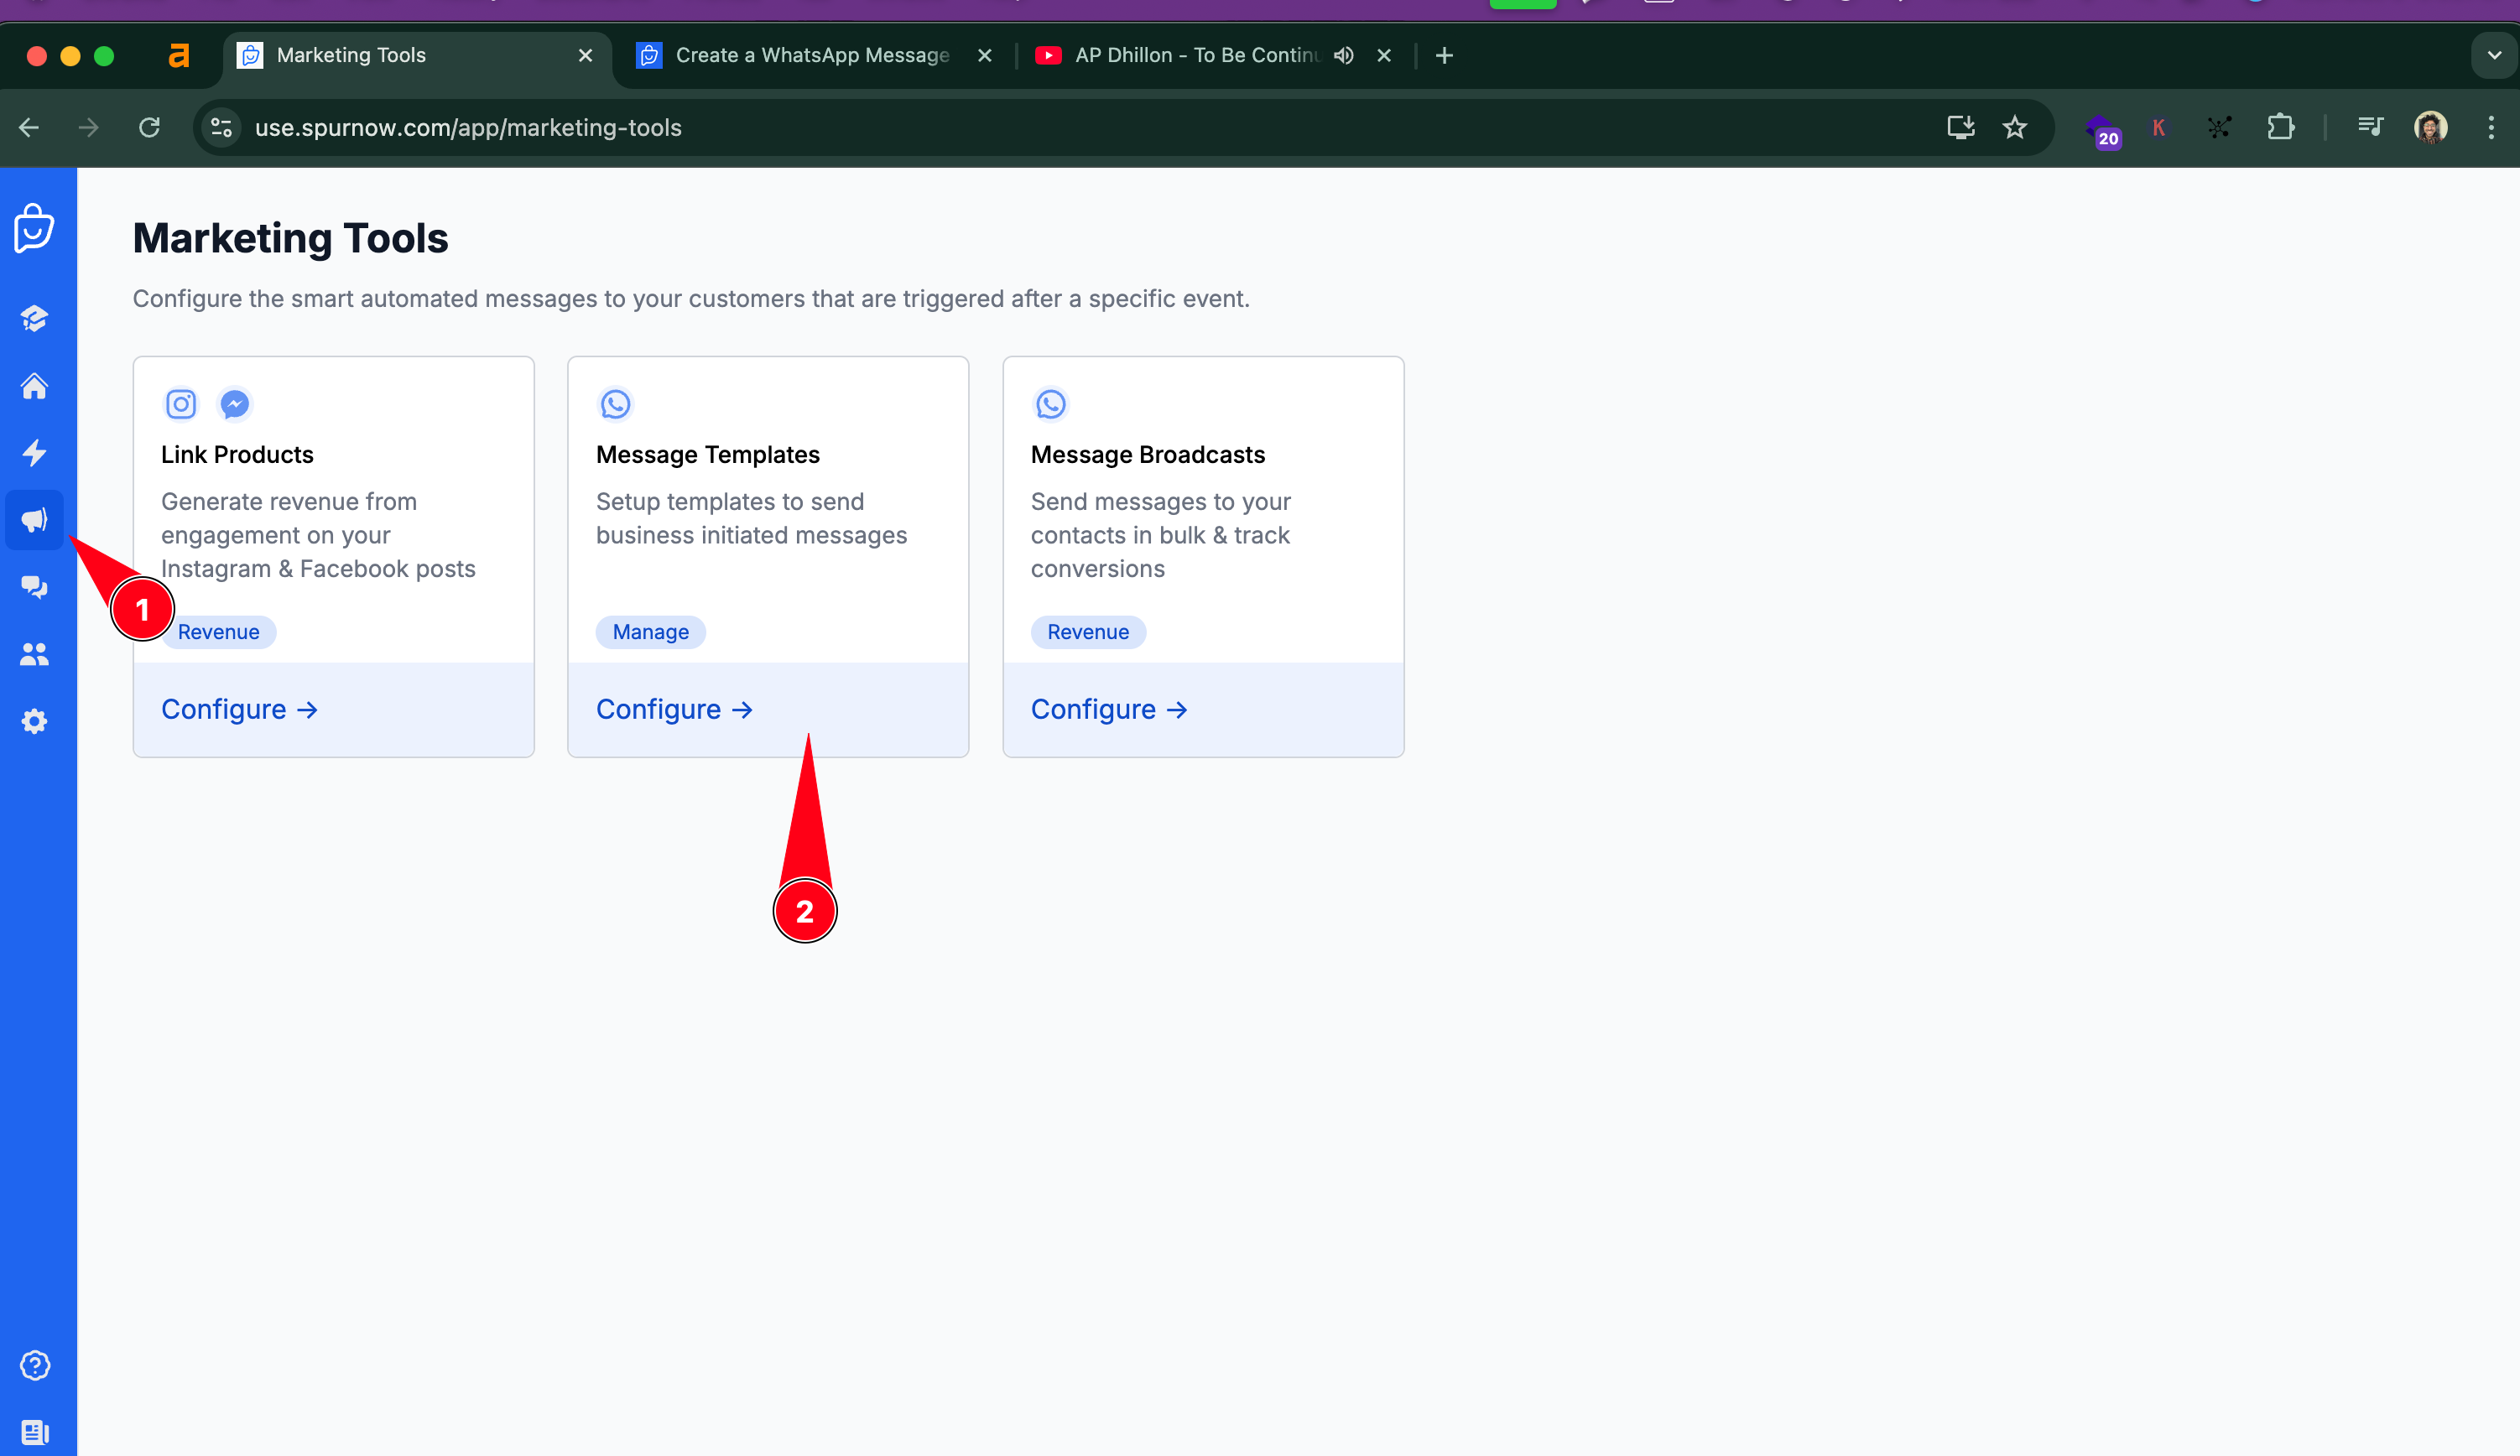
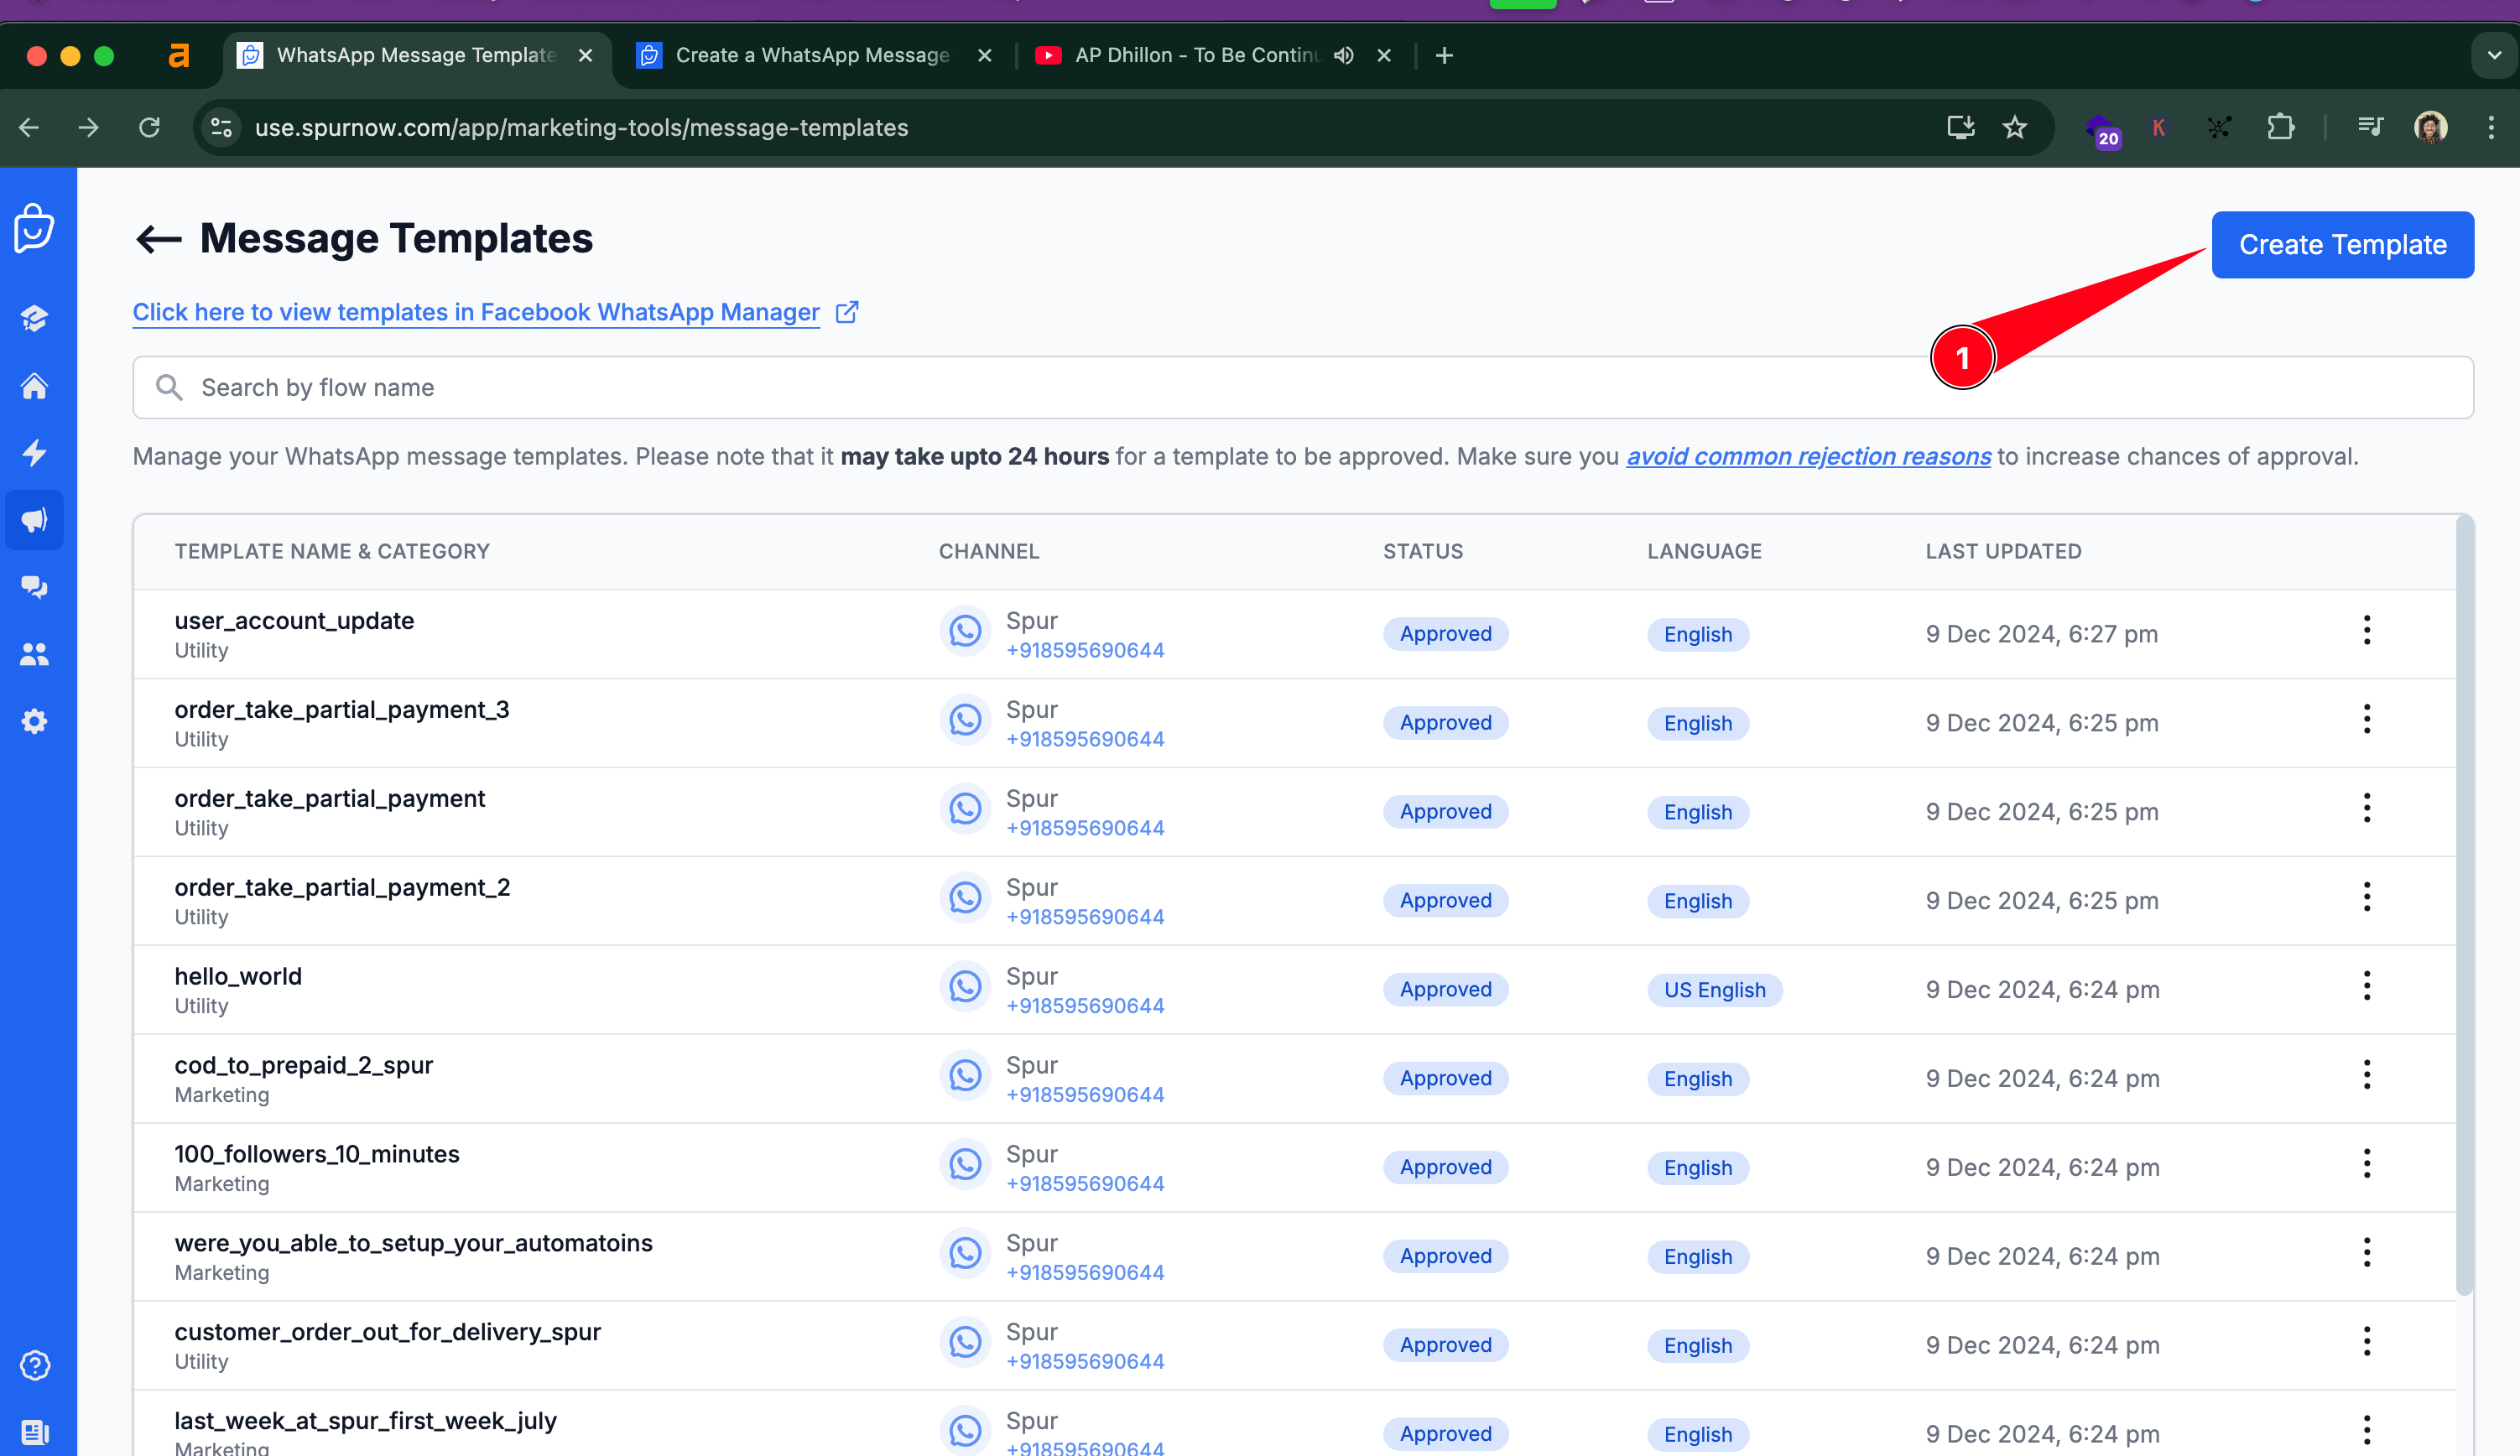
Now select the number you want to send the message from, name the template "user_account_update_2" or a relevant name to your use case.
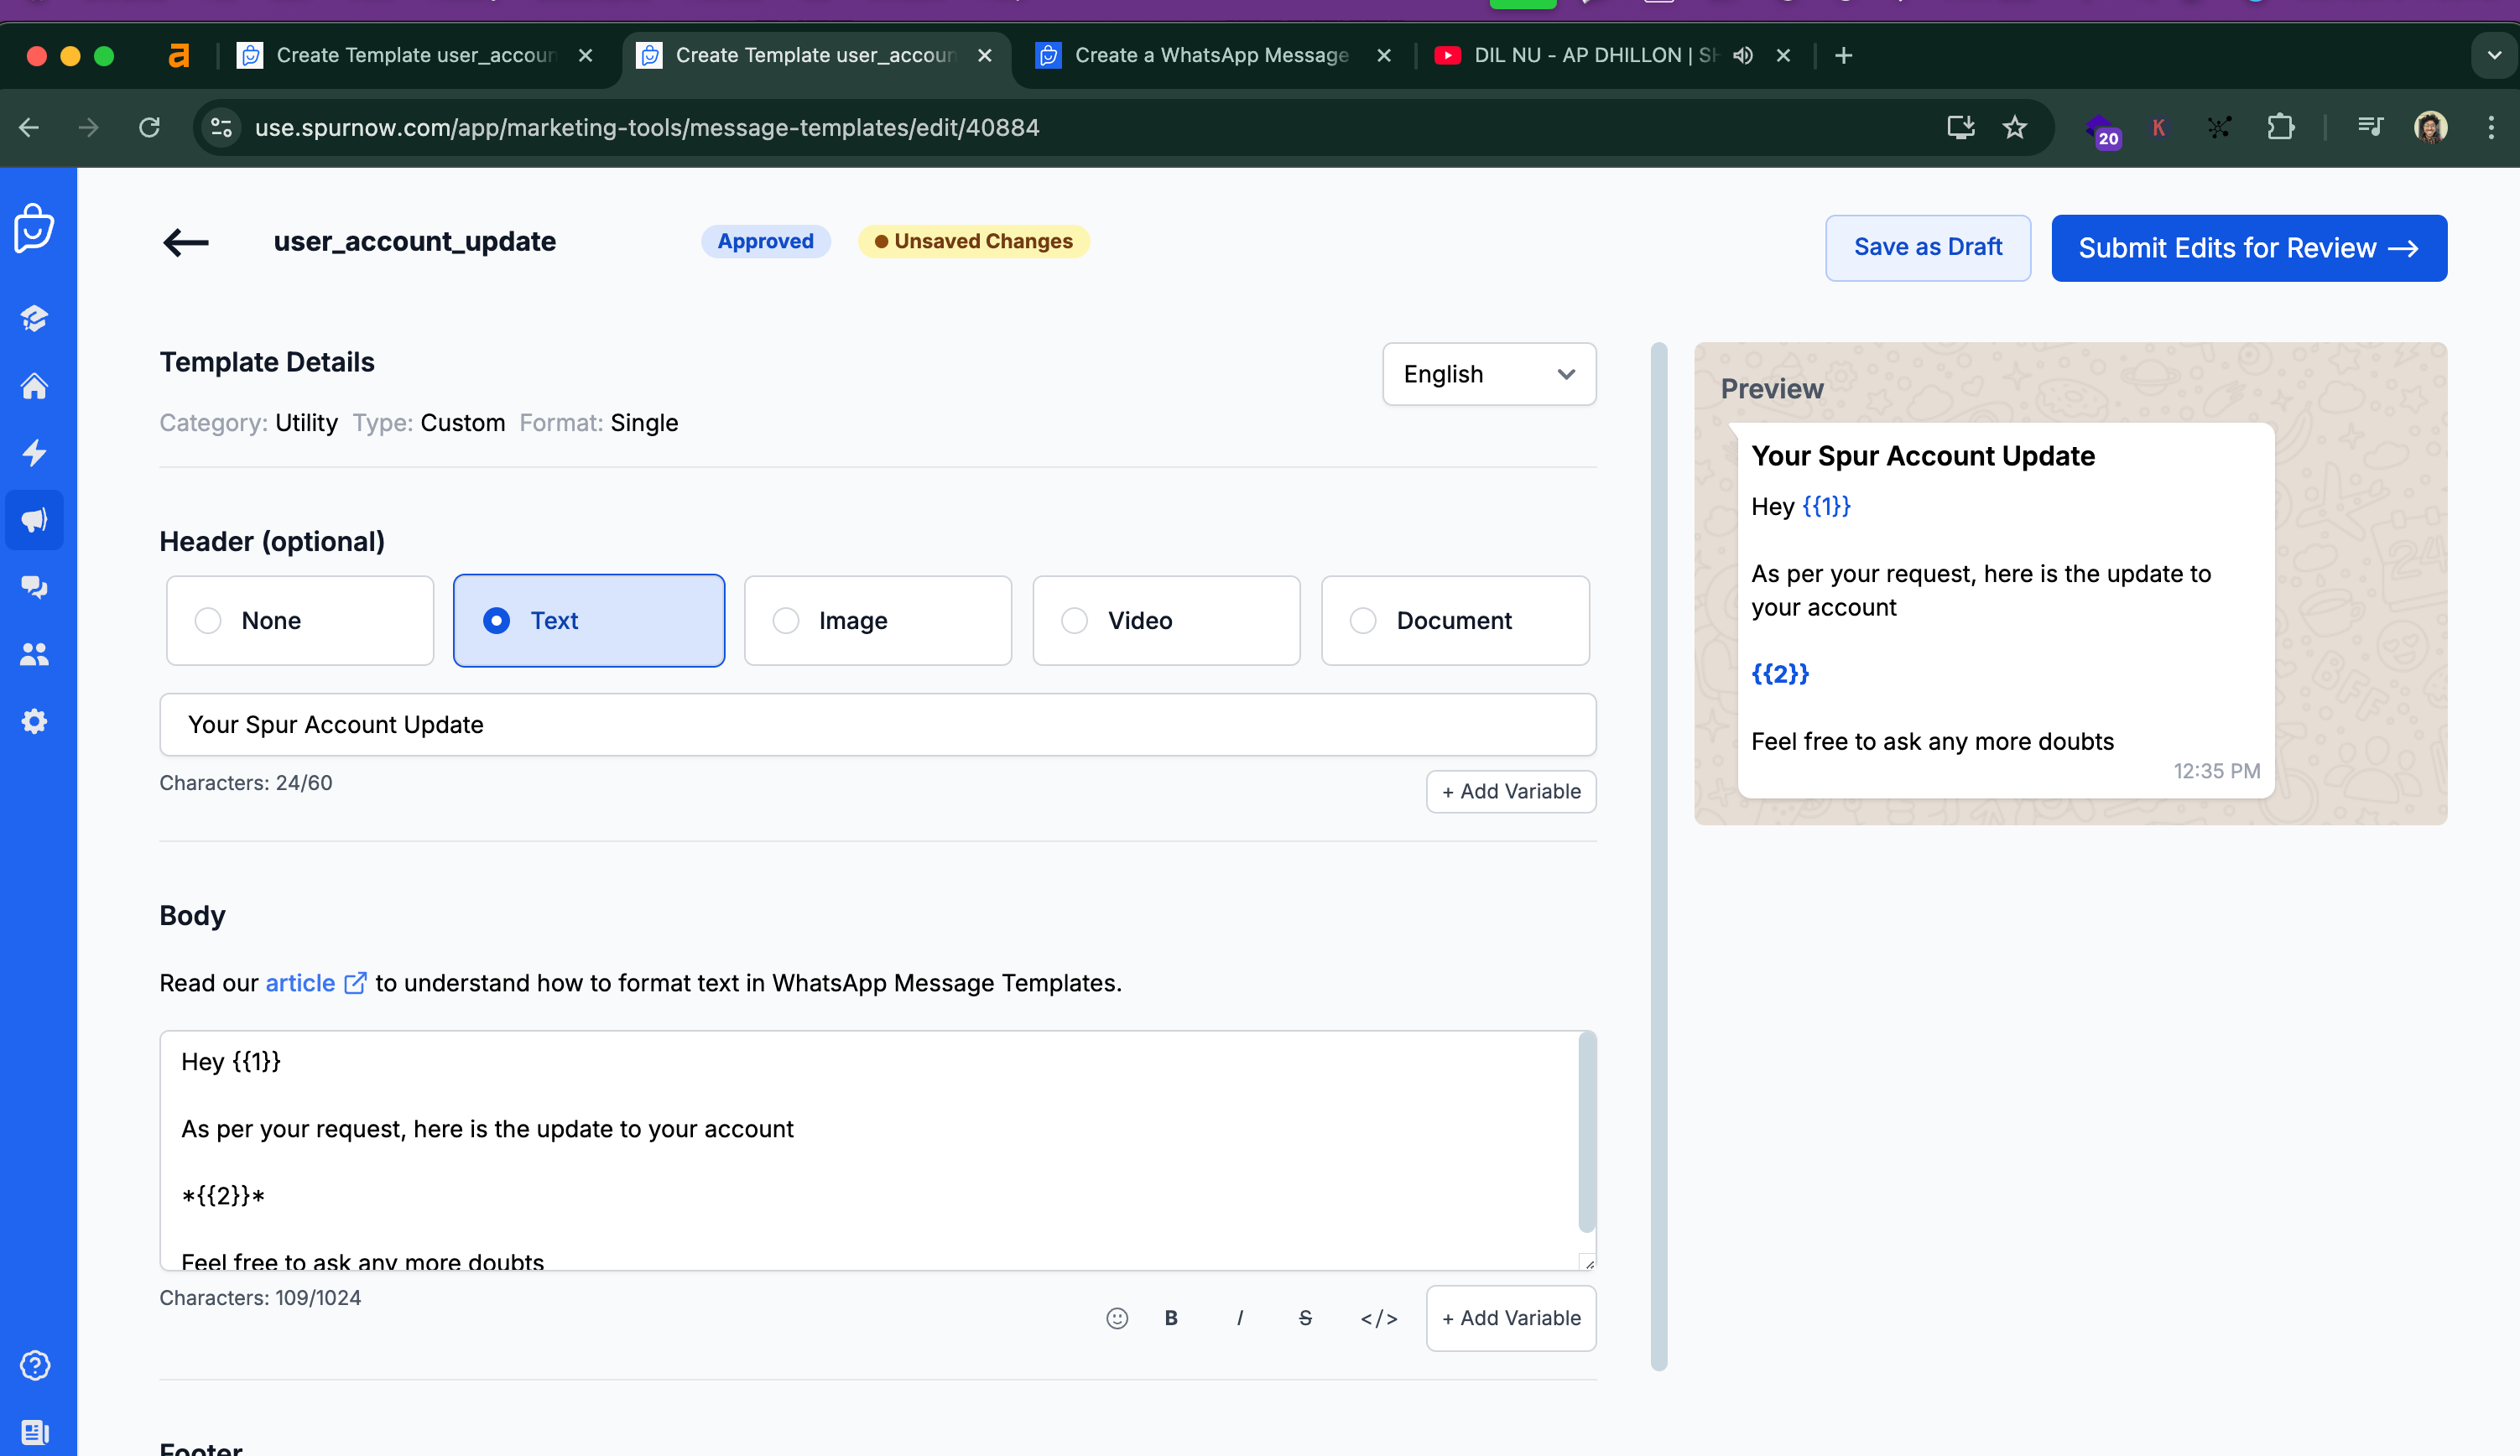
Here is the info of the template I've created, you can just copy paste this while testing
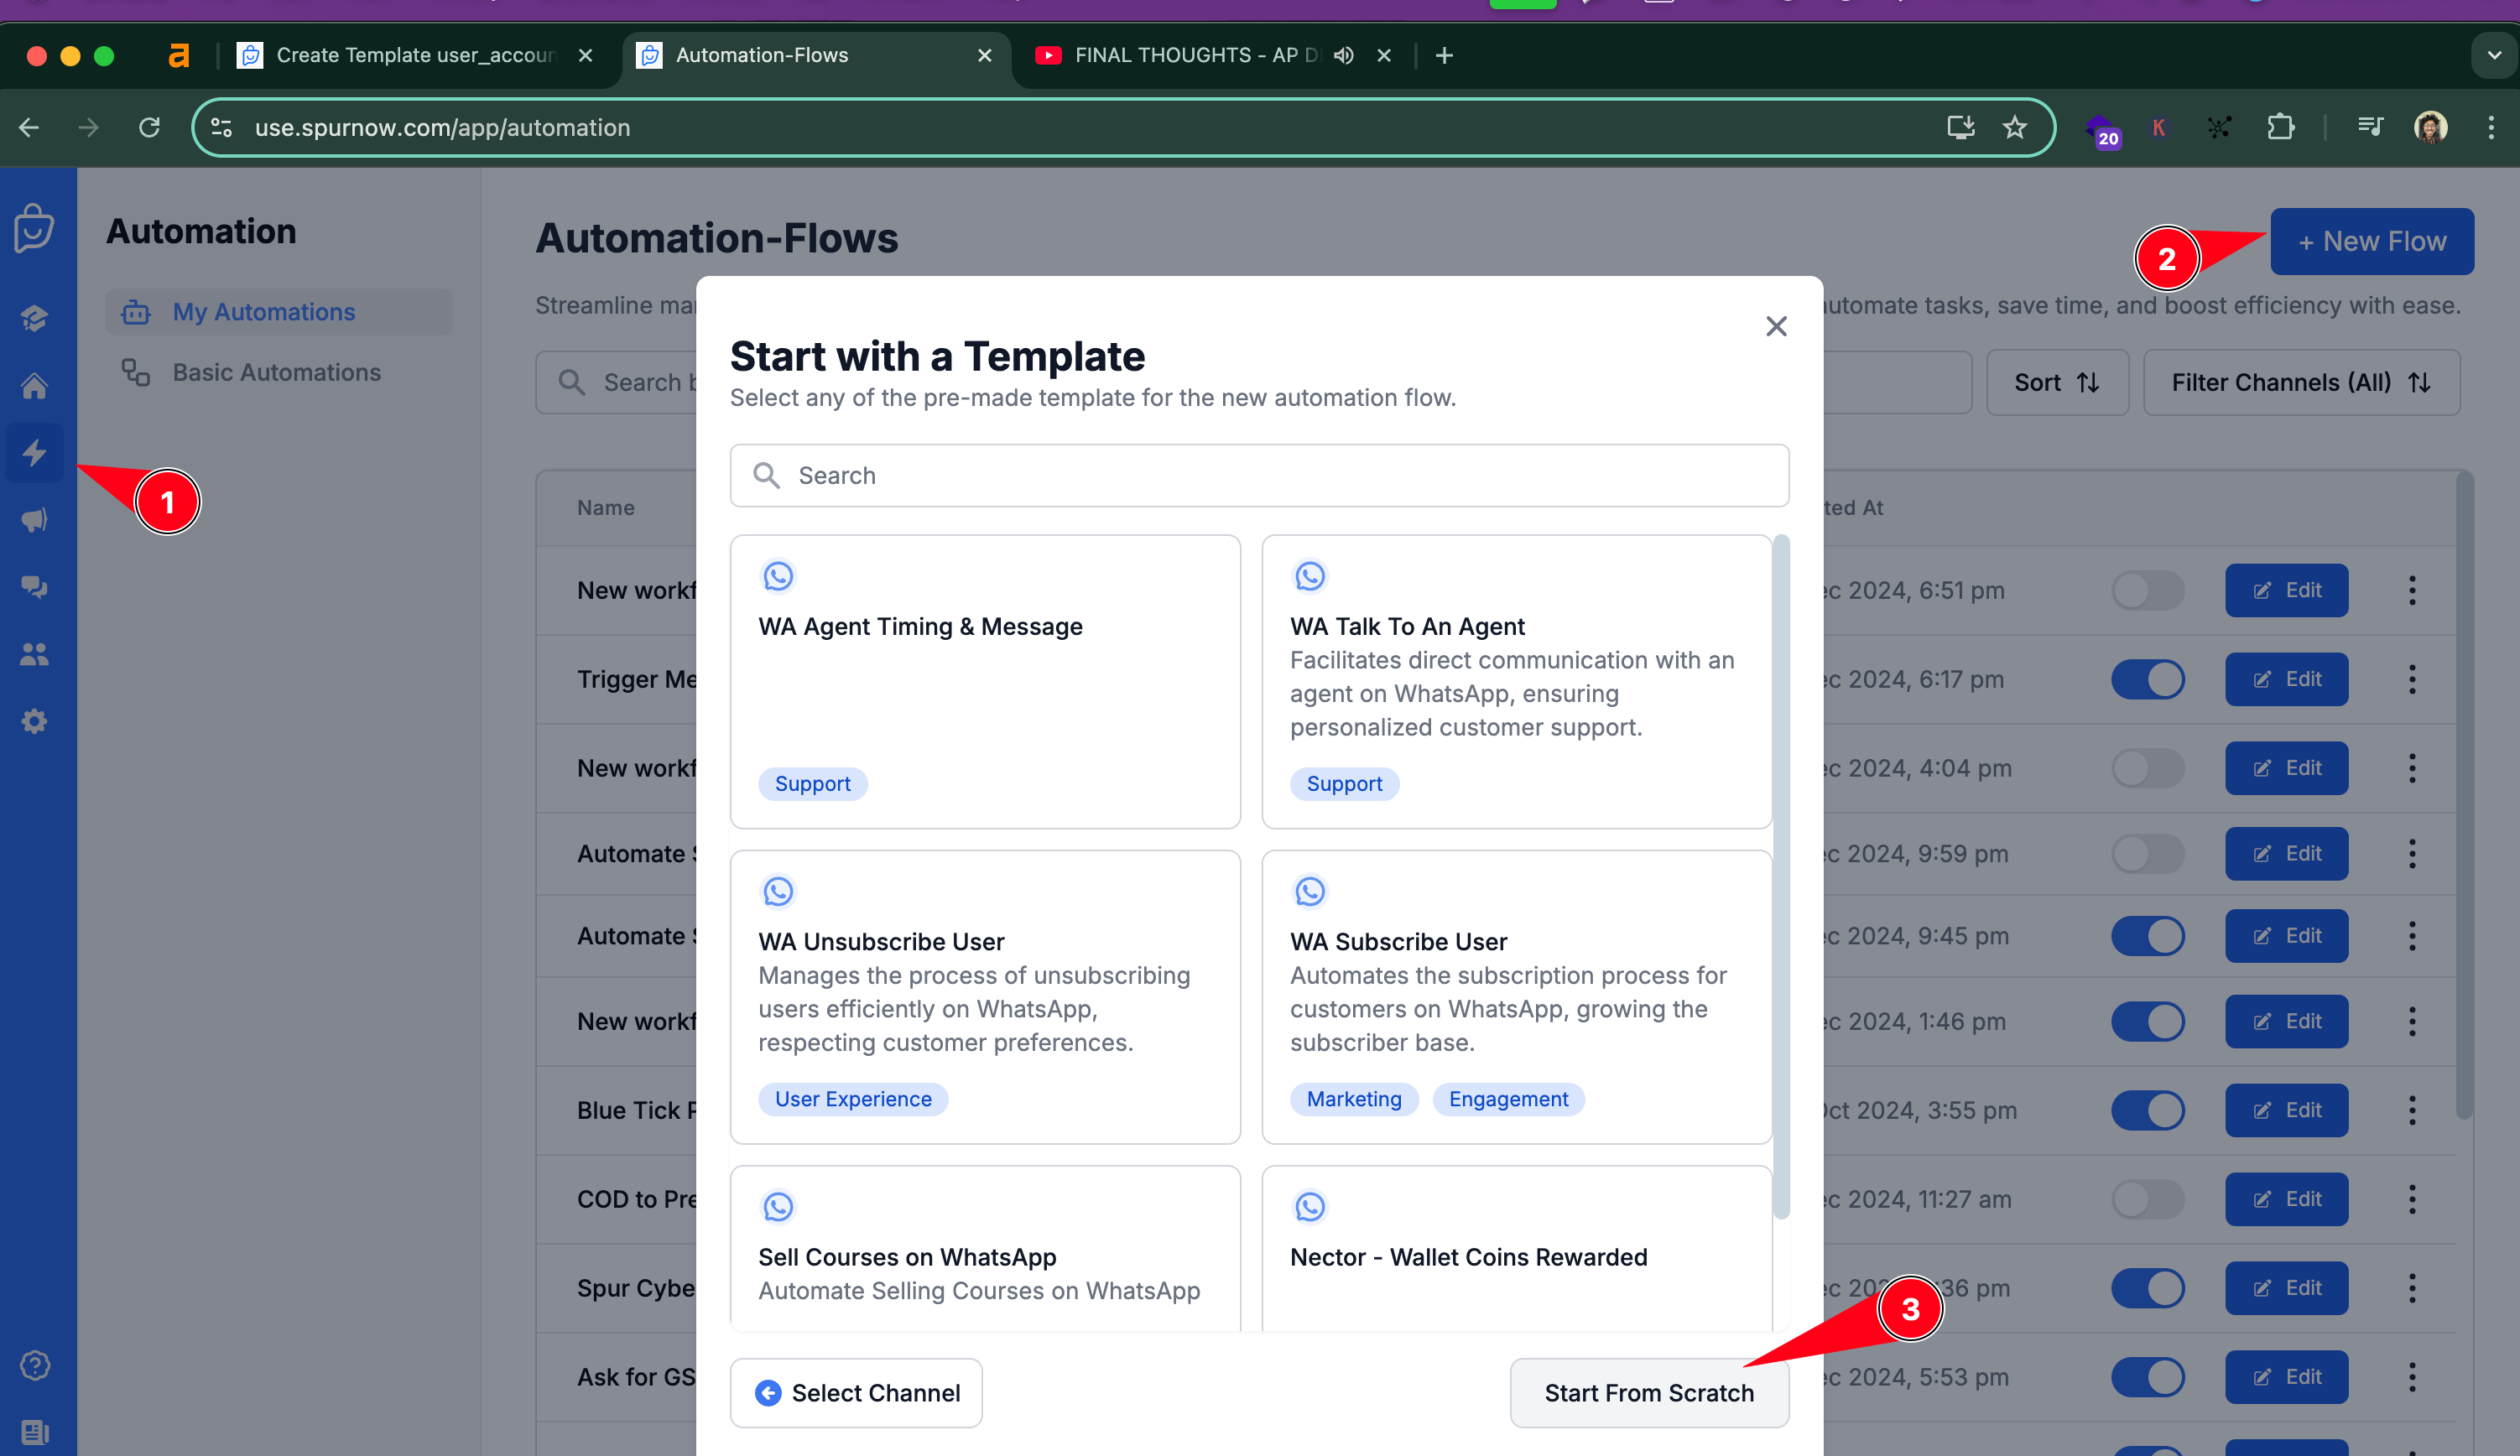
Go to Automations > New Flow > Select the WhatsApp Number > hit "Start From Scratch"
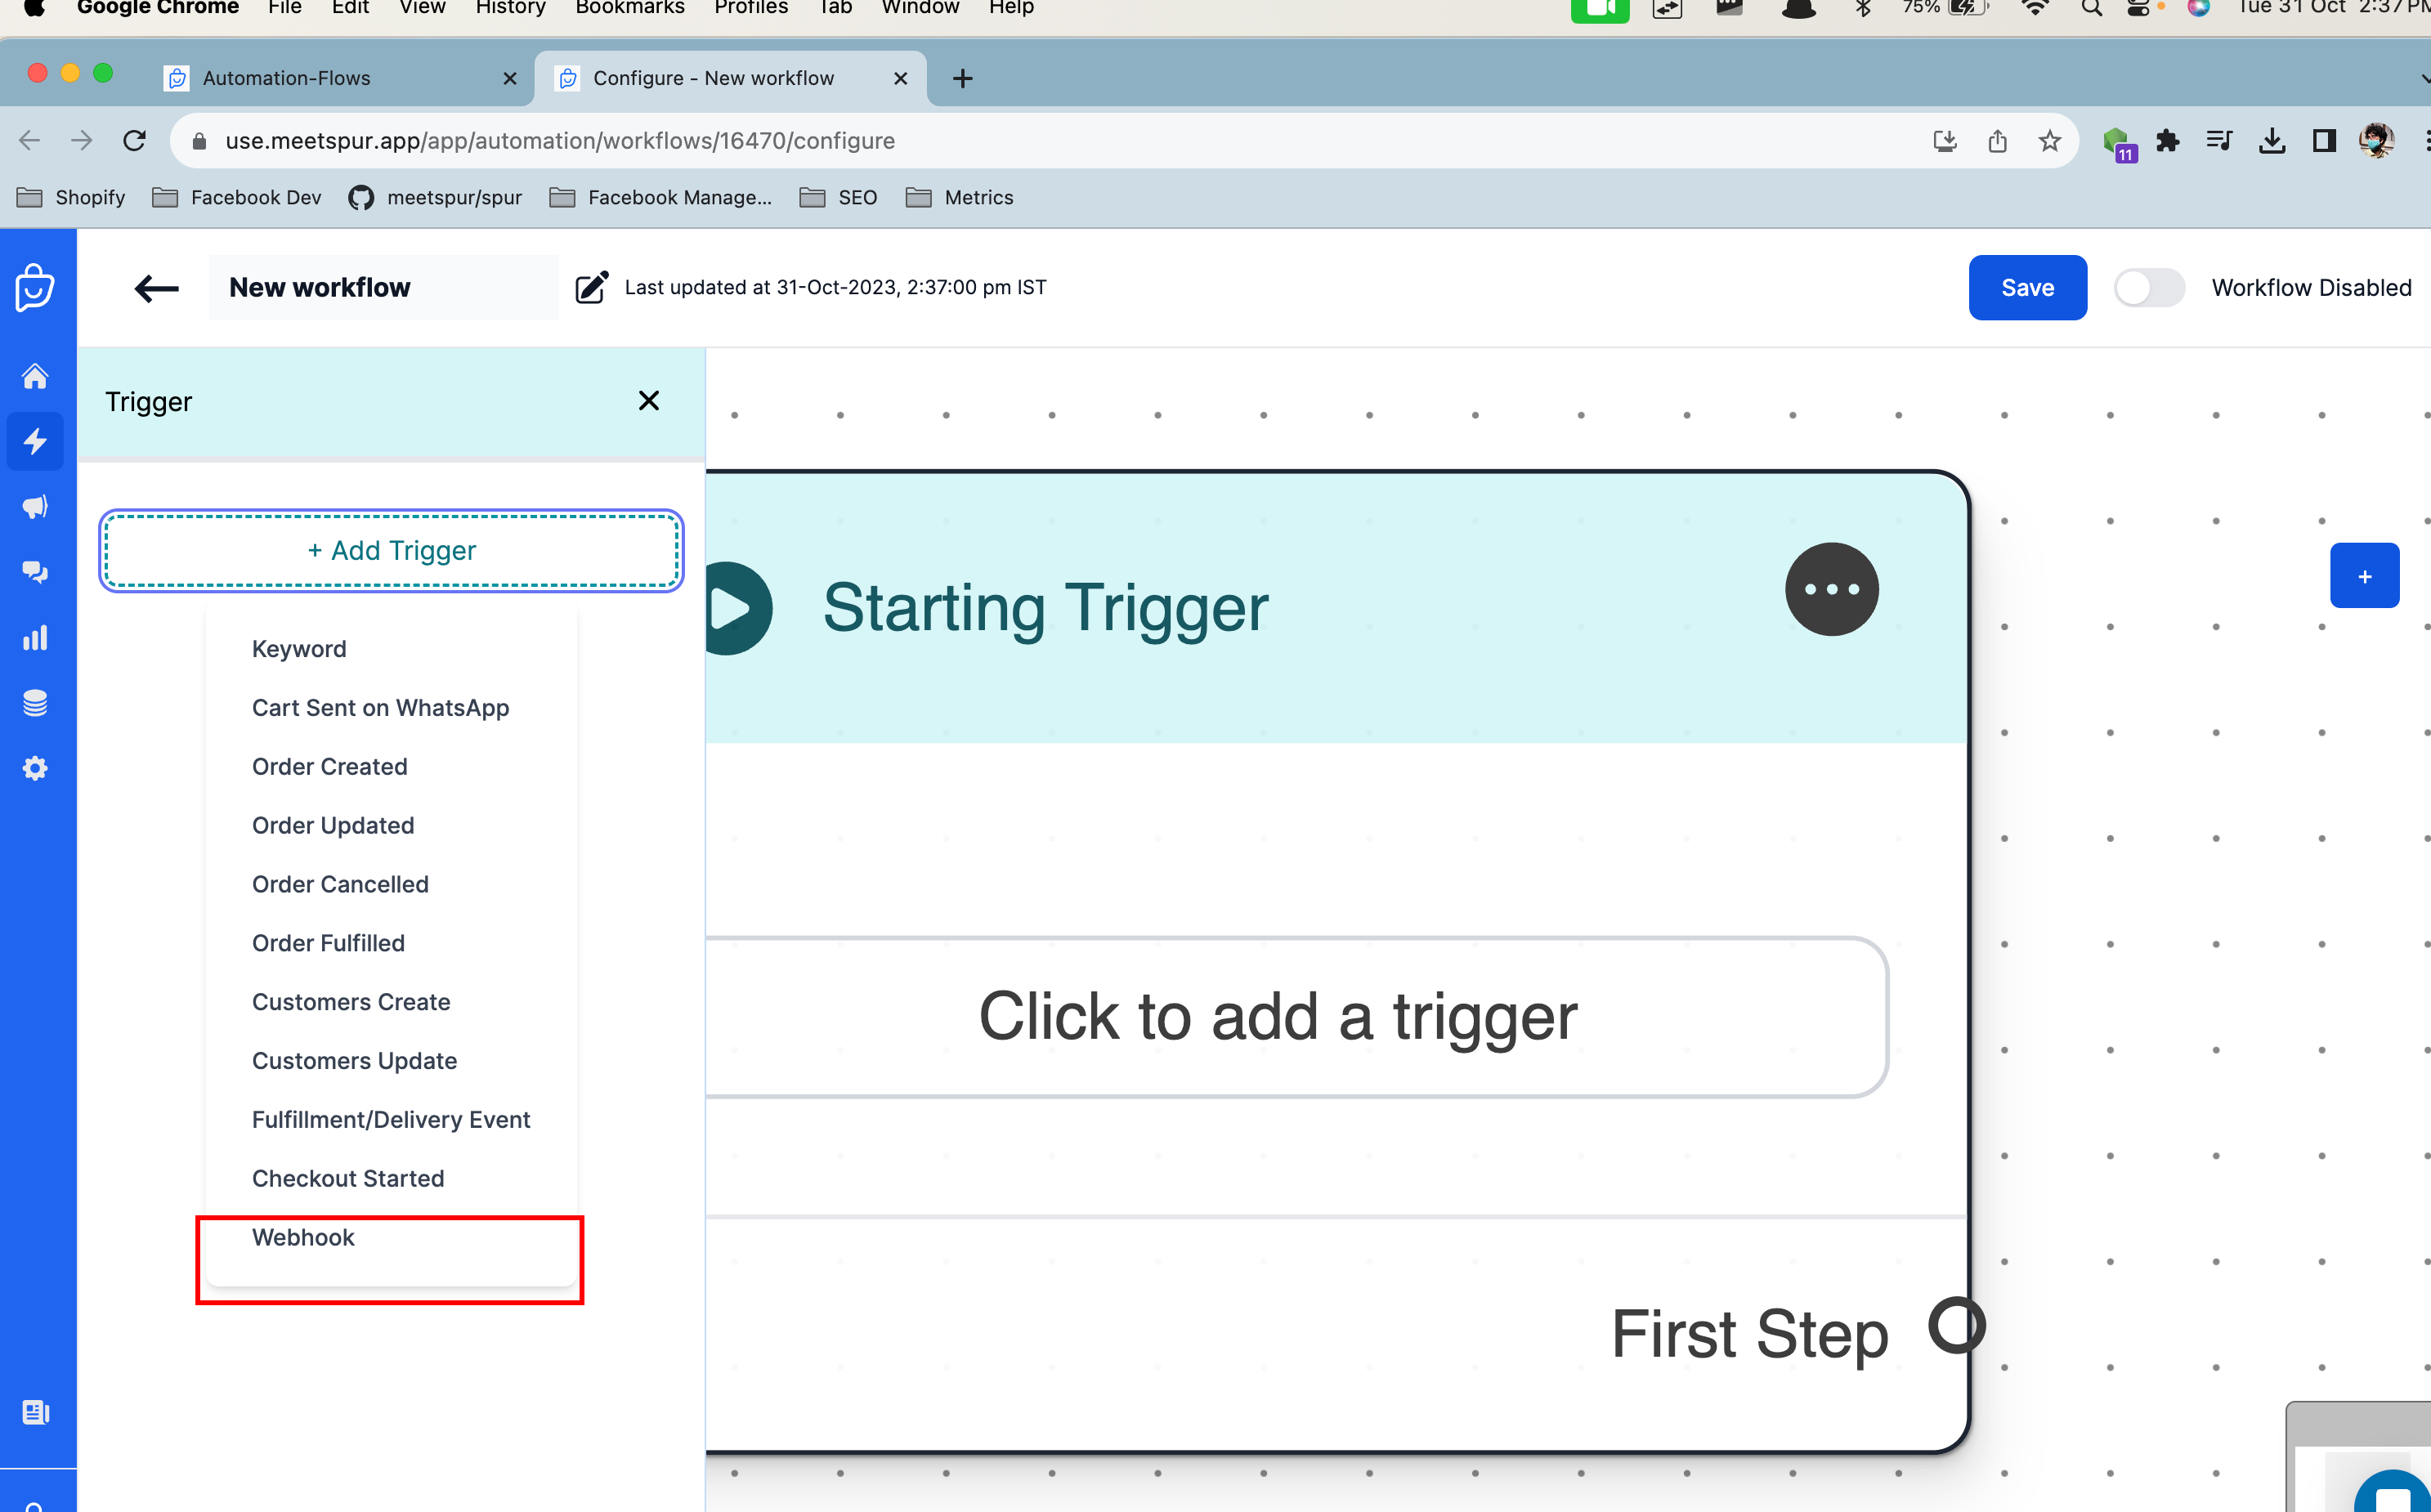
Now we add the trigger, we'll be using Webhooks for this
Now we will select the WhatsApp message to send
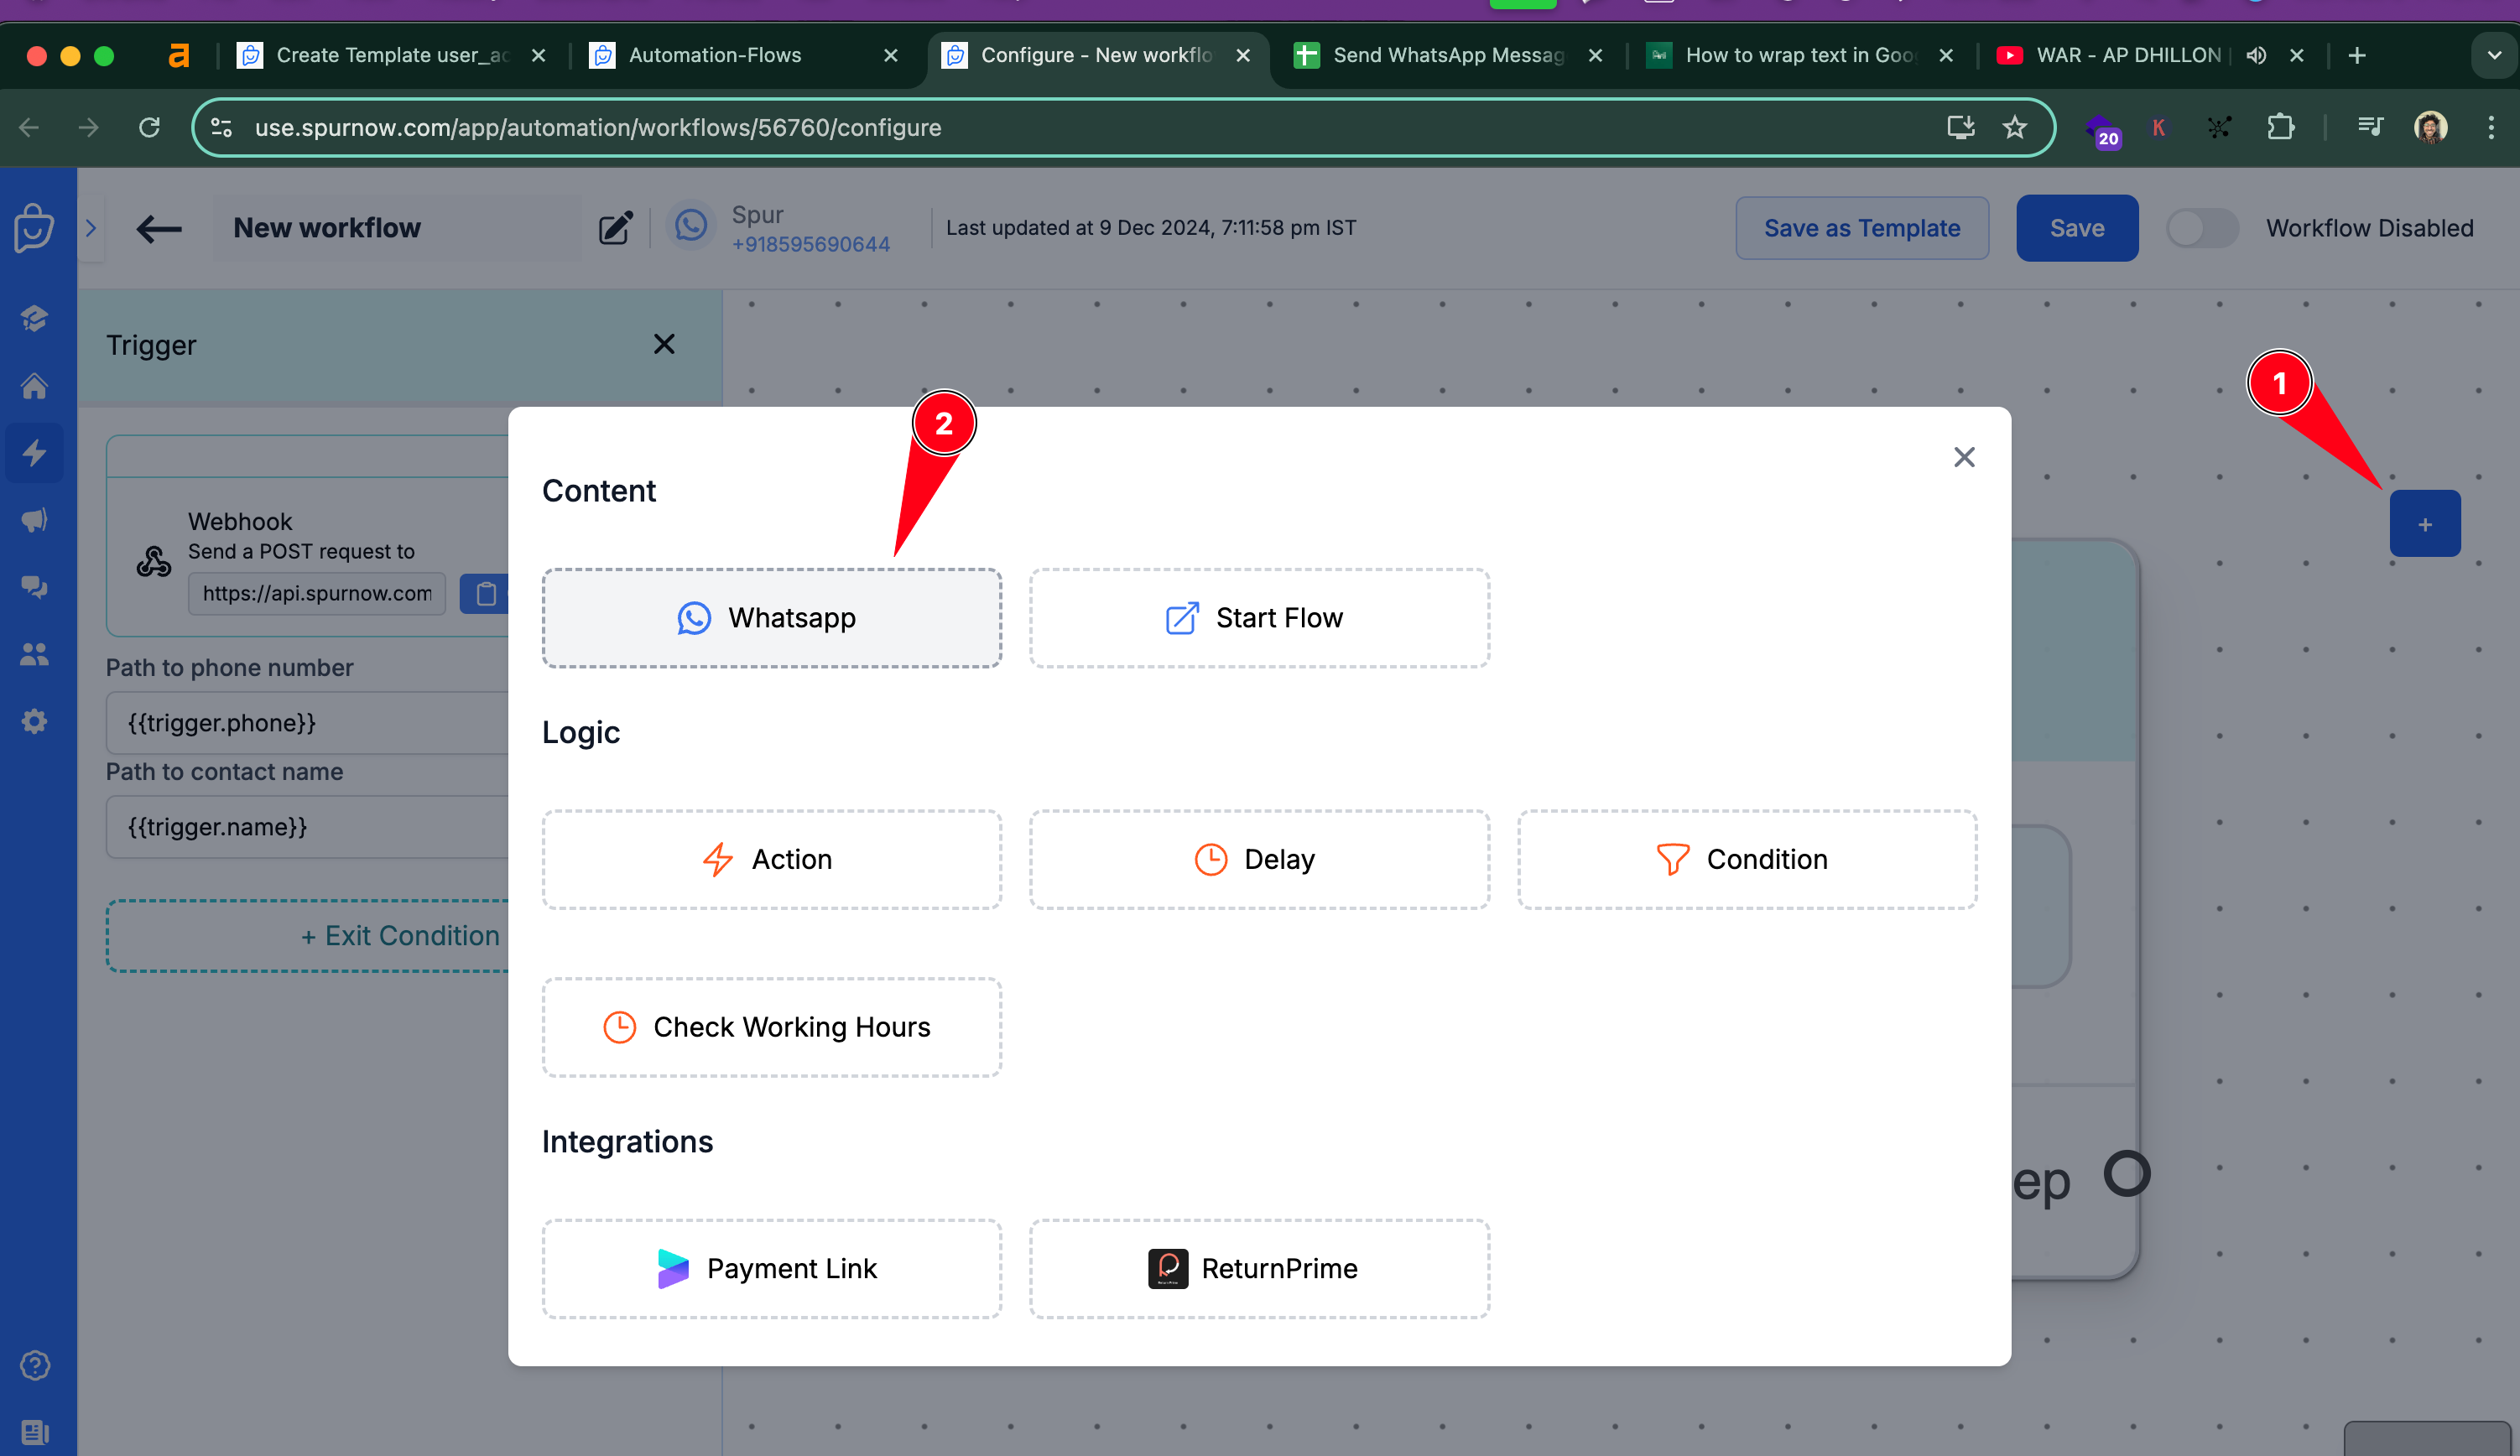
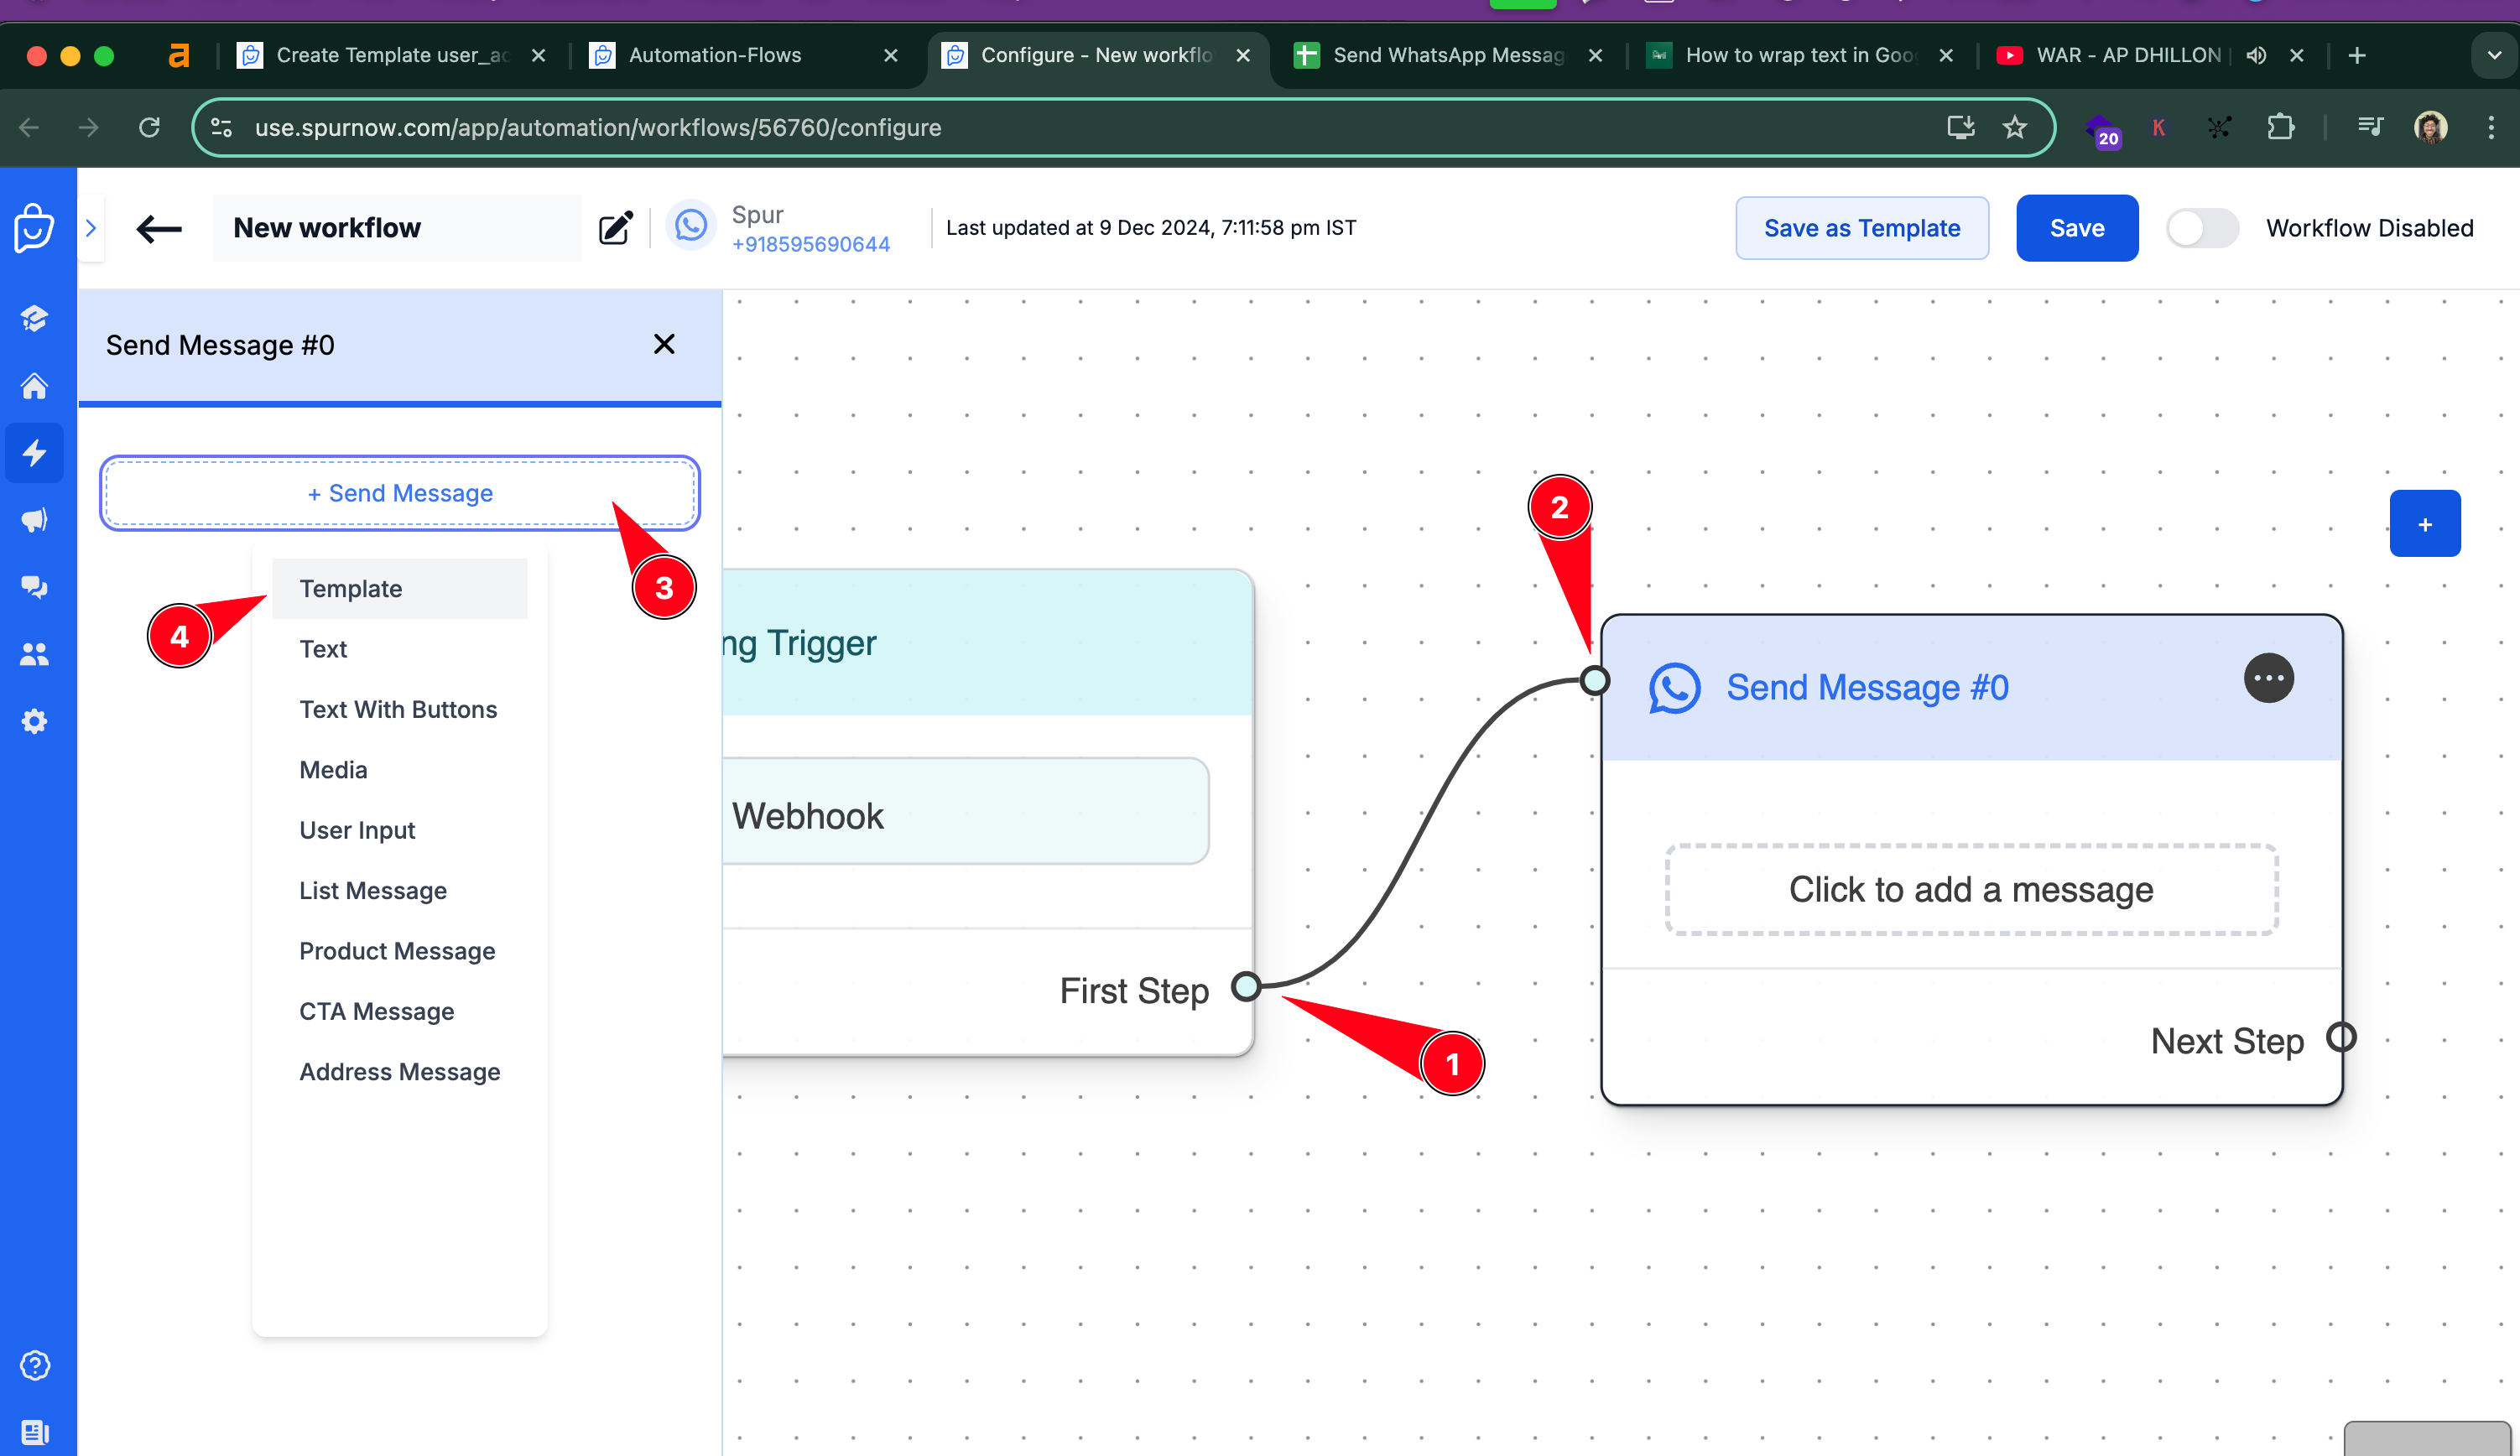
Now we connect the trigger to this step
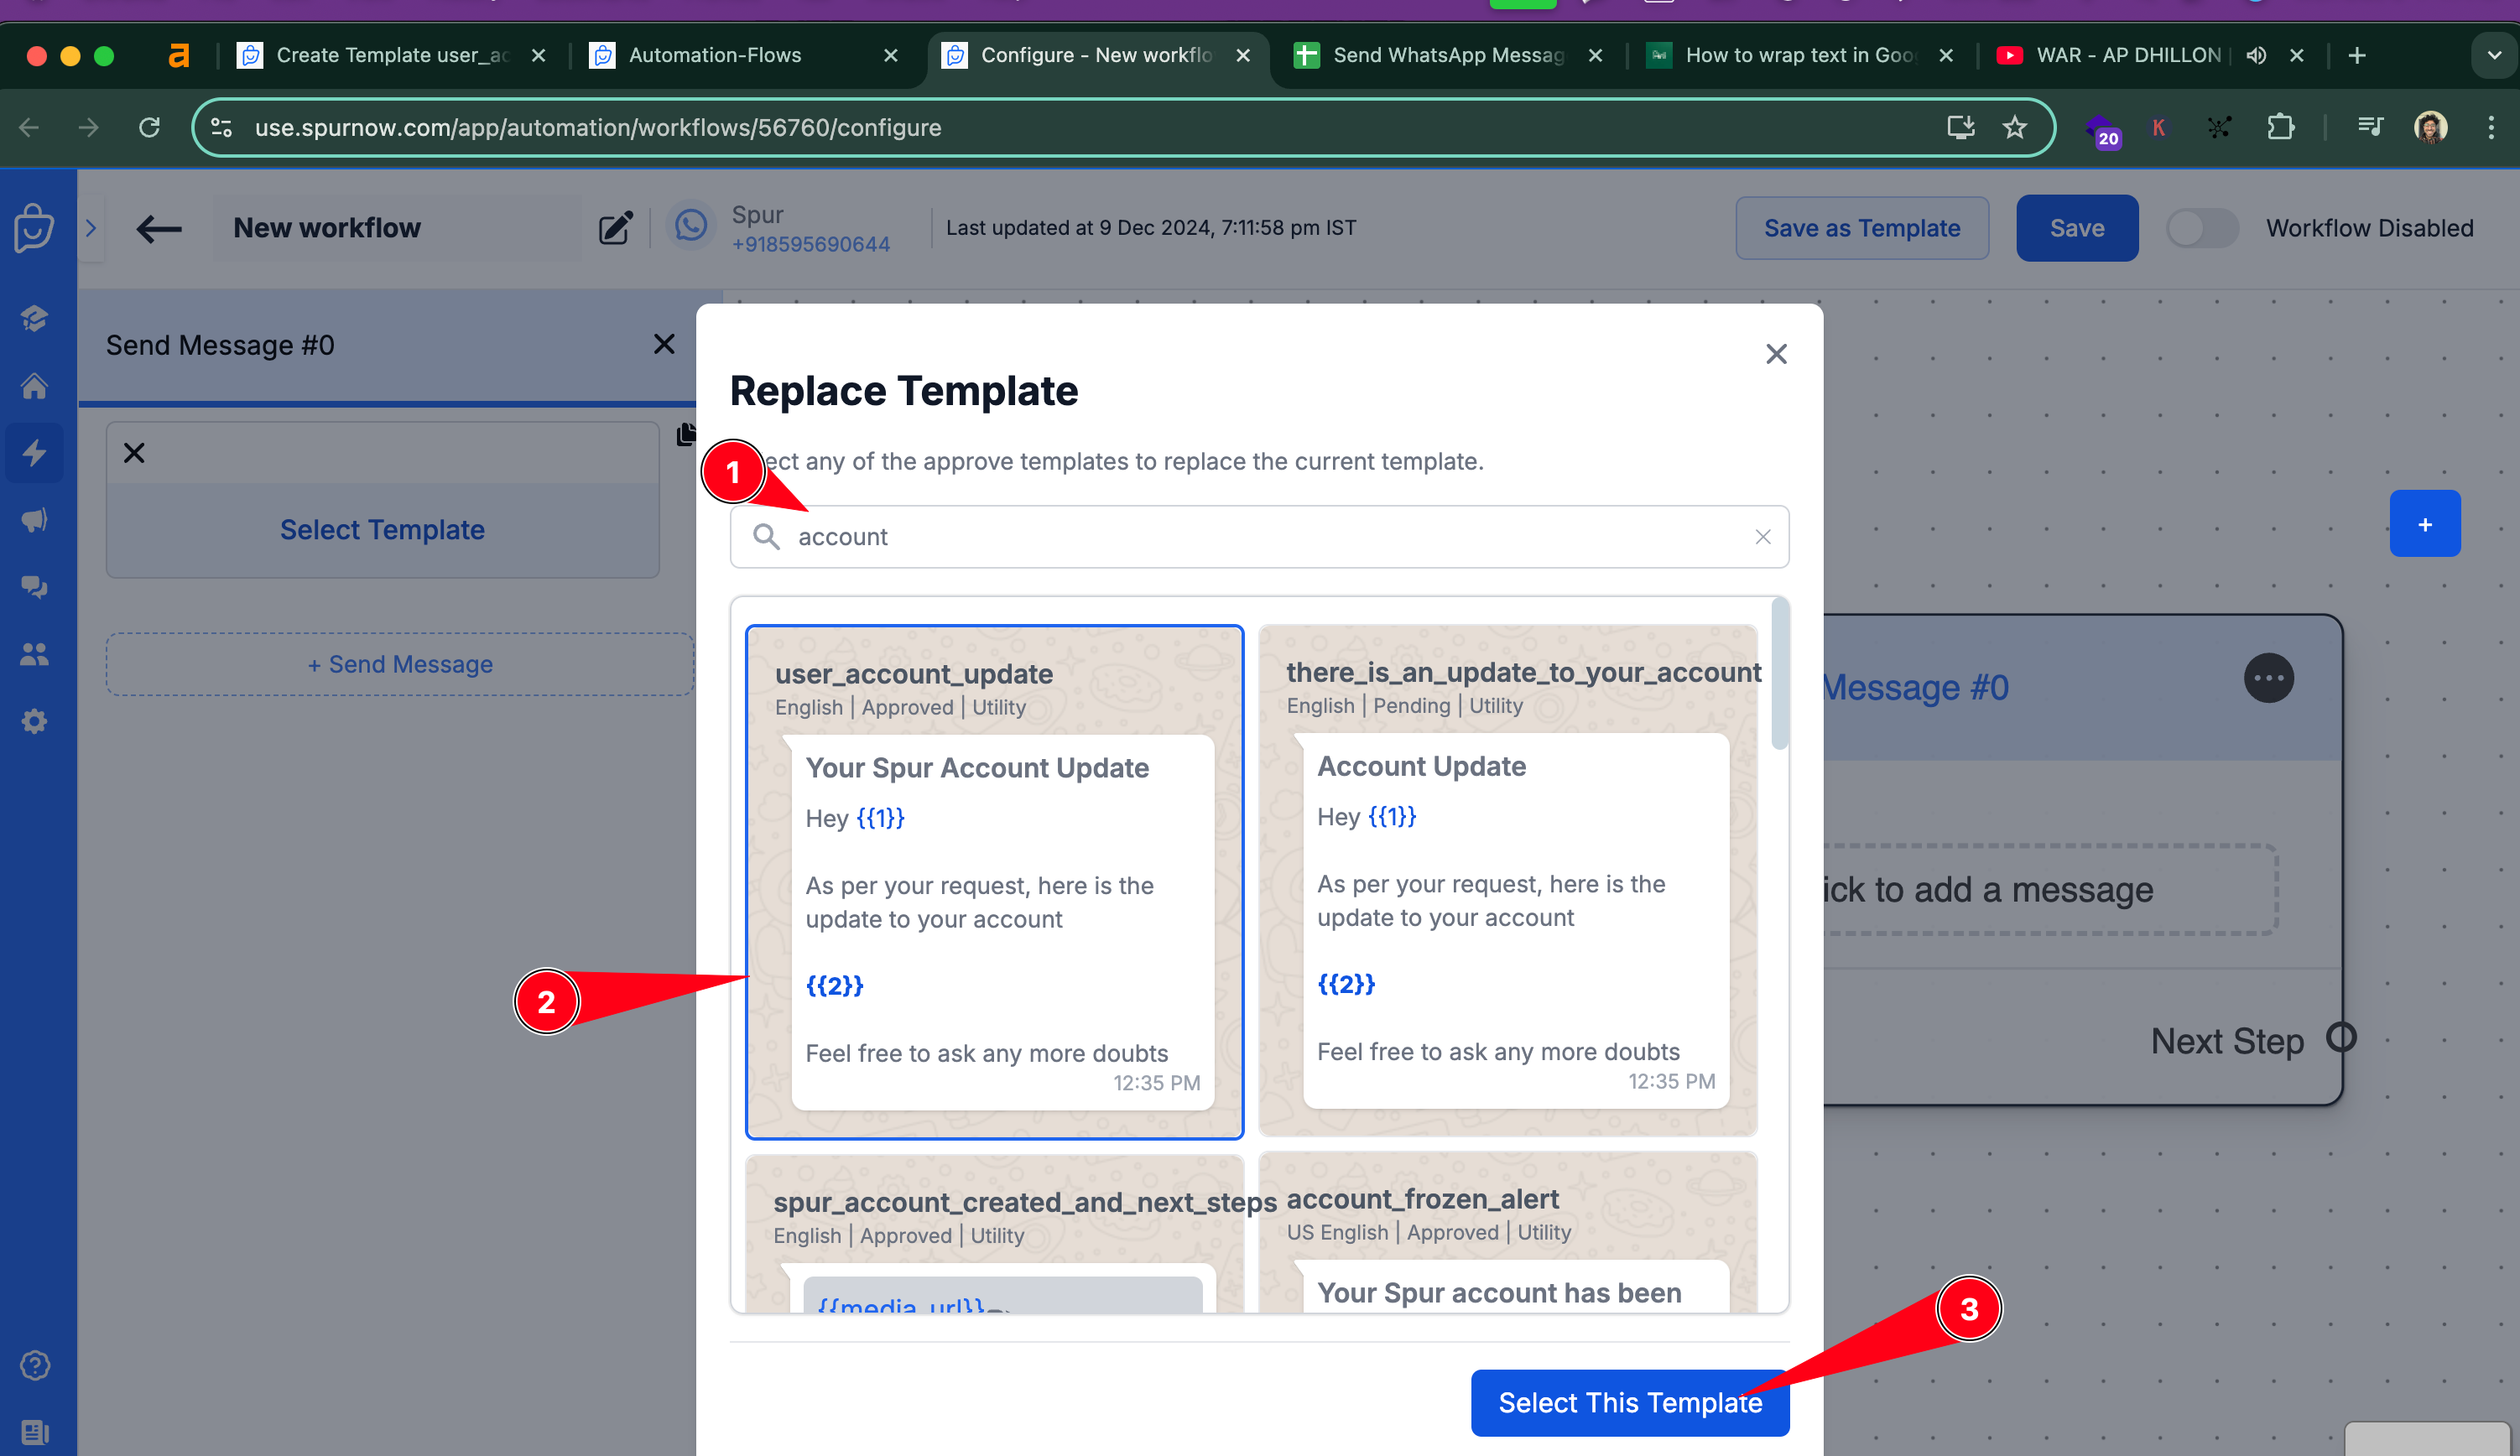
Search for the respective template and hit "Select this Template"
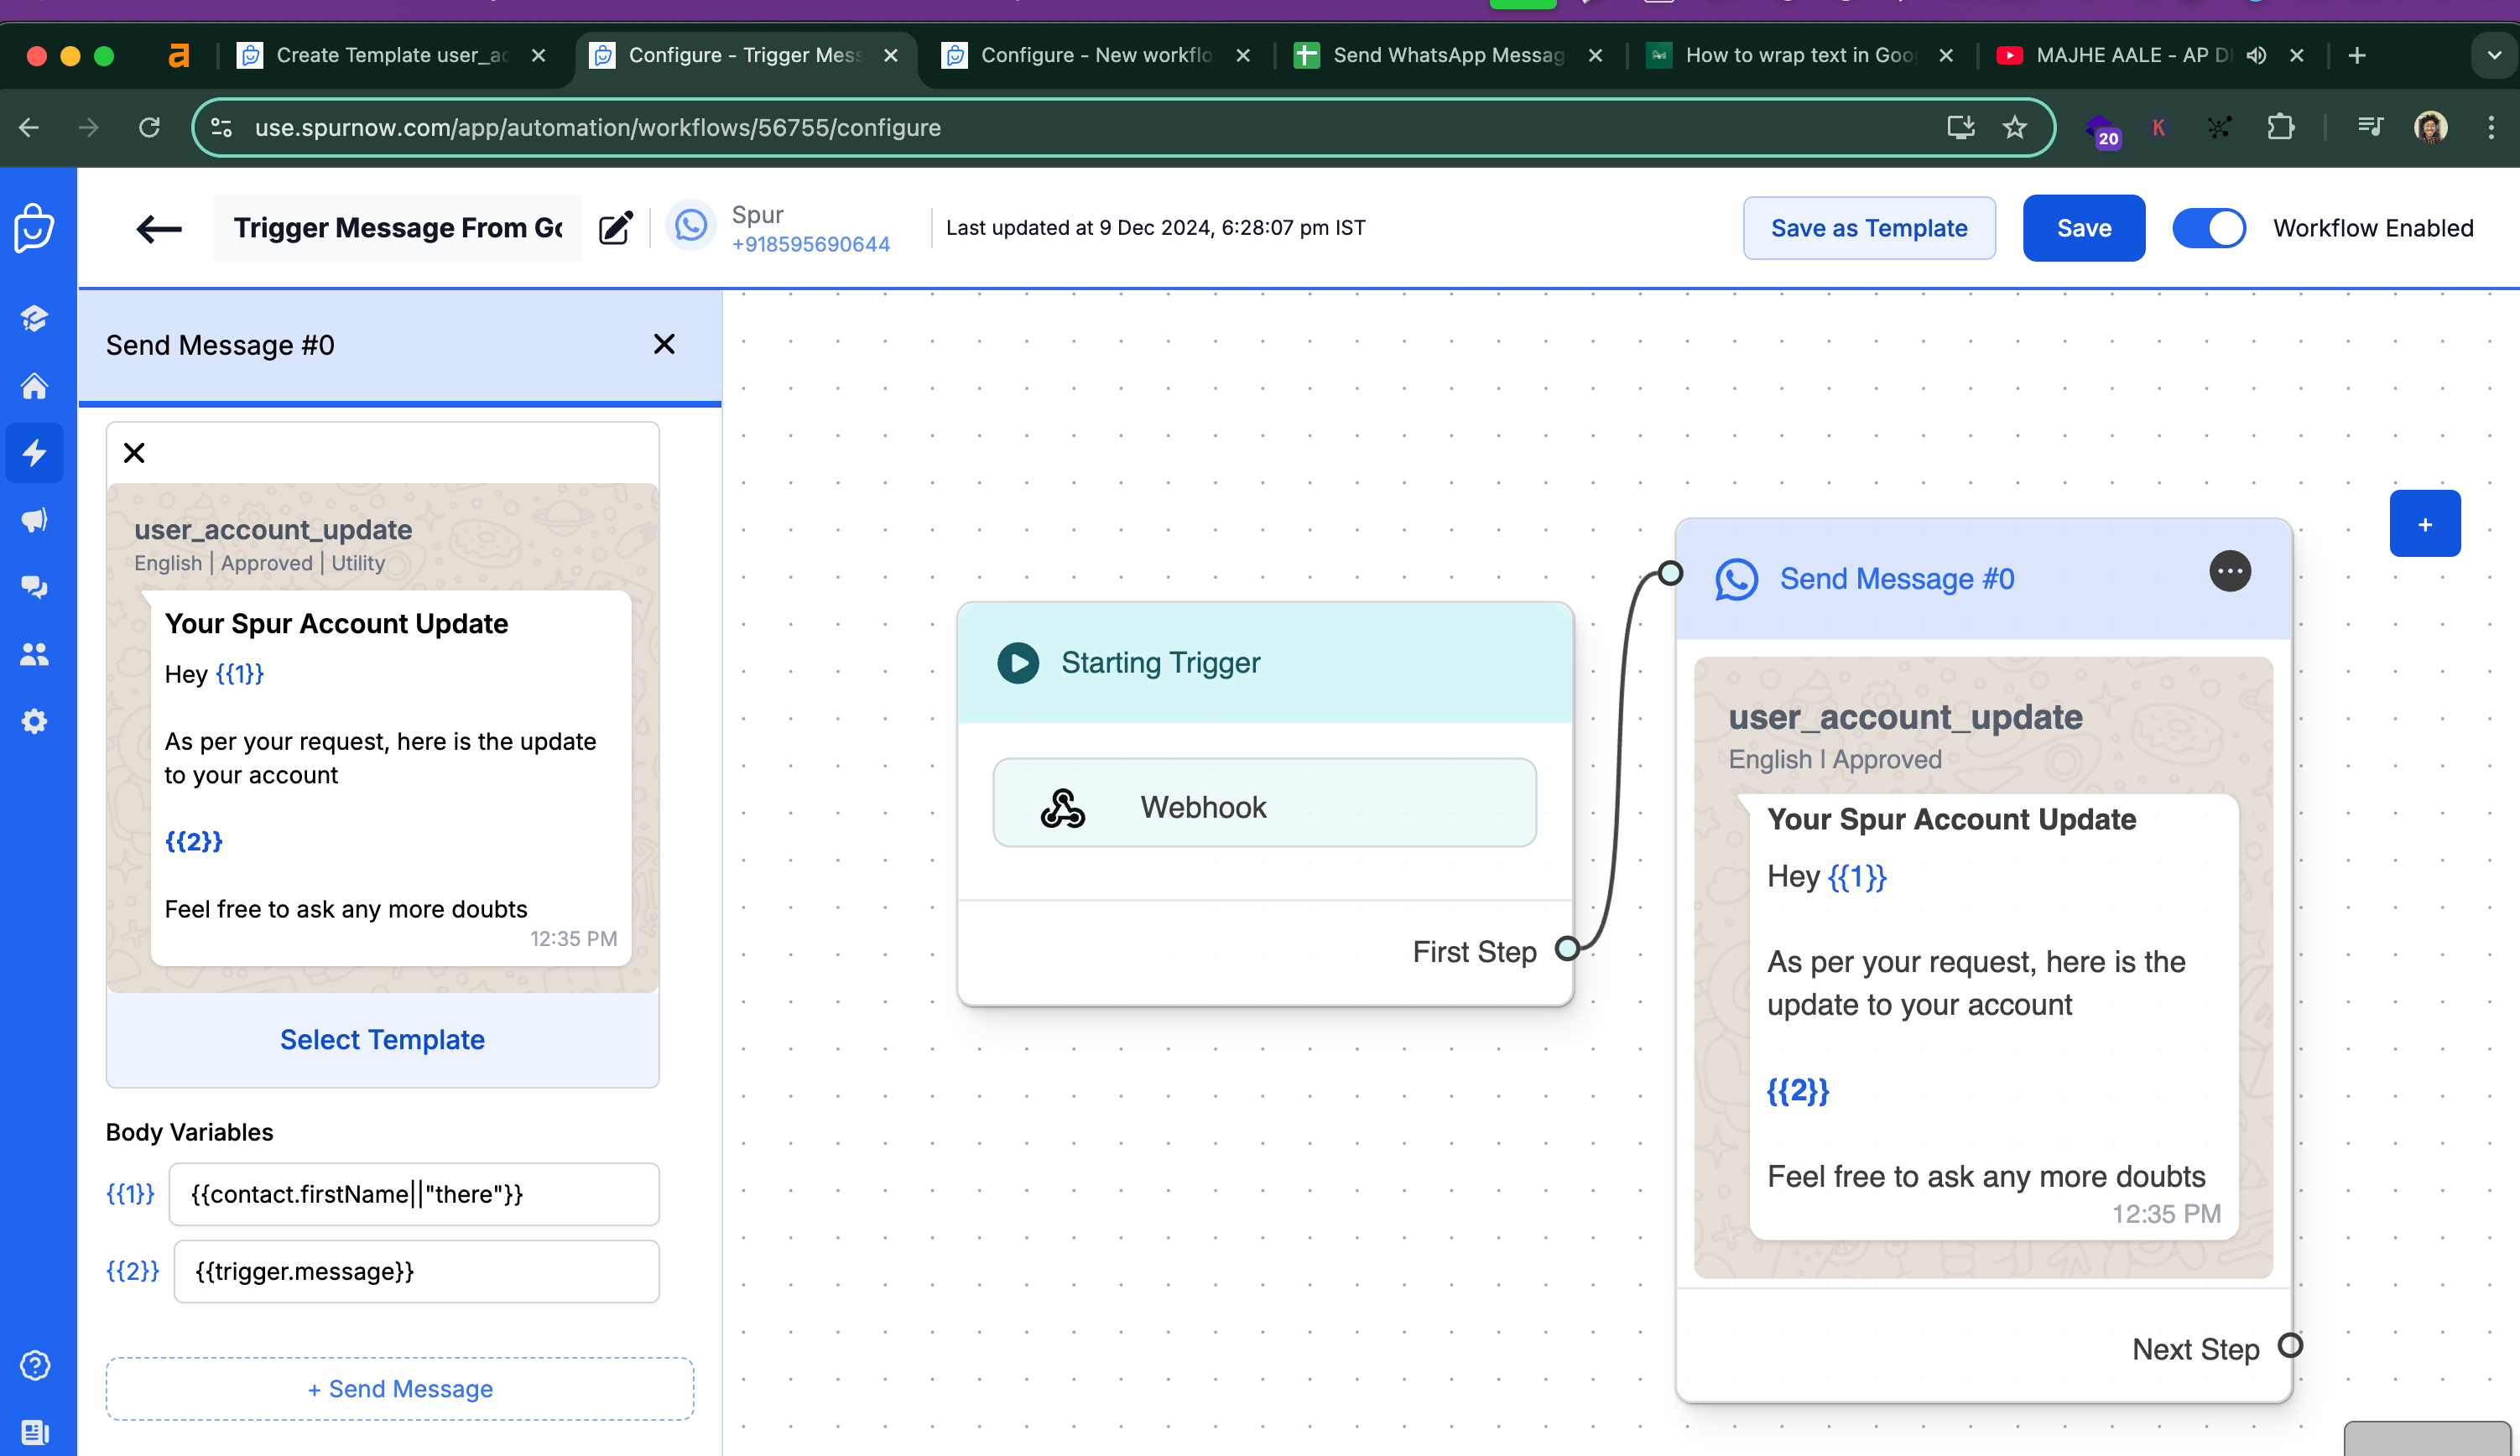
Now we fill in the variables
- {{1}} is for the first name, I'll fill it in with `{{contact.firstName||"there"}}`
- {{2}} is for the actual message, we will pull in info from the "Message" column in Google Sheets and just replace here
- Keep in mind that a variable can have 60 characters max
- You can of course use multiple columns in a Google sheet and multiple variable to surpass these limits. I've kept things simple for the sake of this tutorial.
First, clone this Zap Template that I've built.
- Change the Google sheets source to your own
- Go to the Spur Workflow, click on the trigger an copy the URL
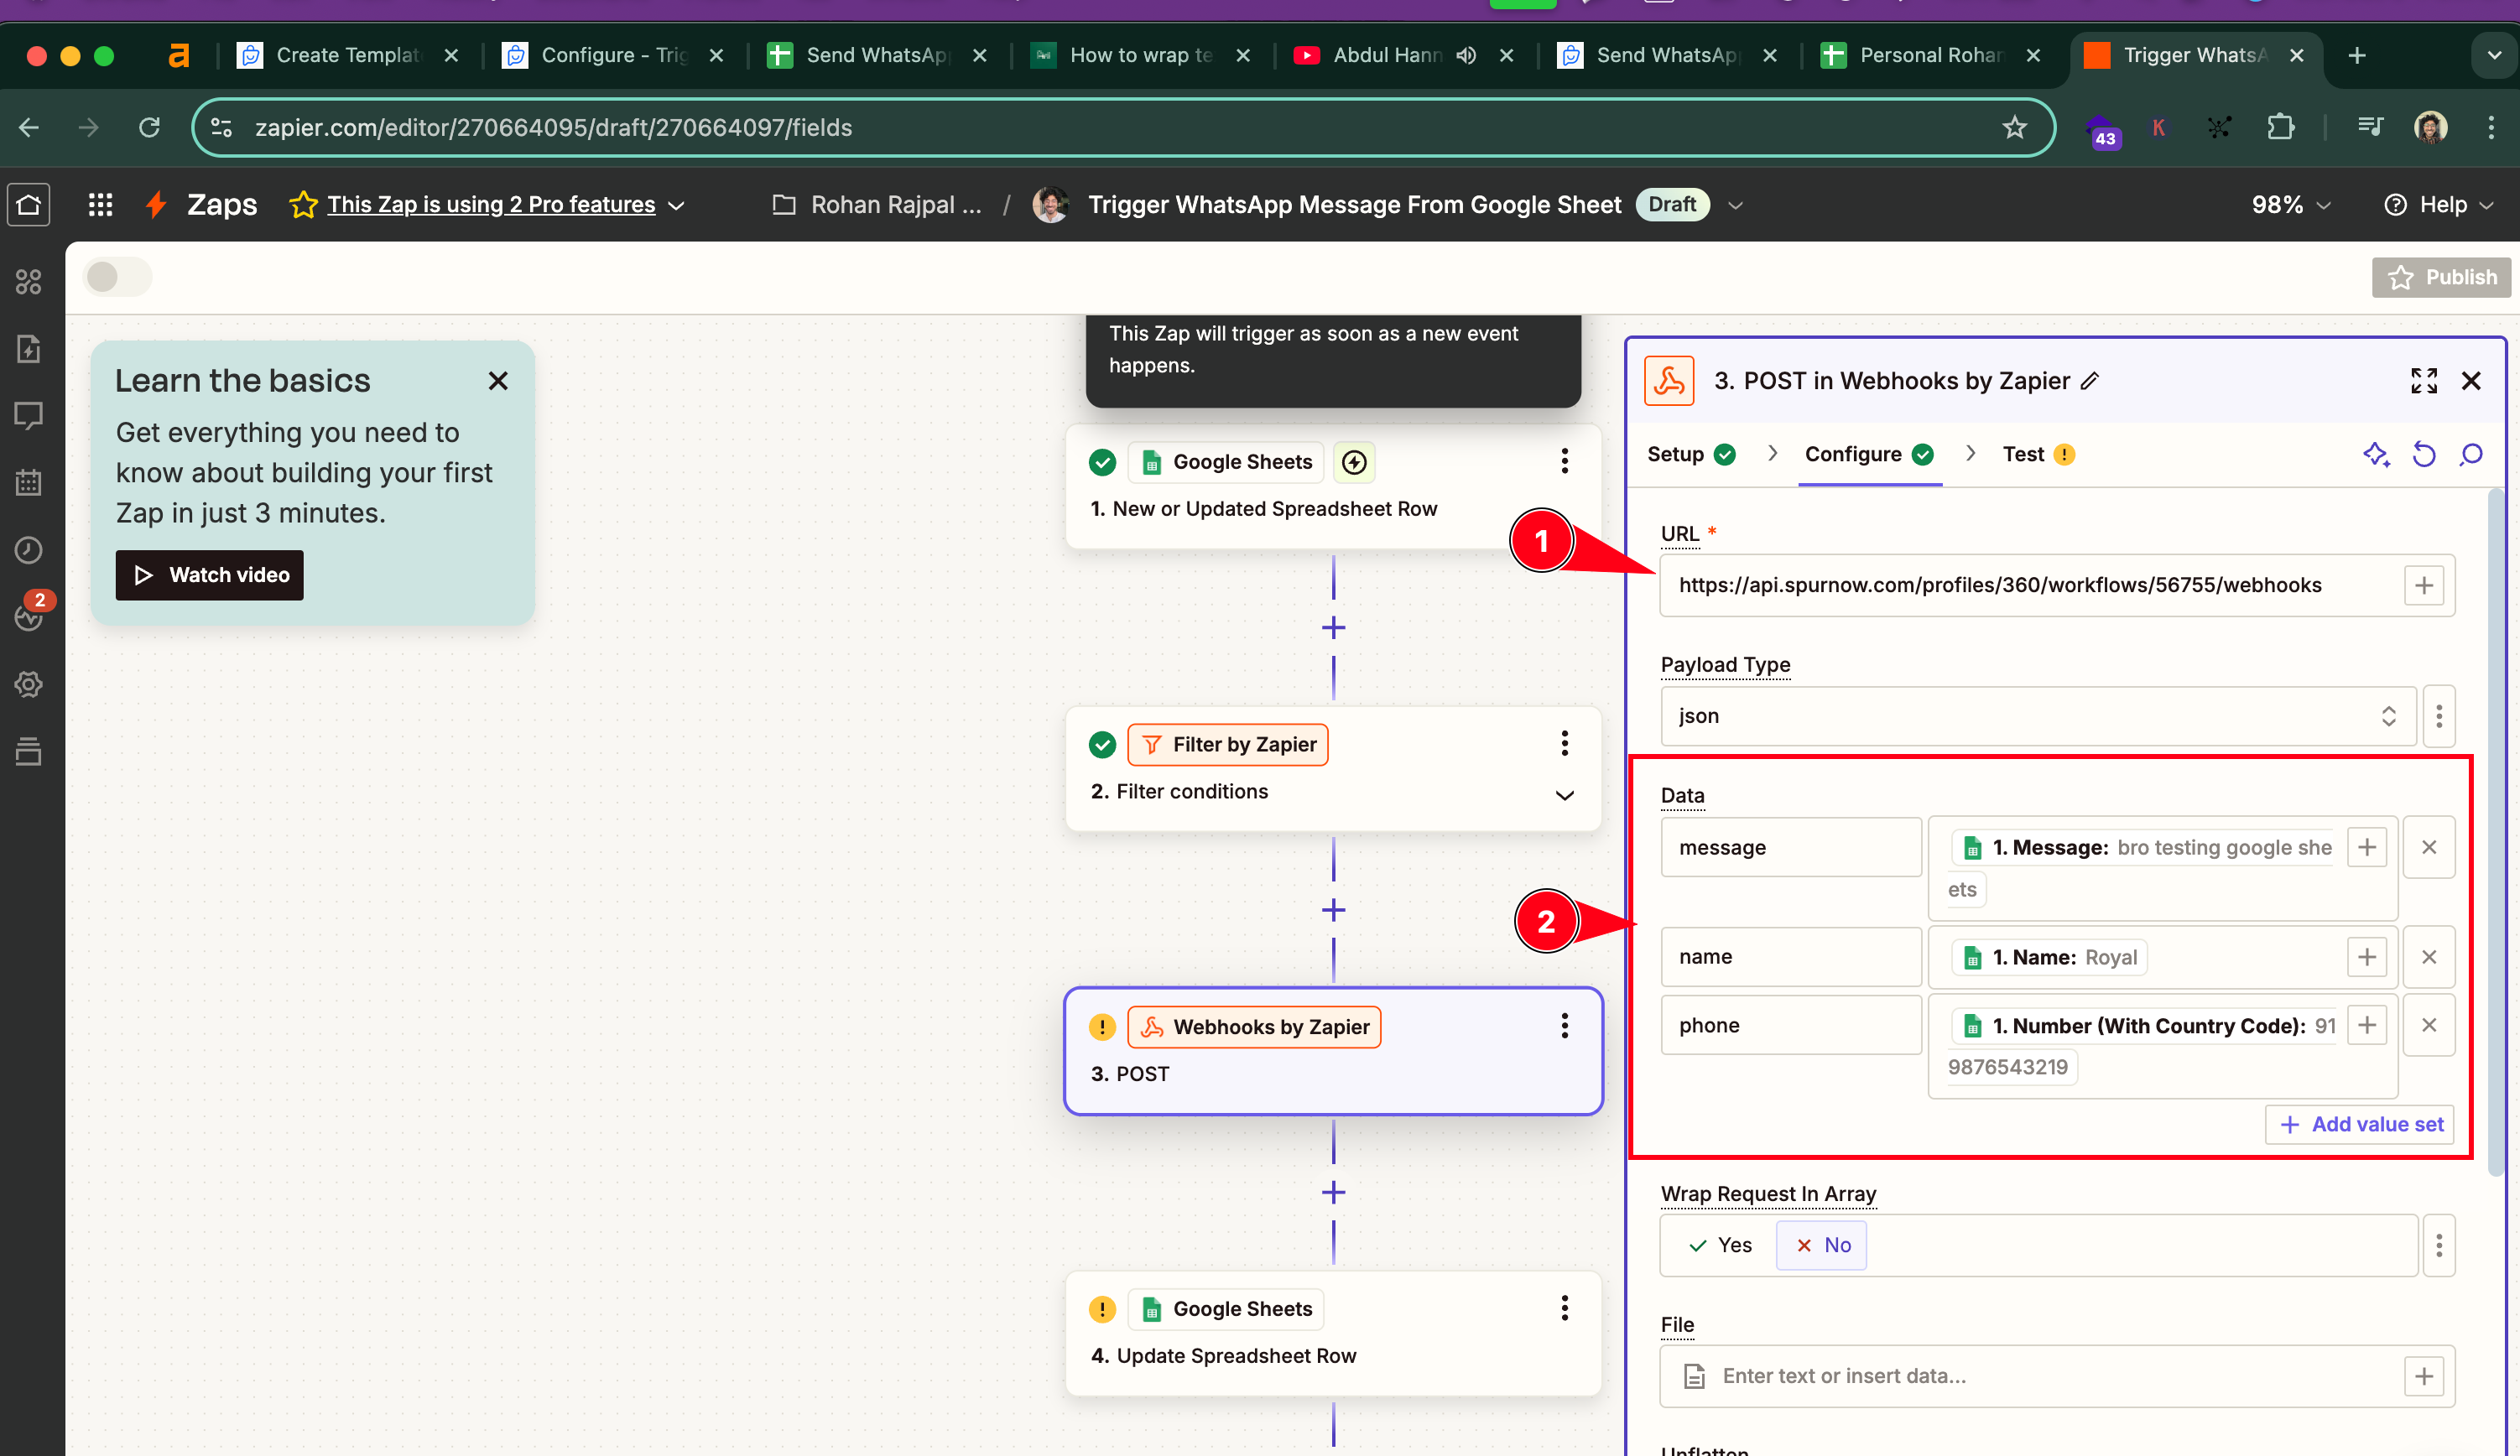
- Paste the URL in the "Webhook" action
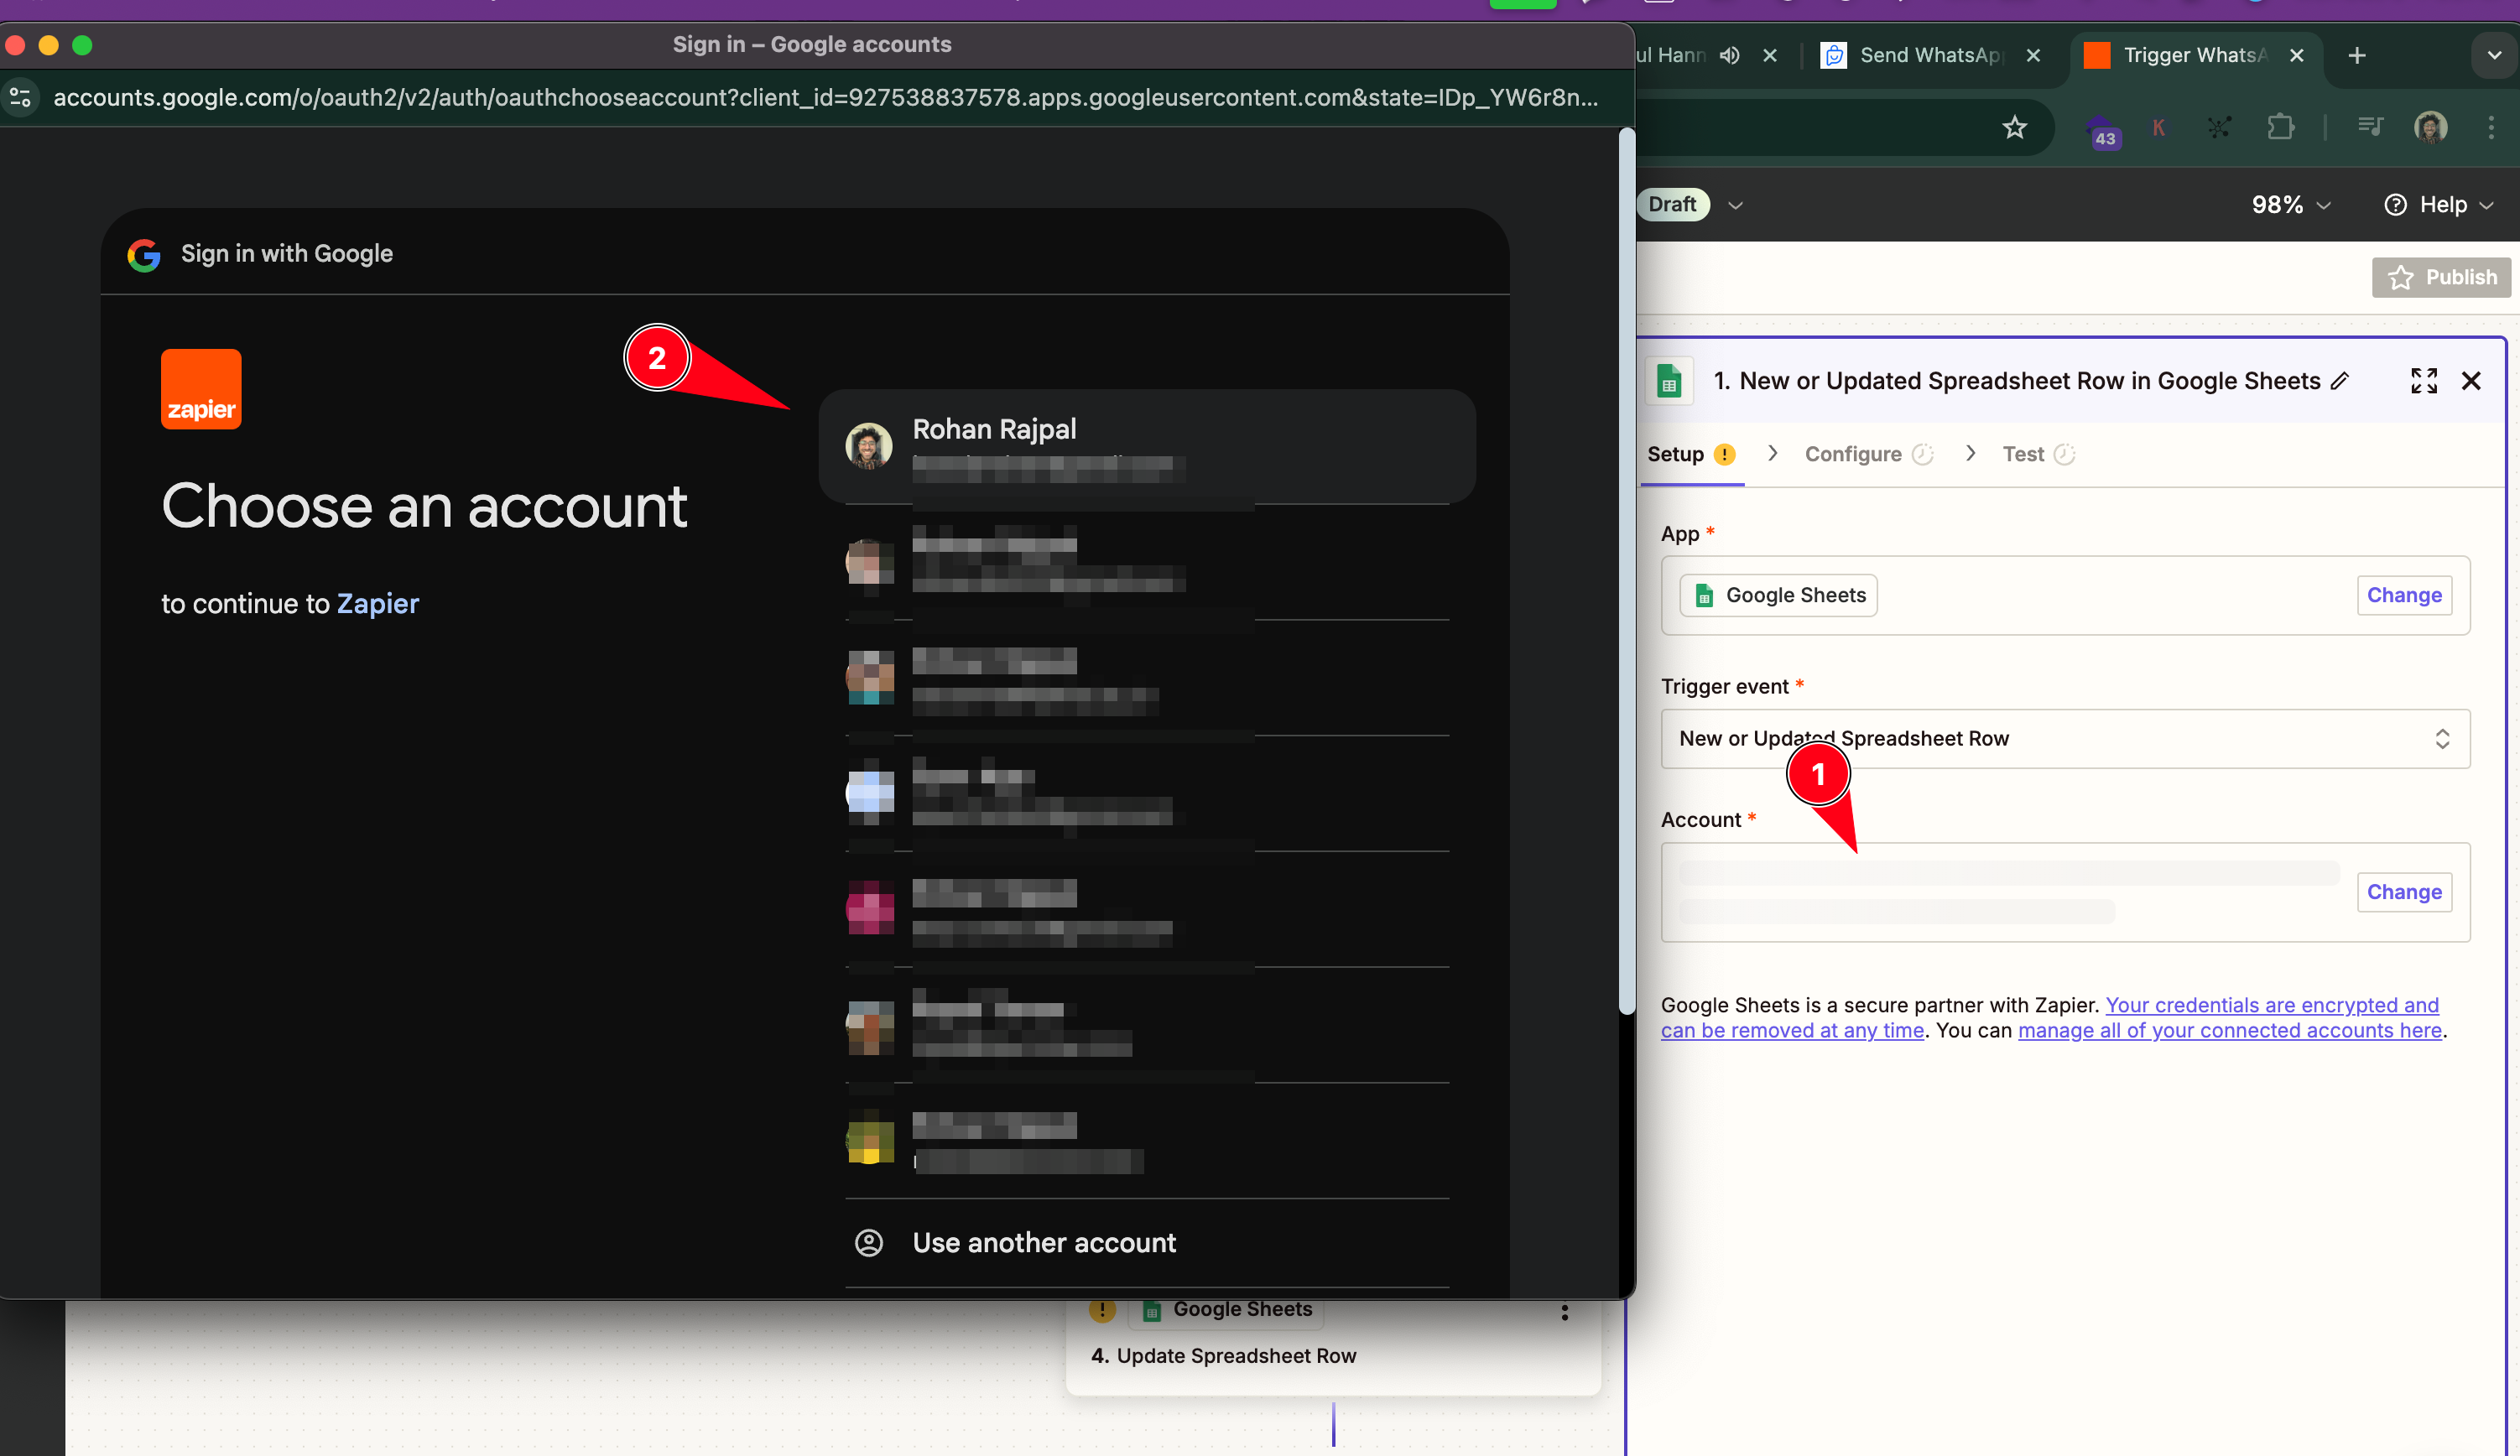
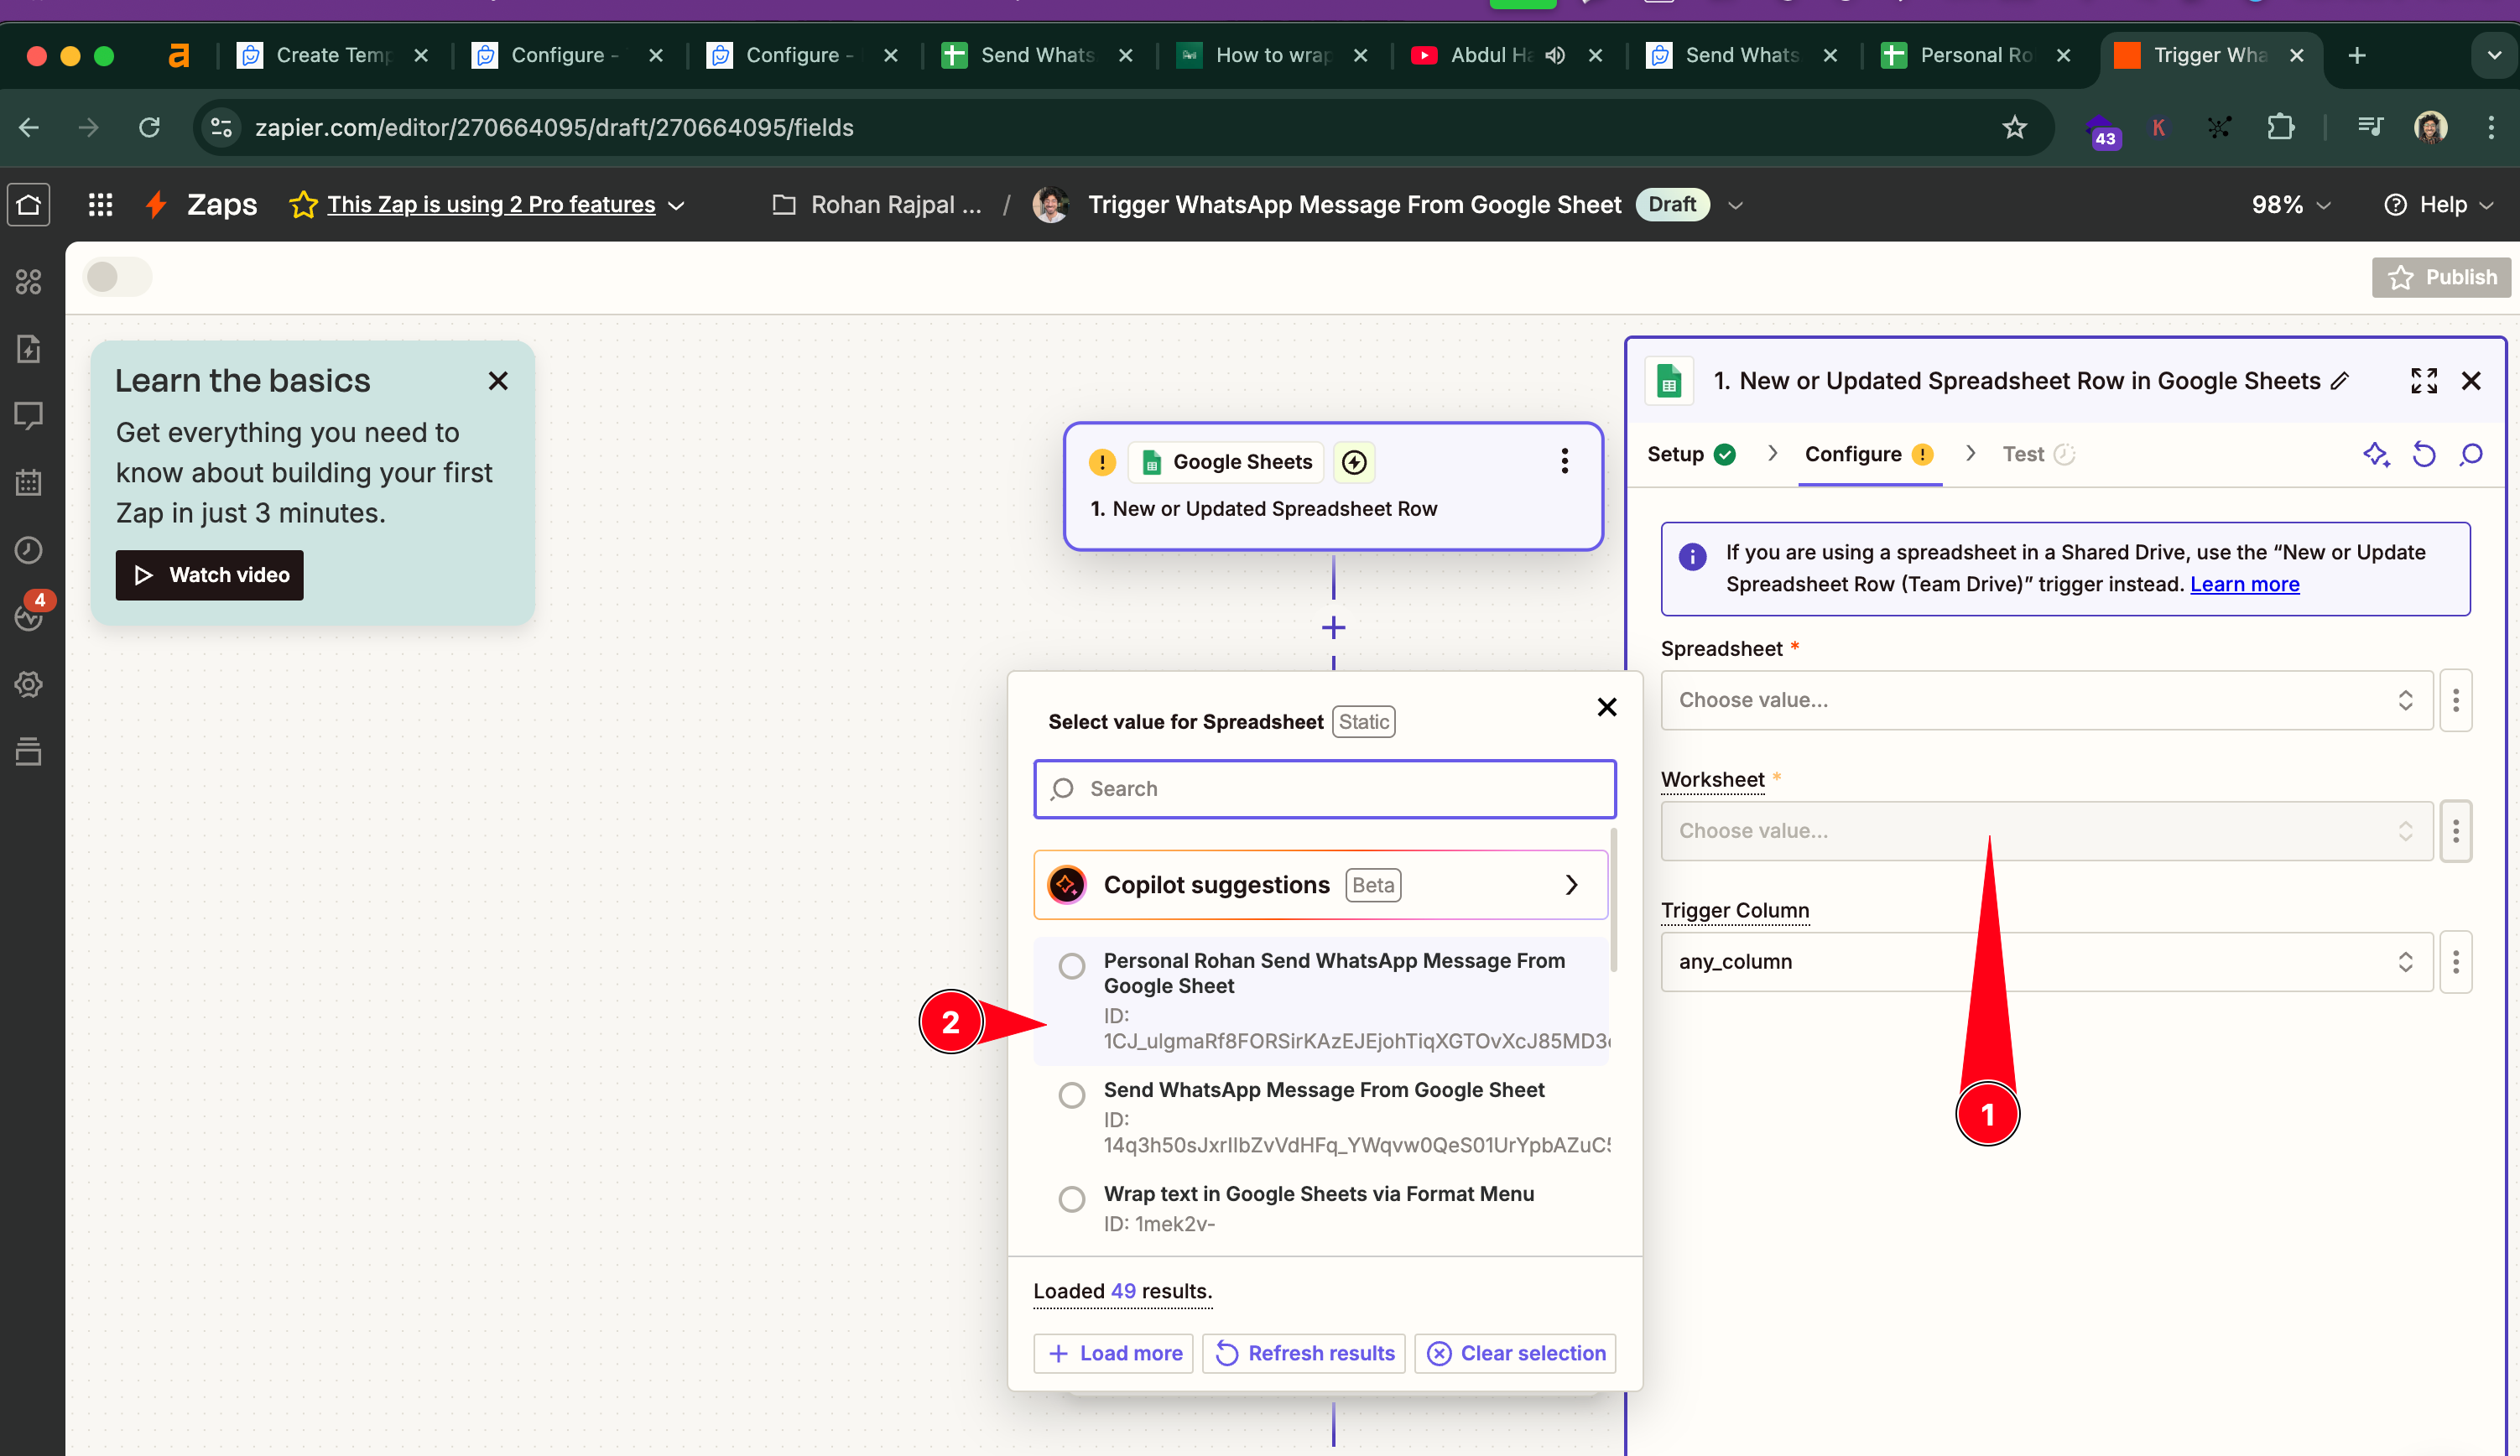
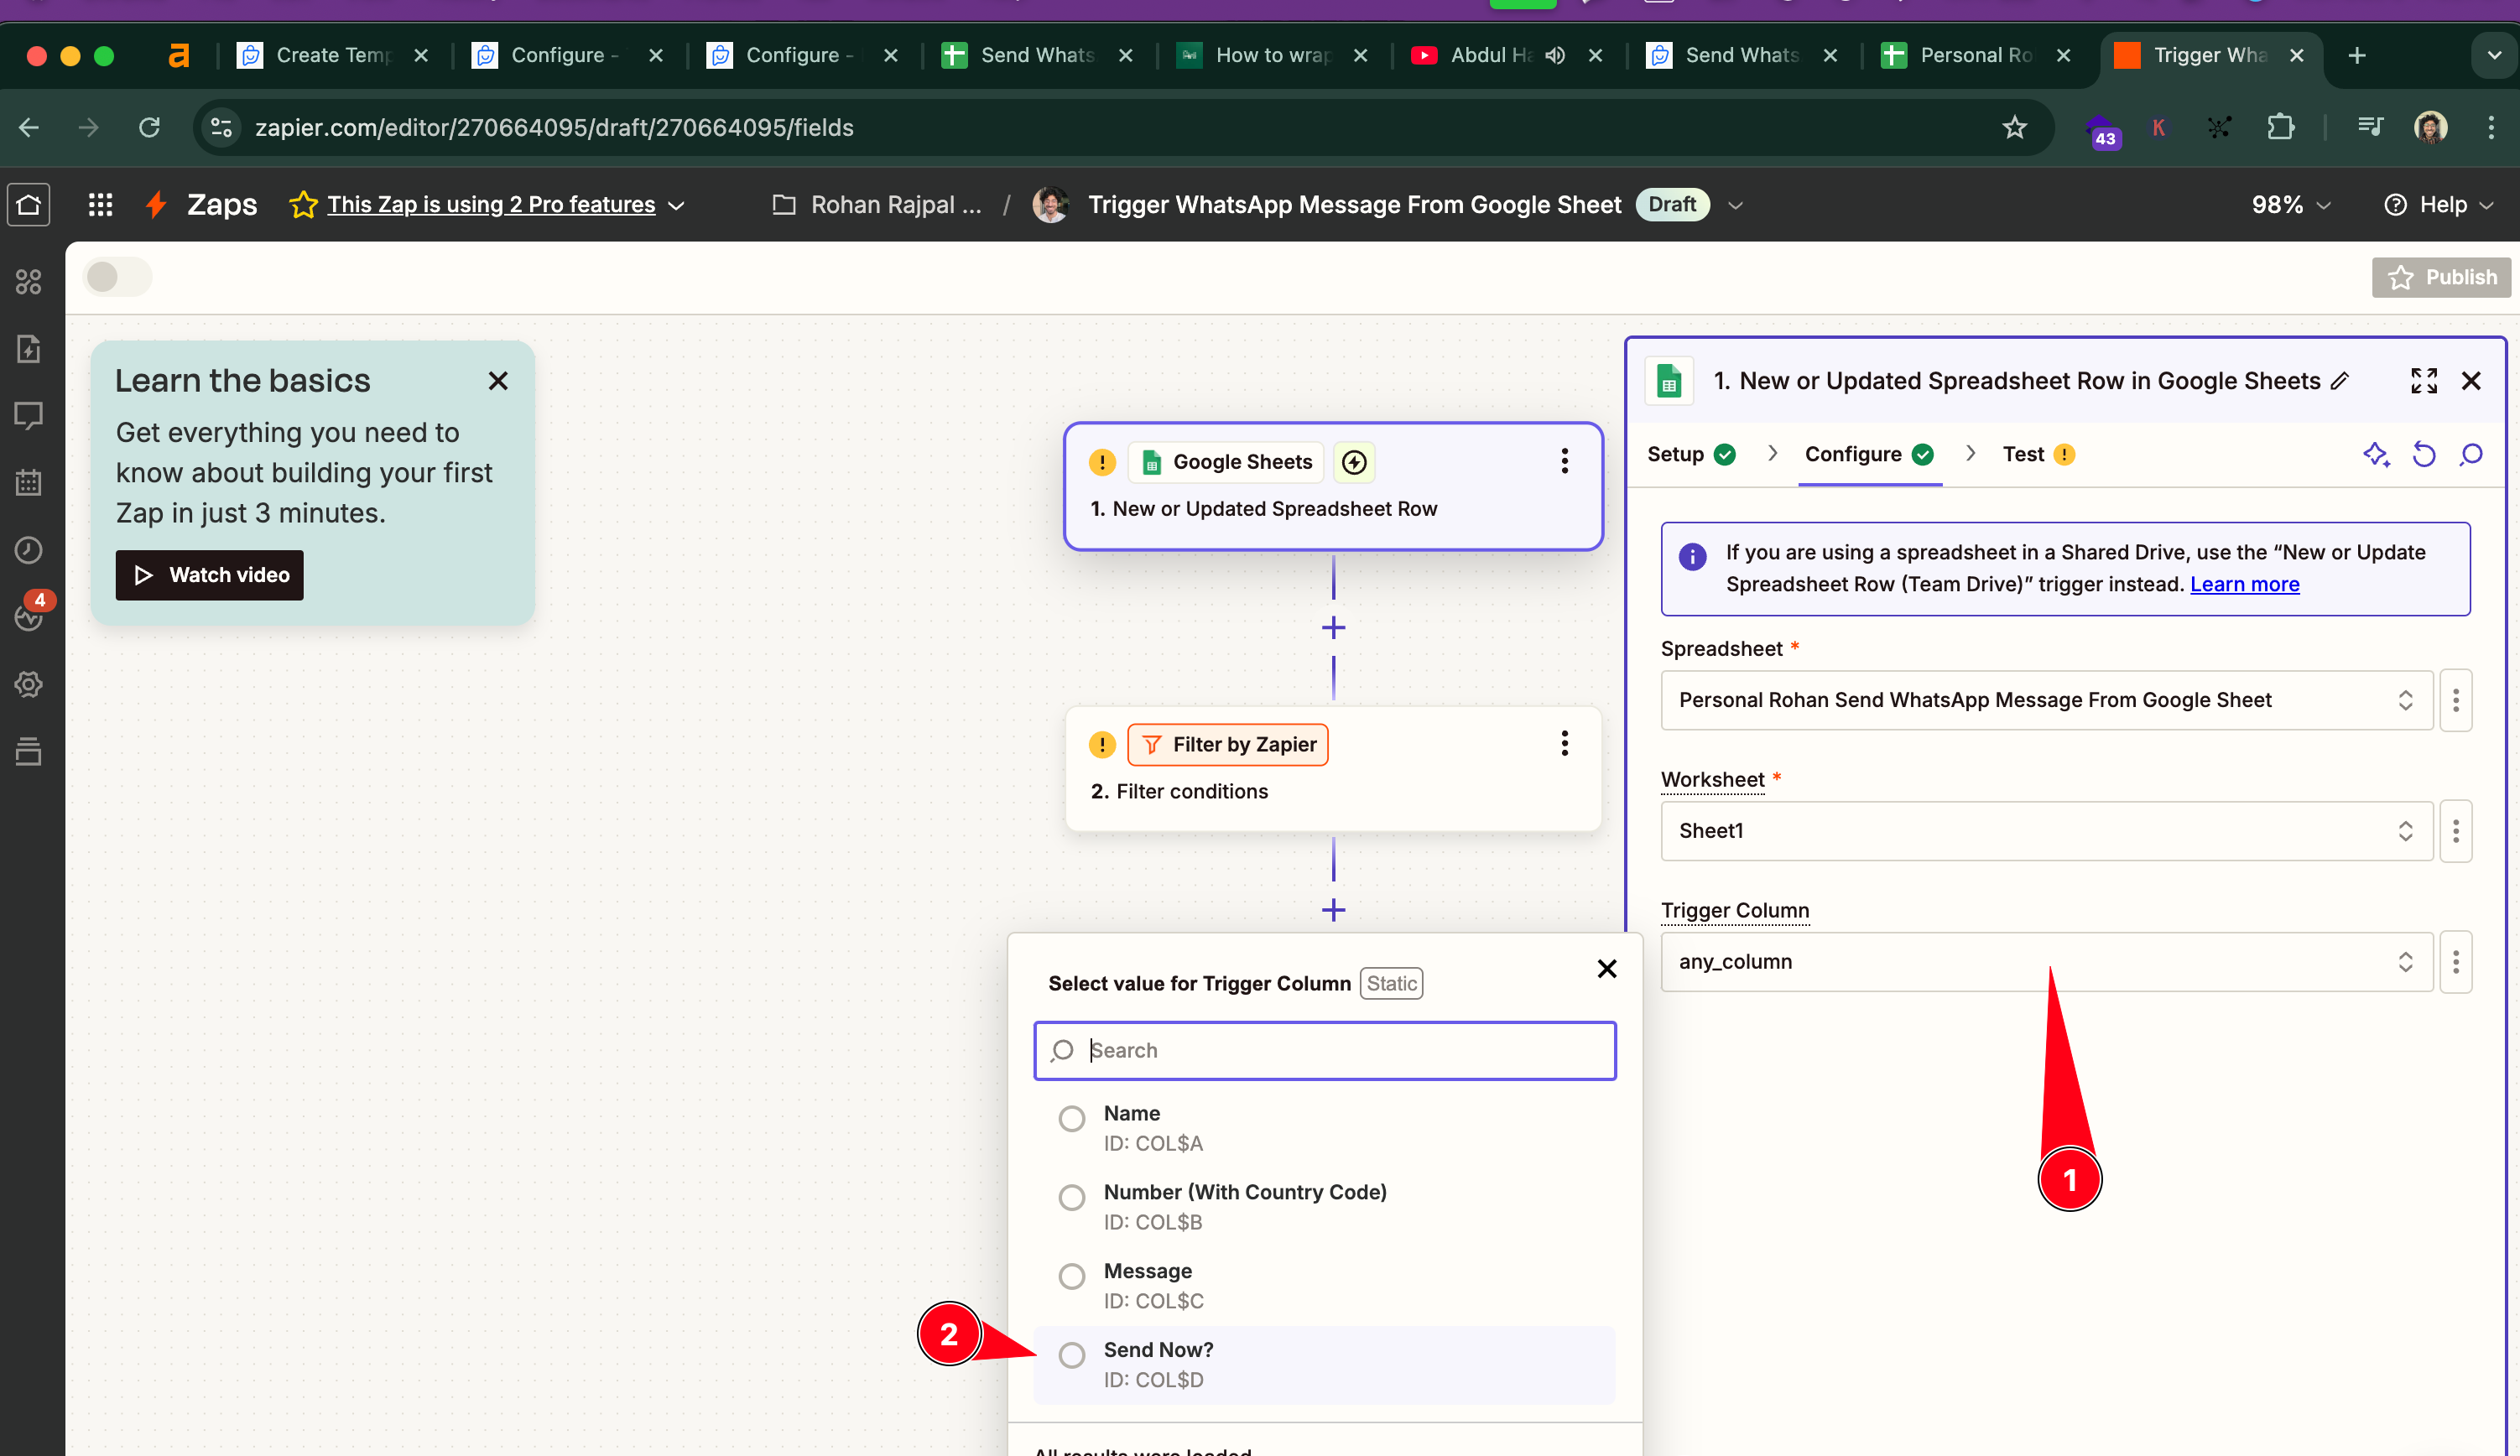
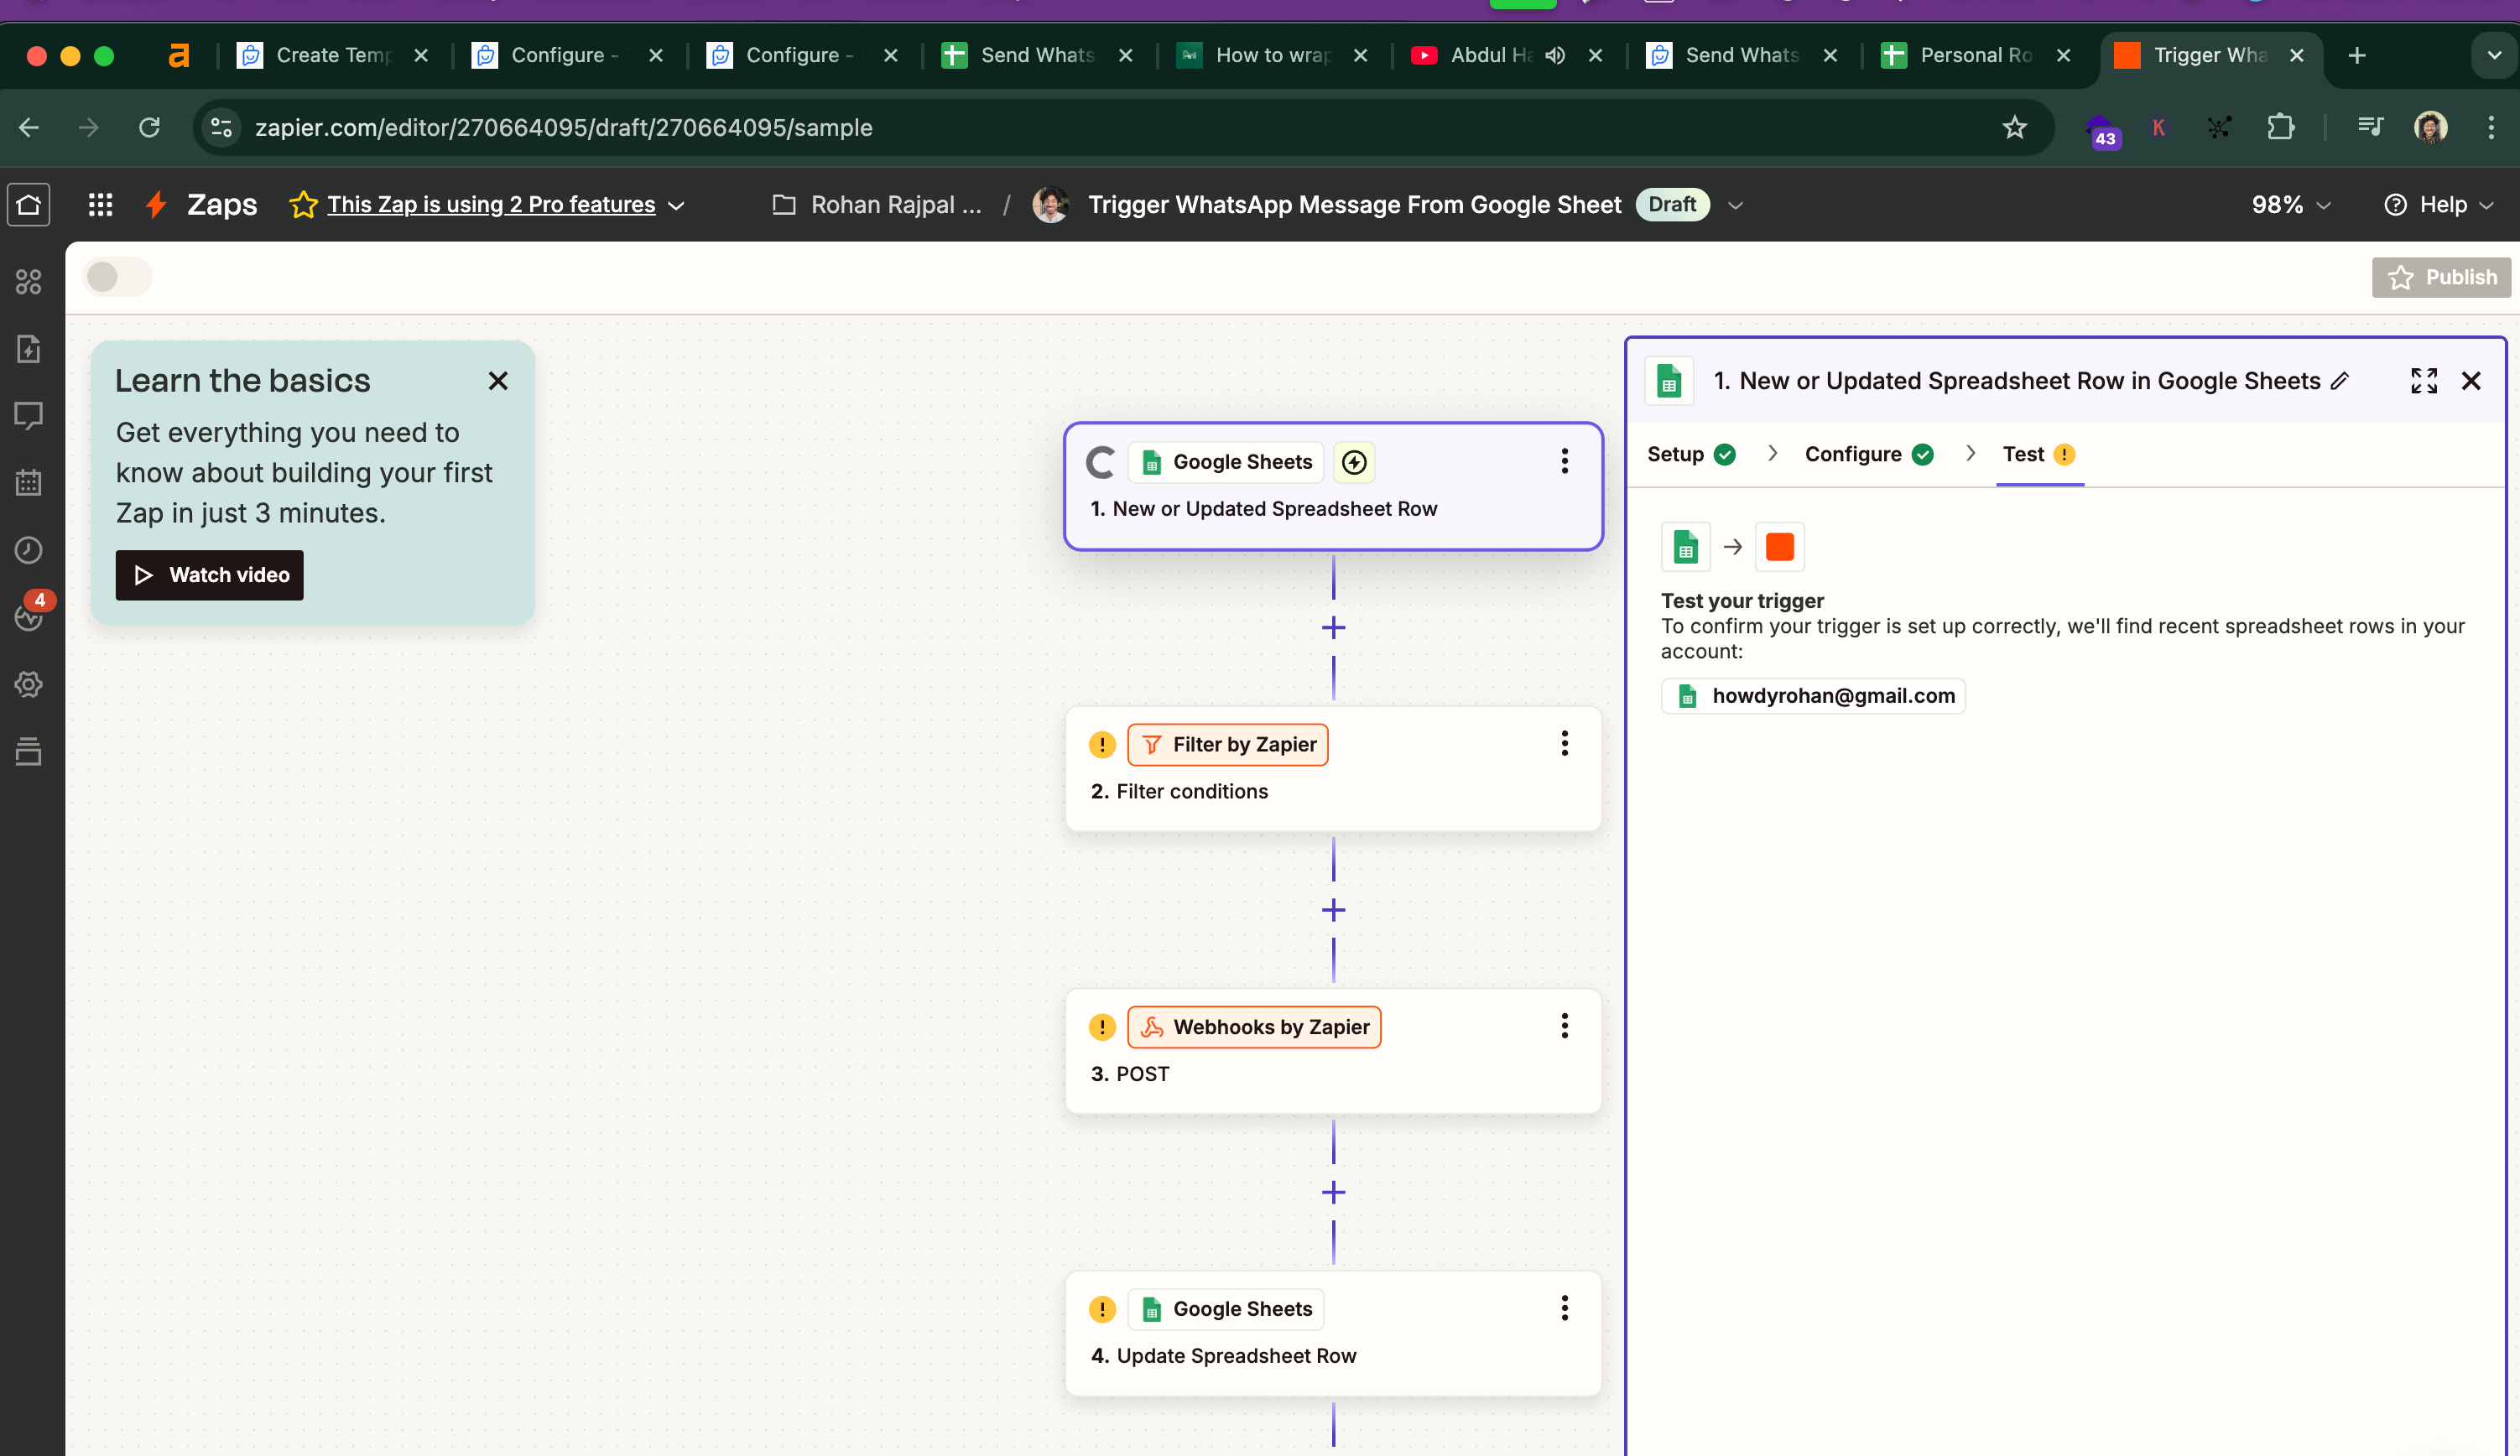
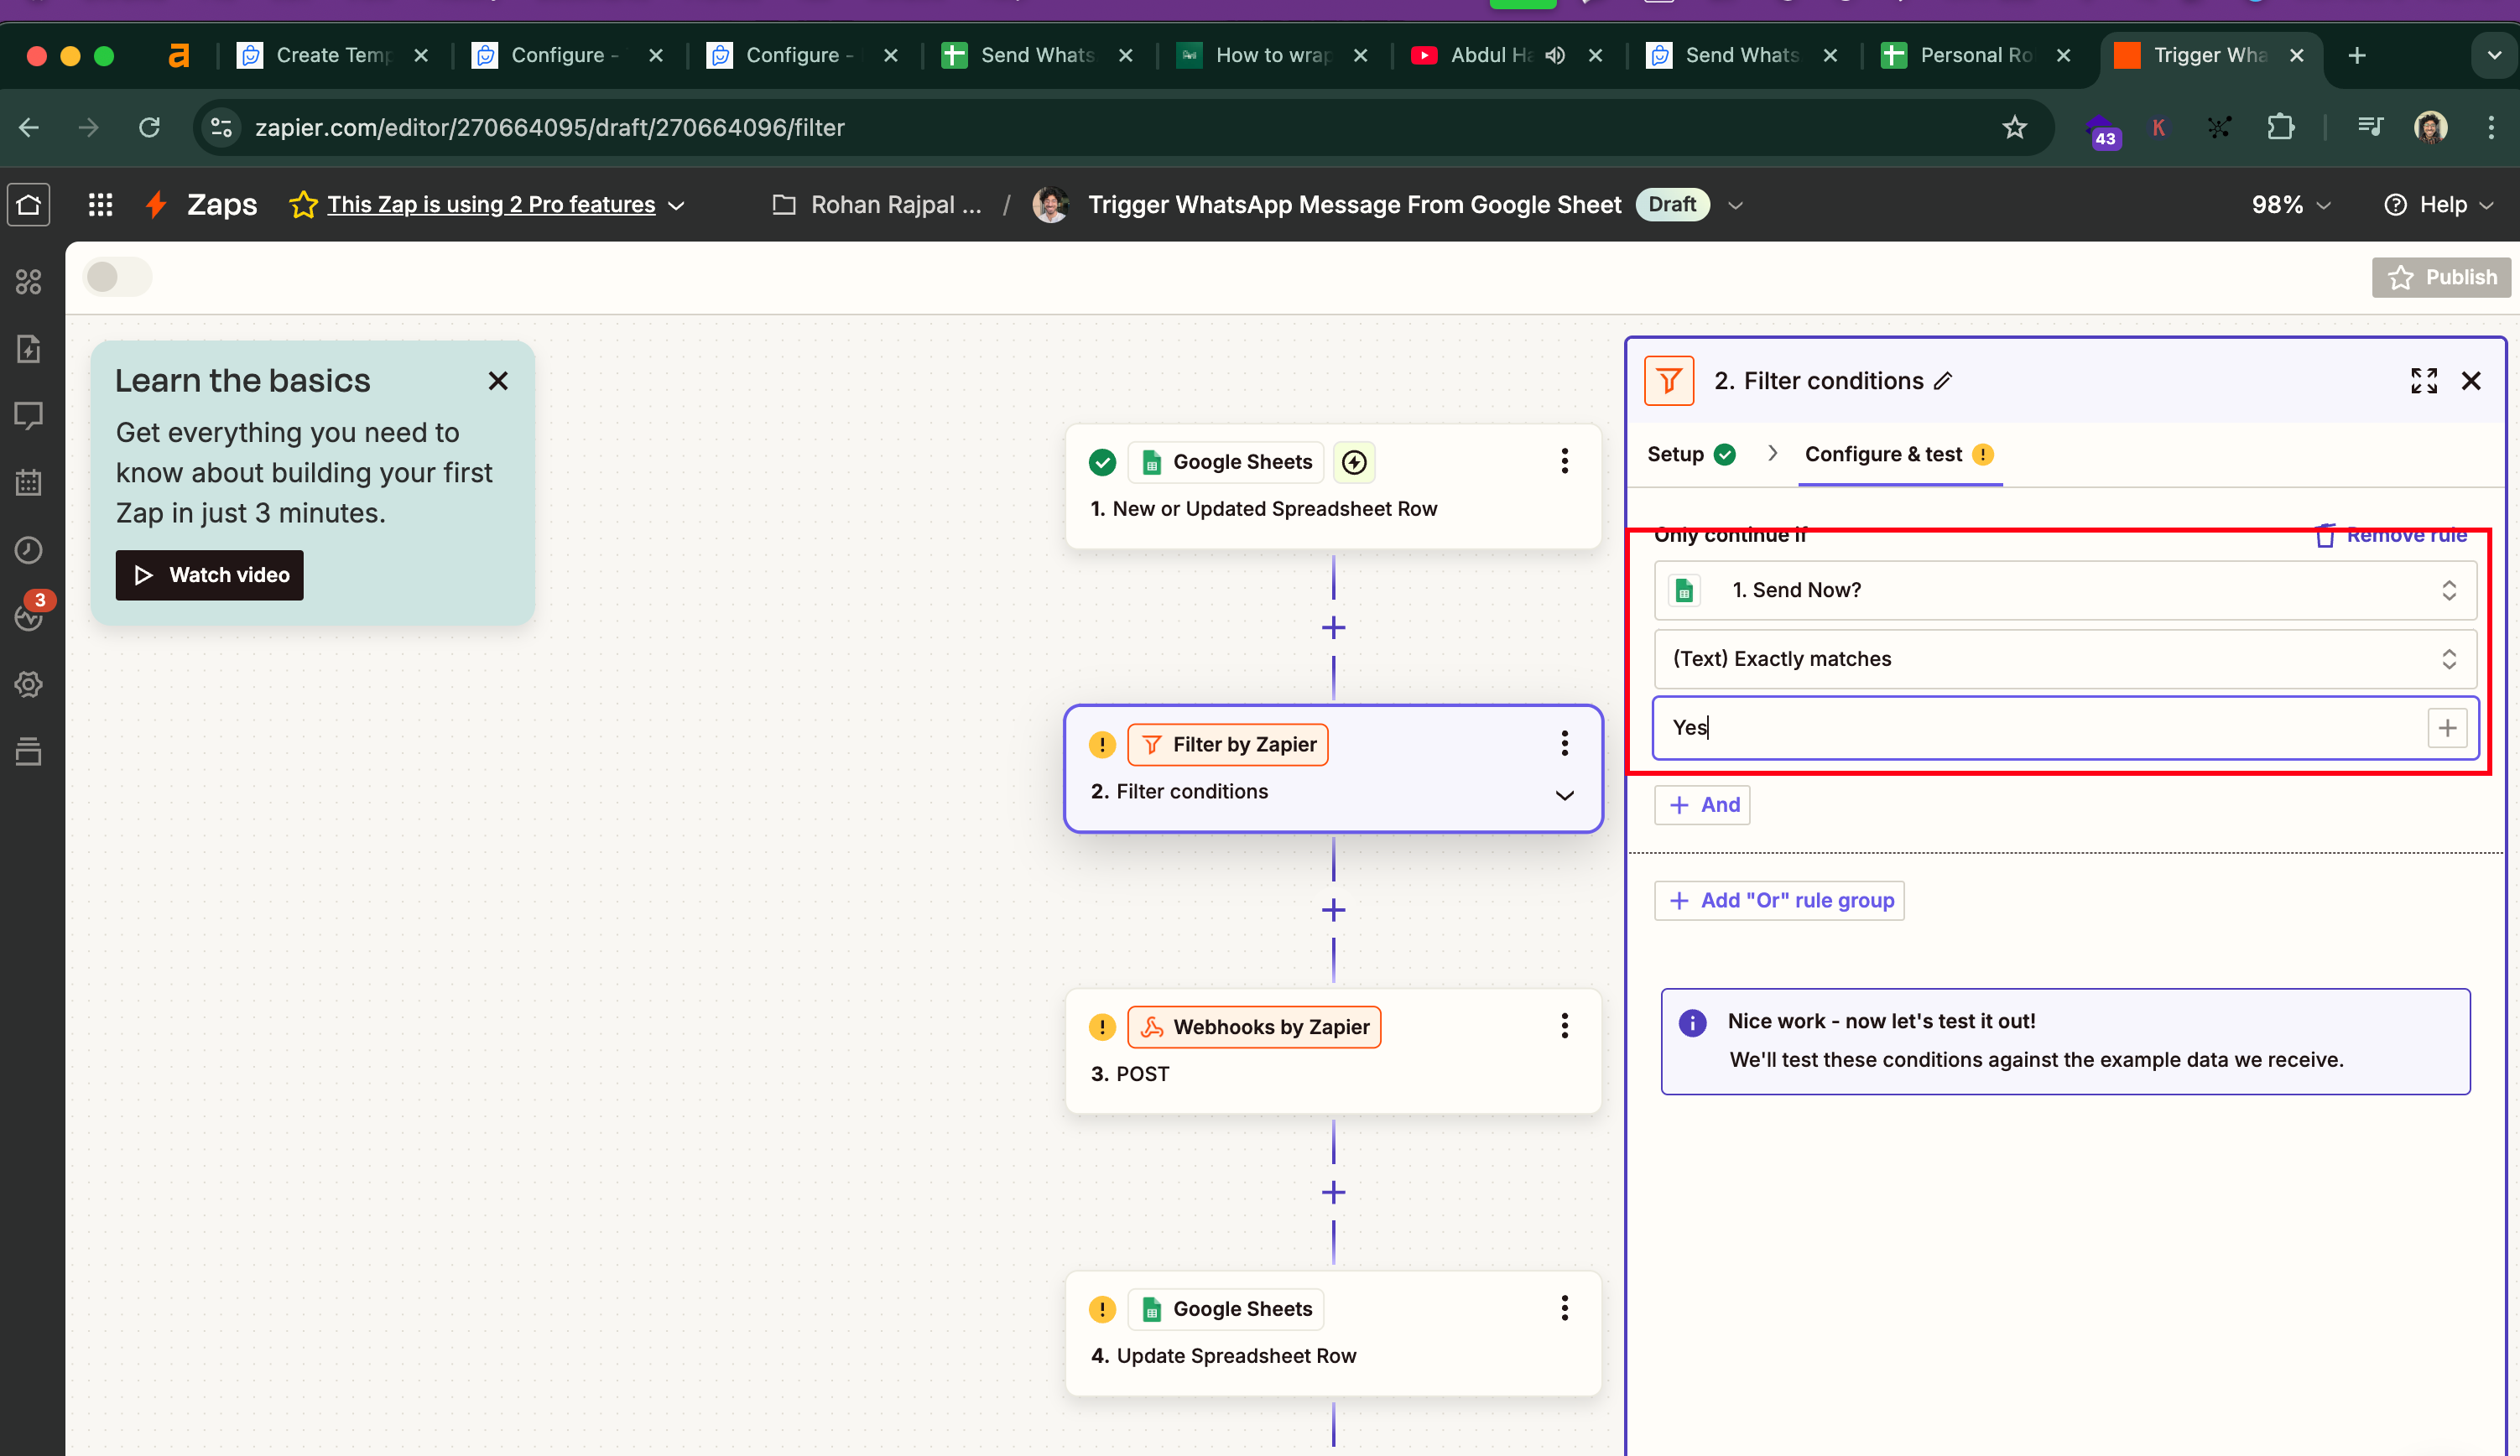
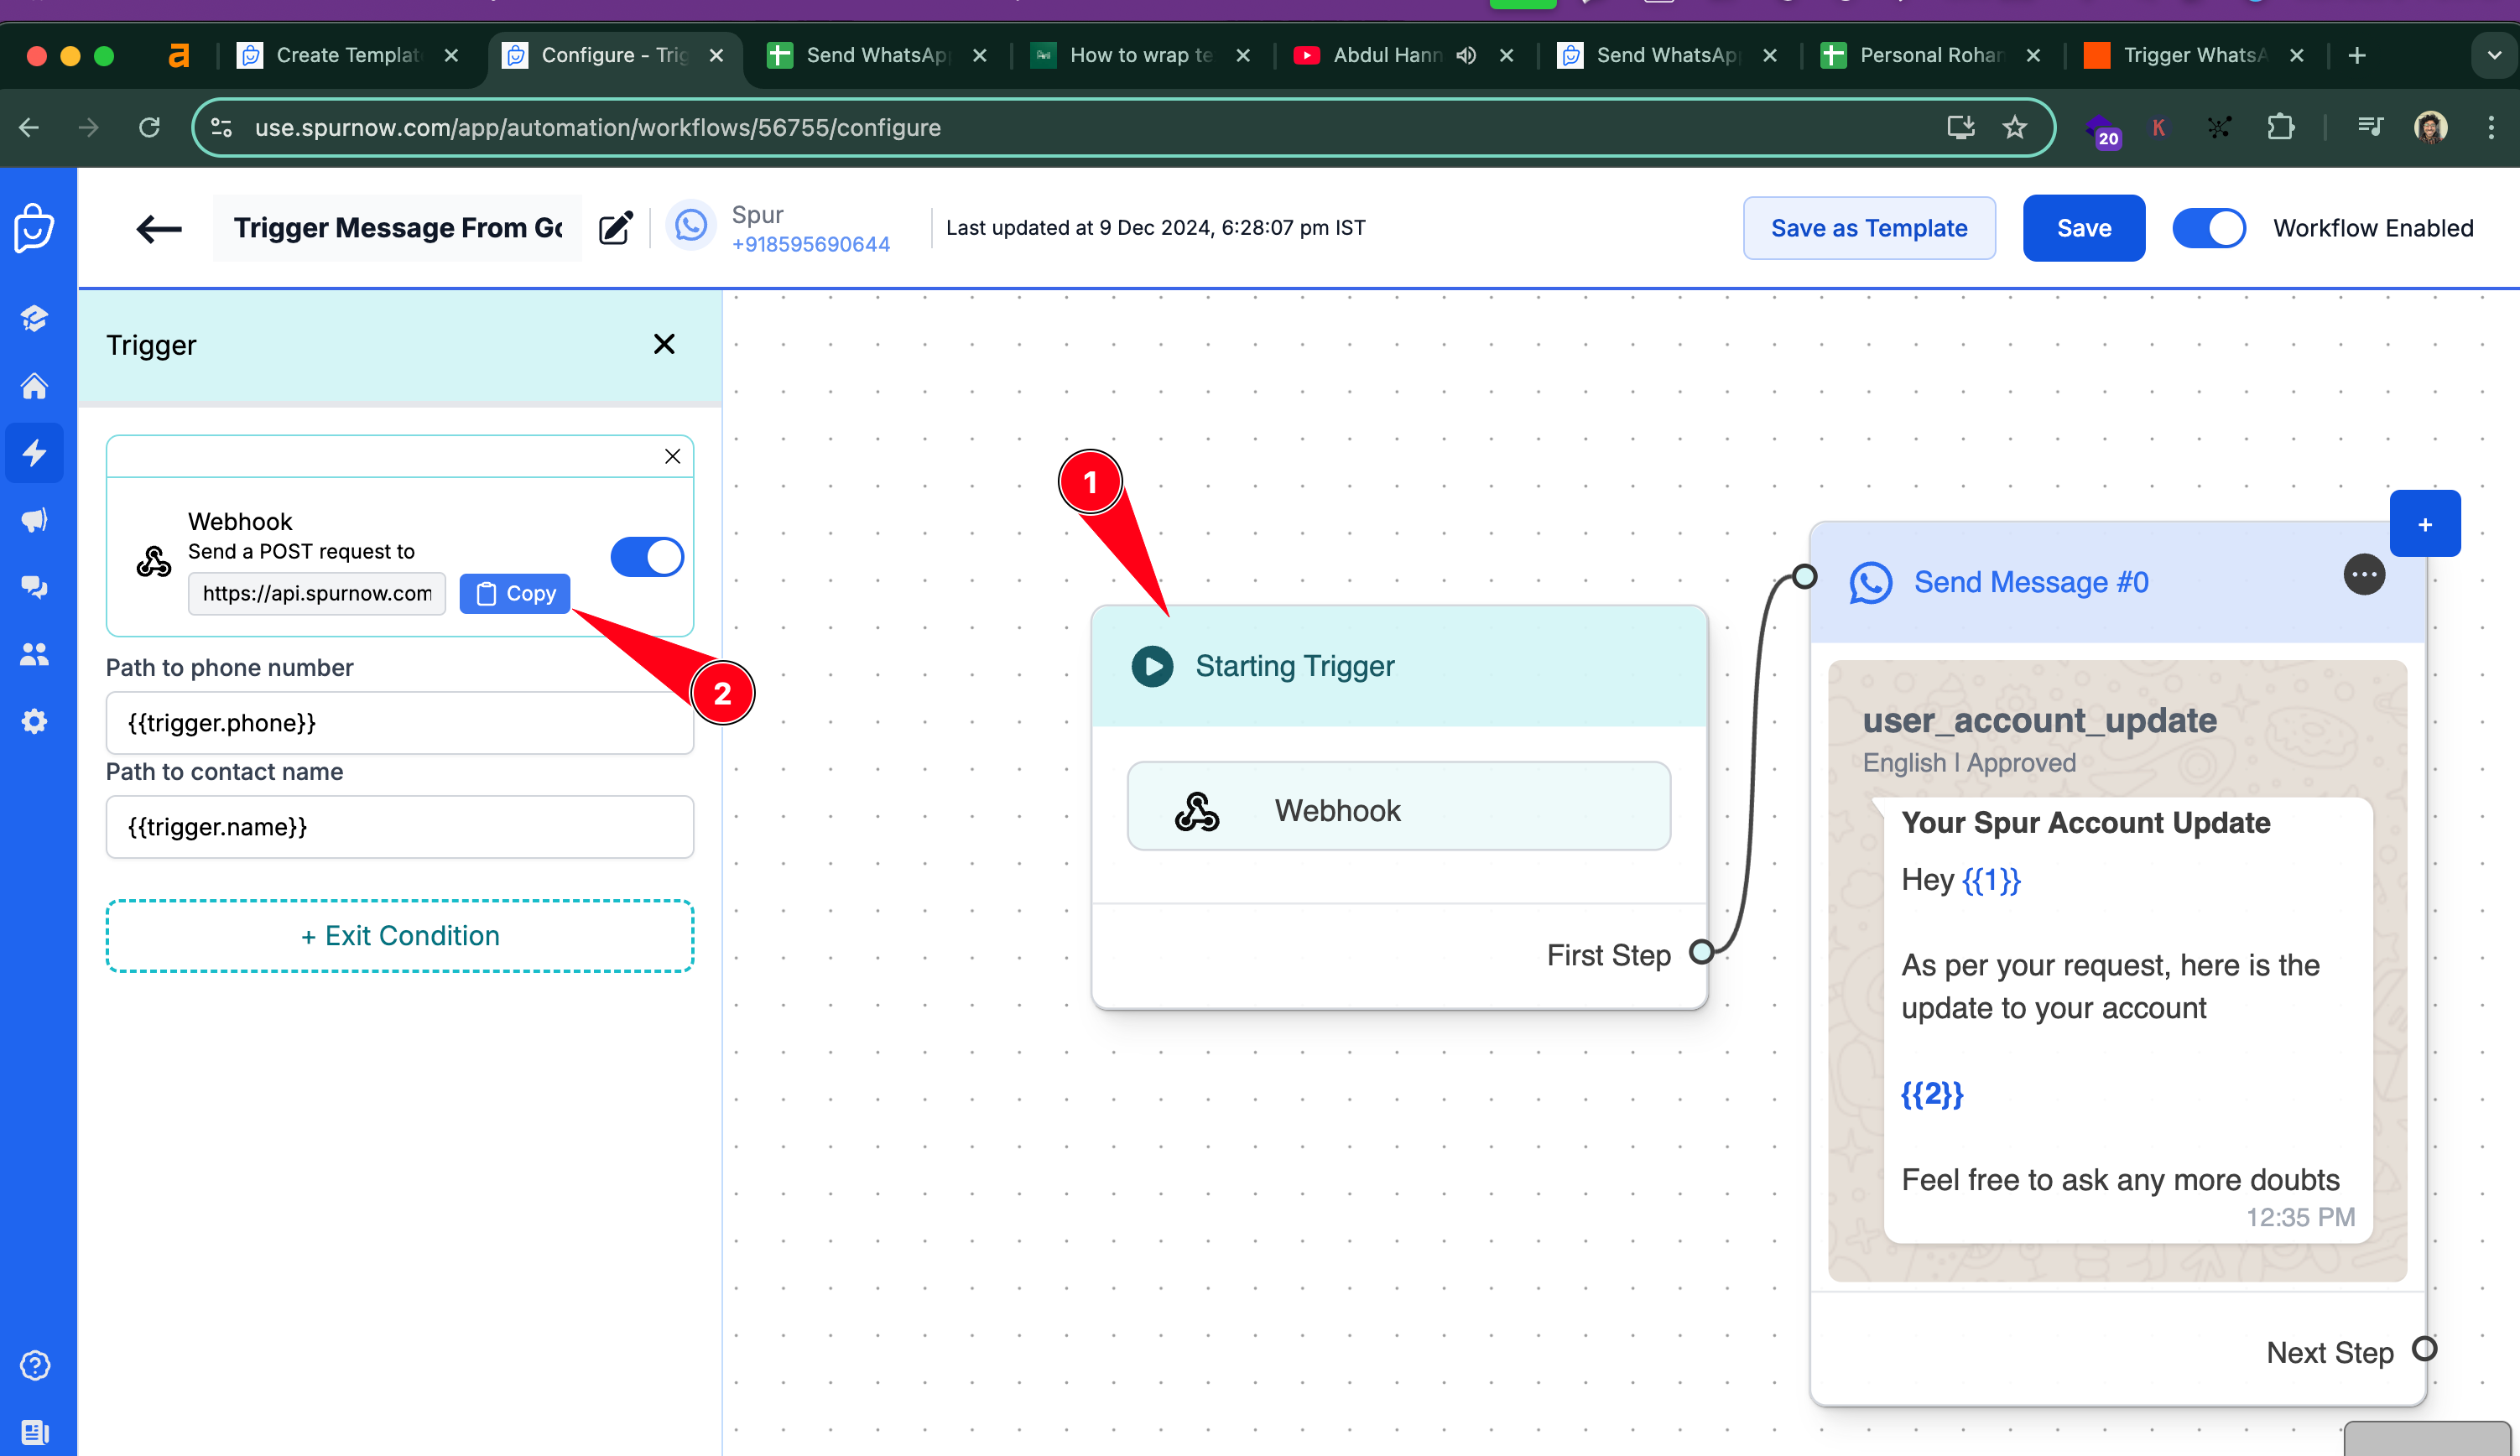
Paste the Webhook URL in the webhook action. Add these fields to the Data part, make sure the payload type is "json"
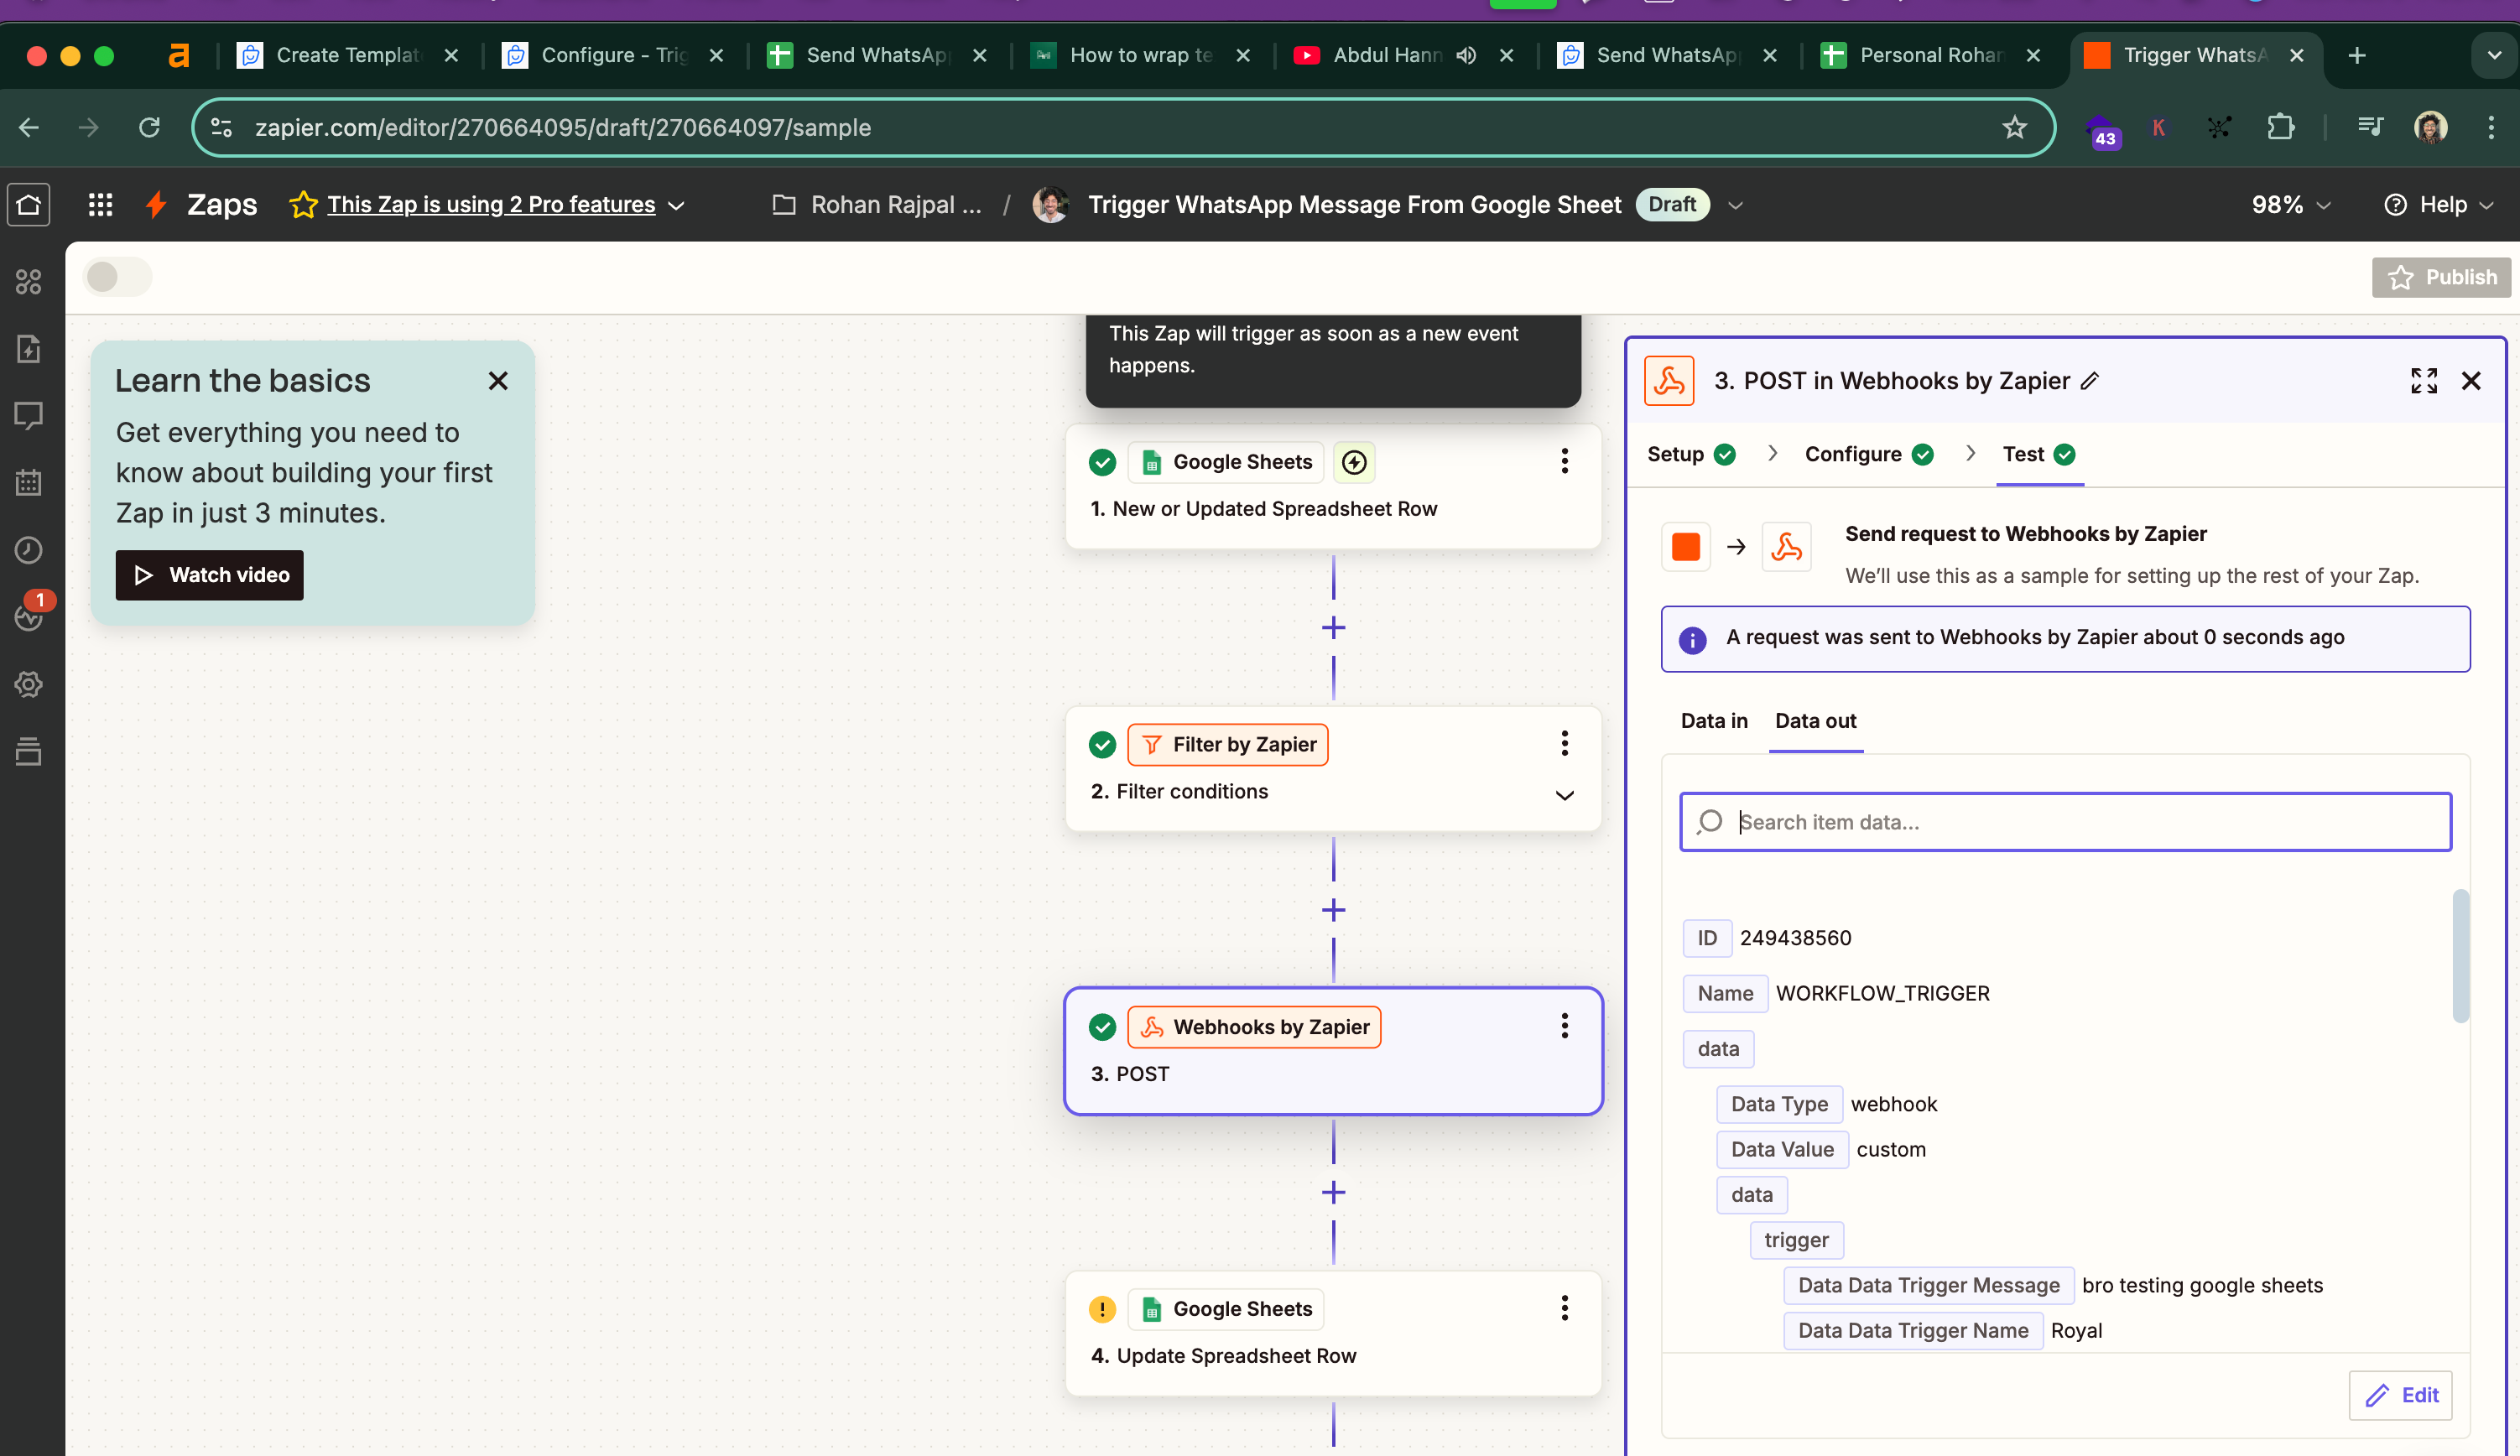
The moment you hit test here, you should get a message
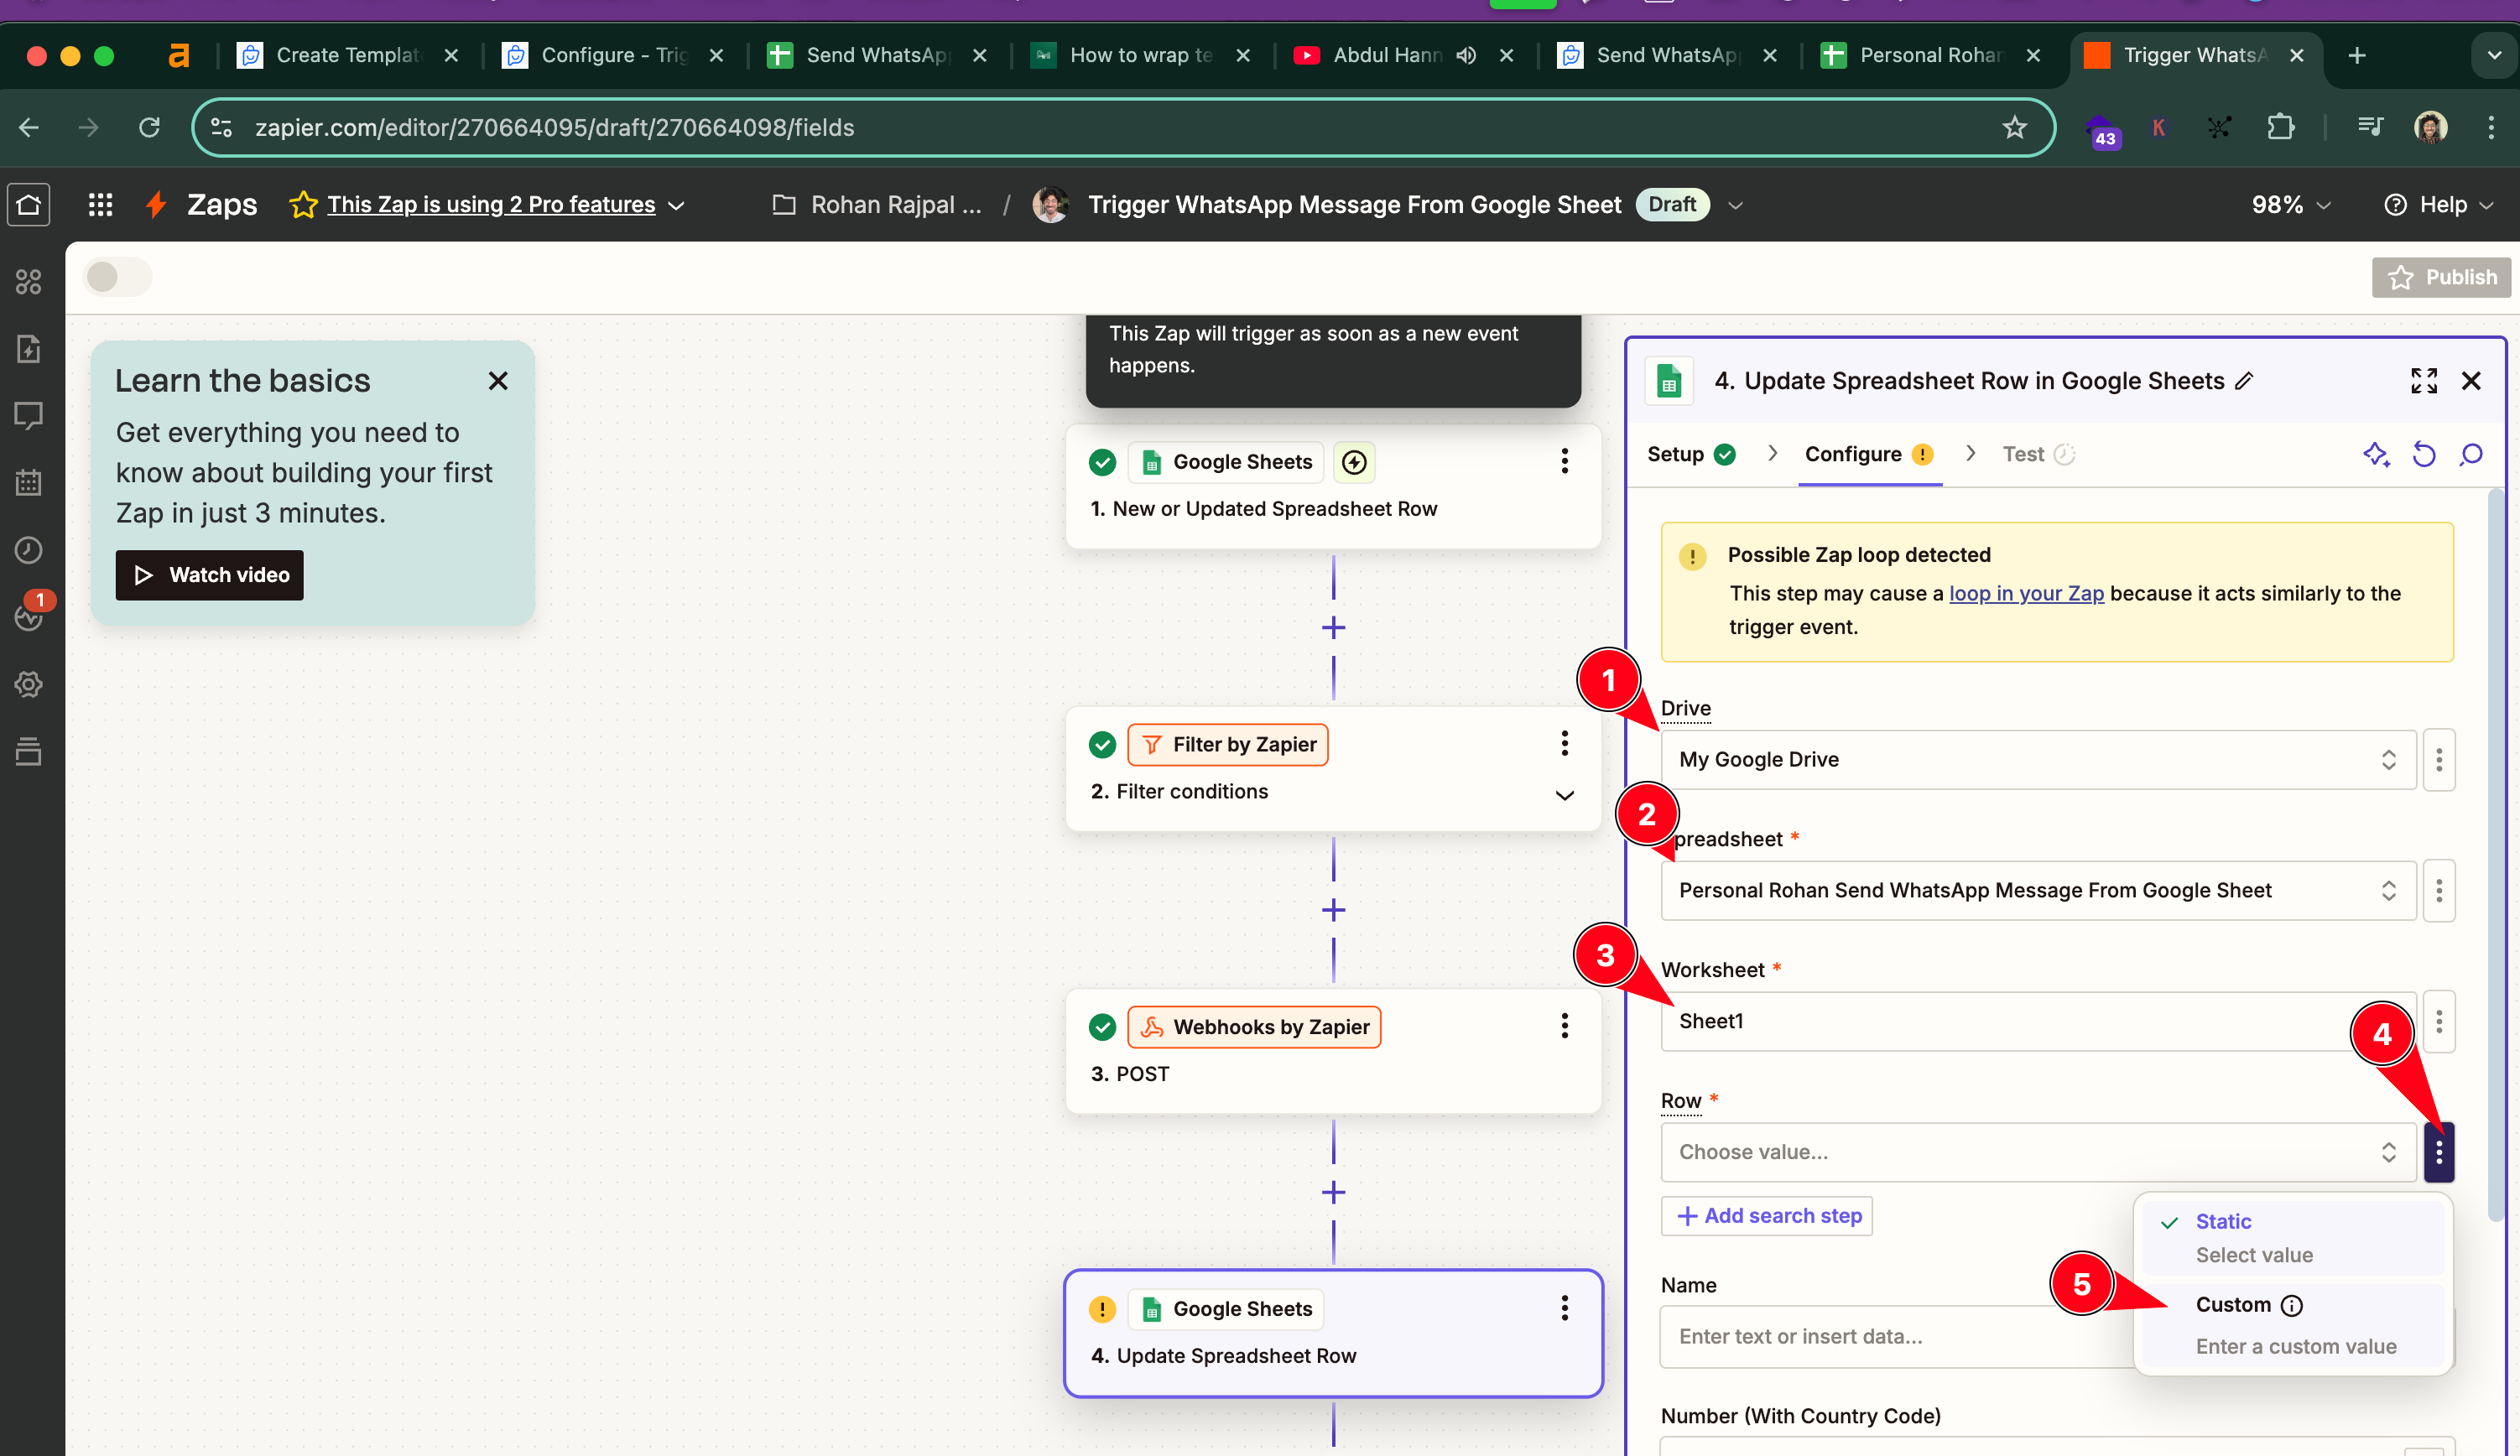
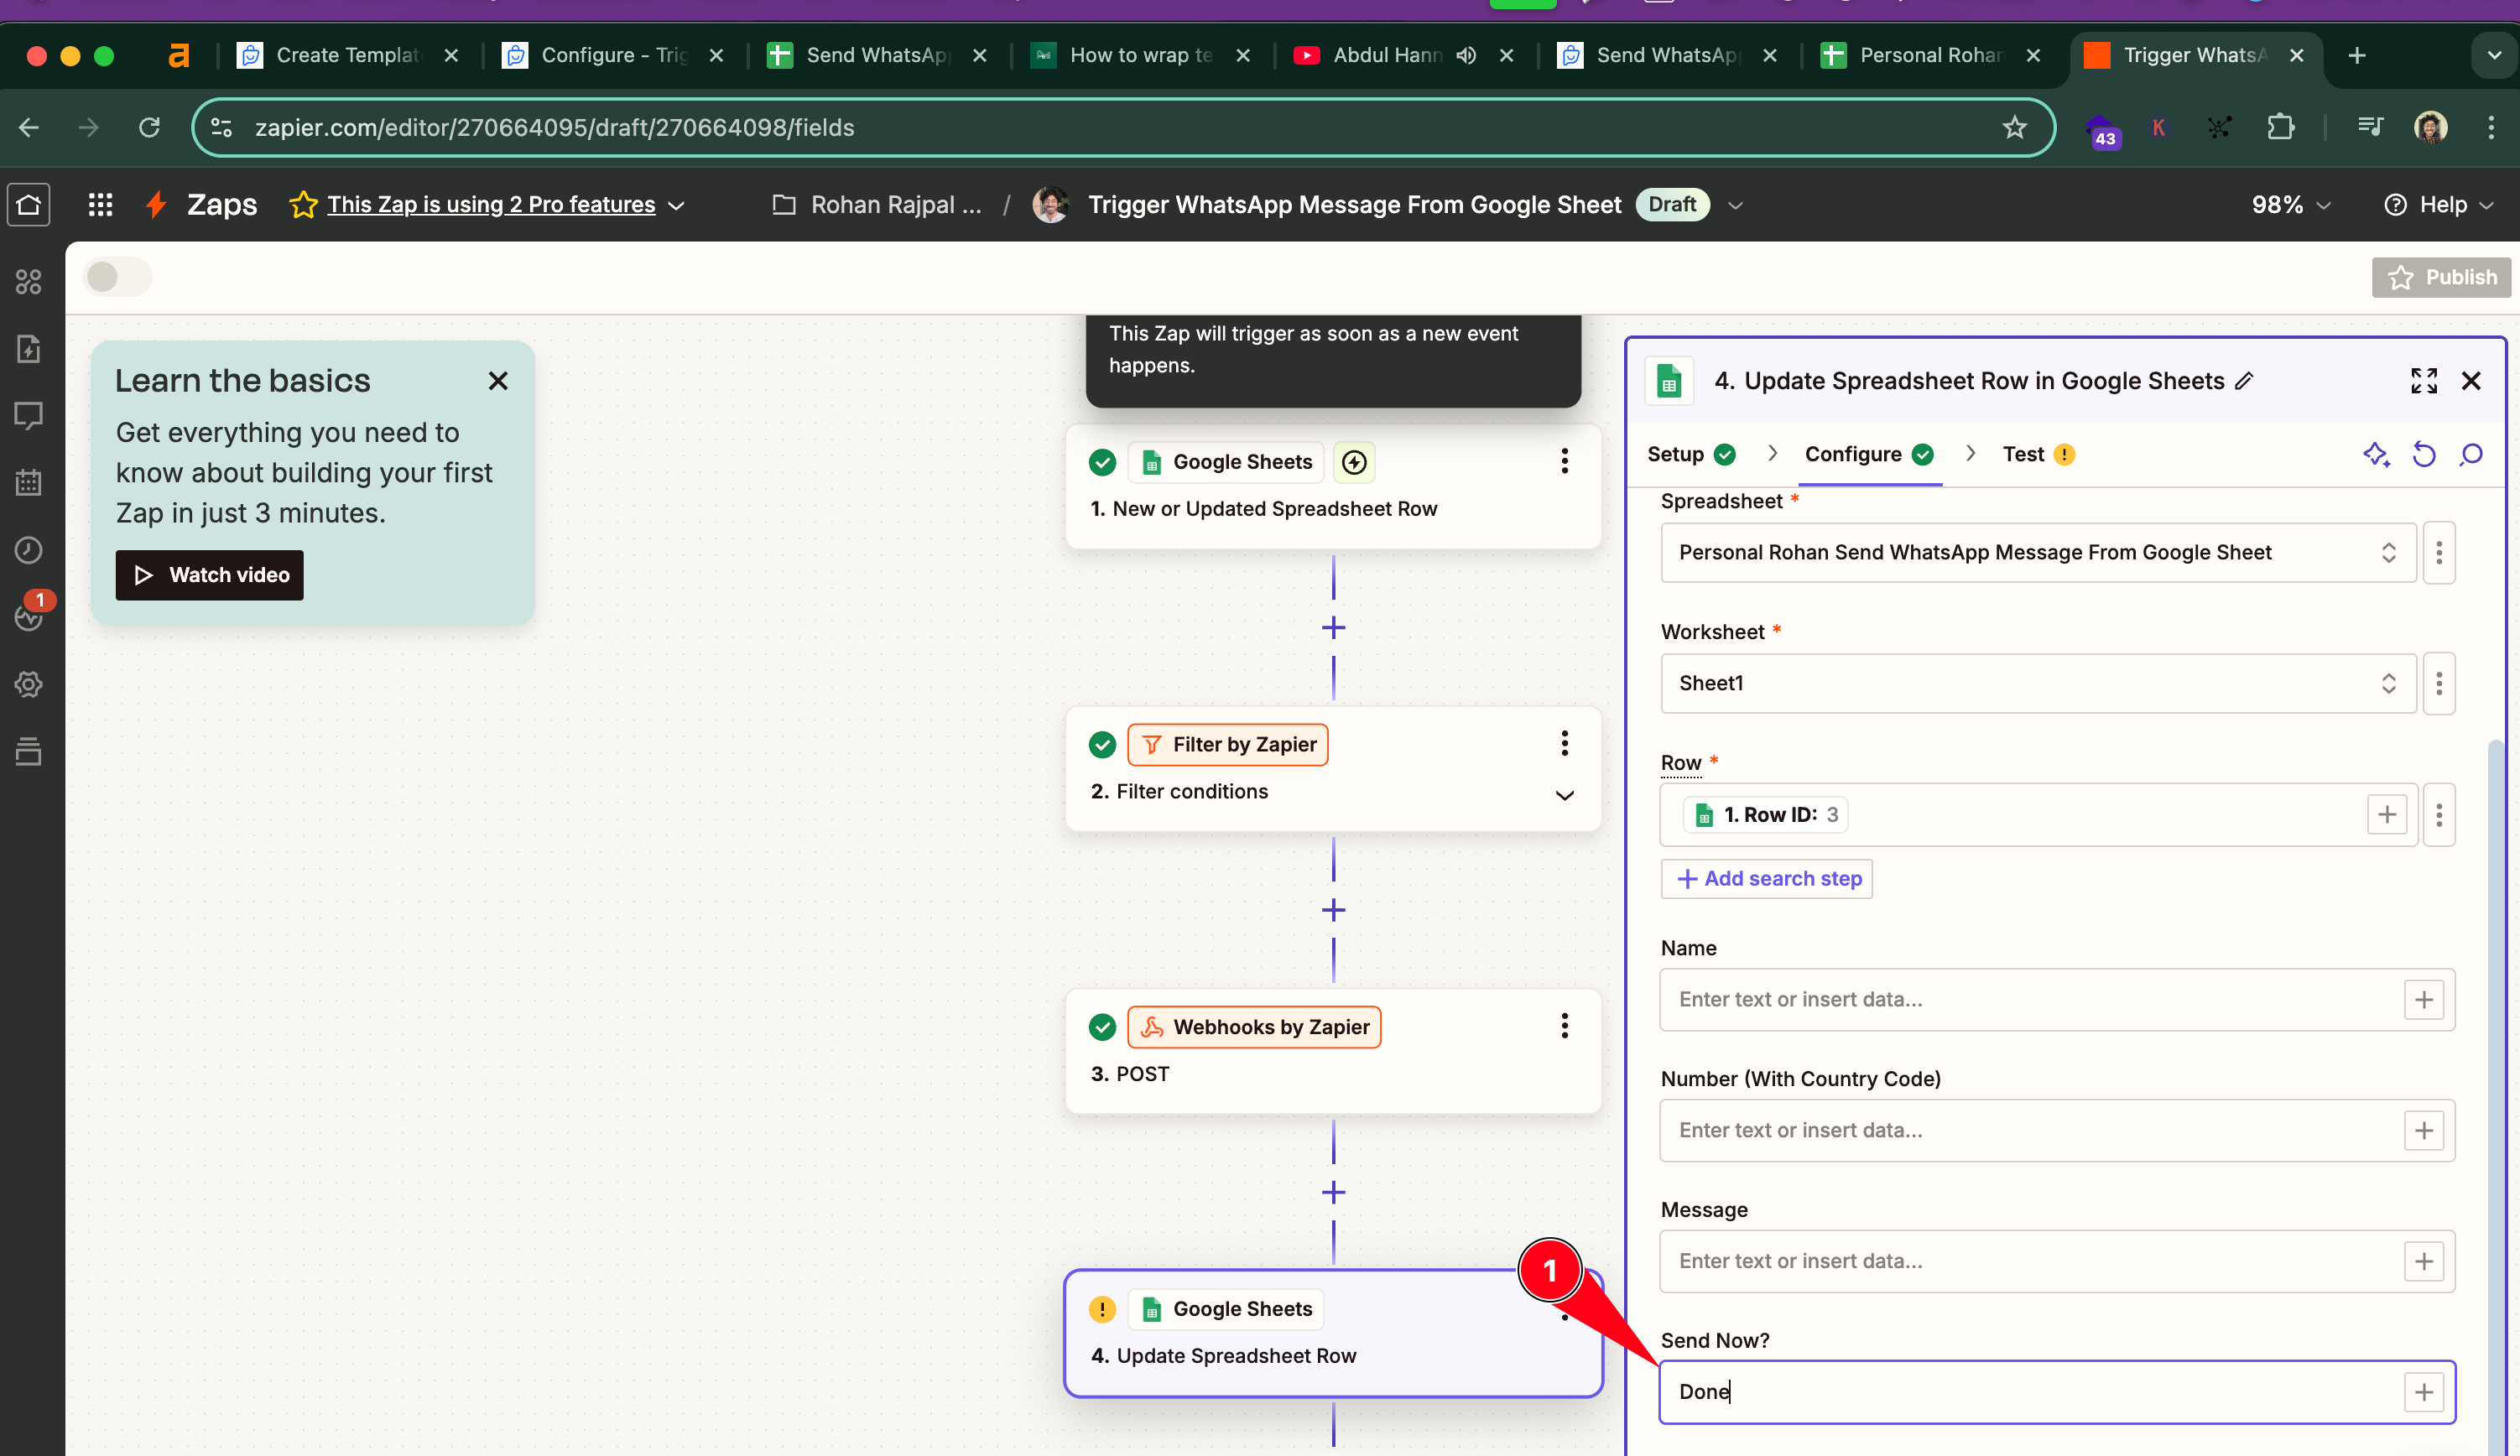
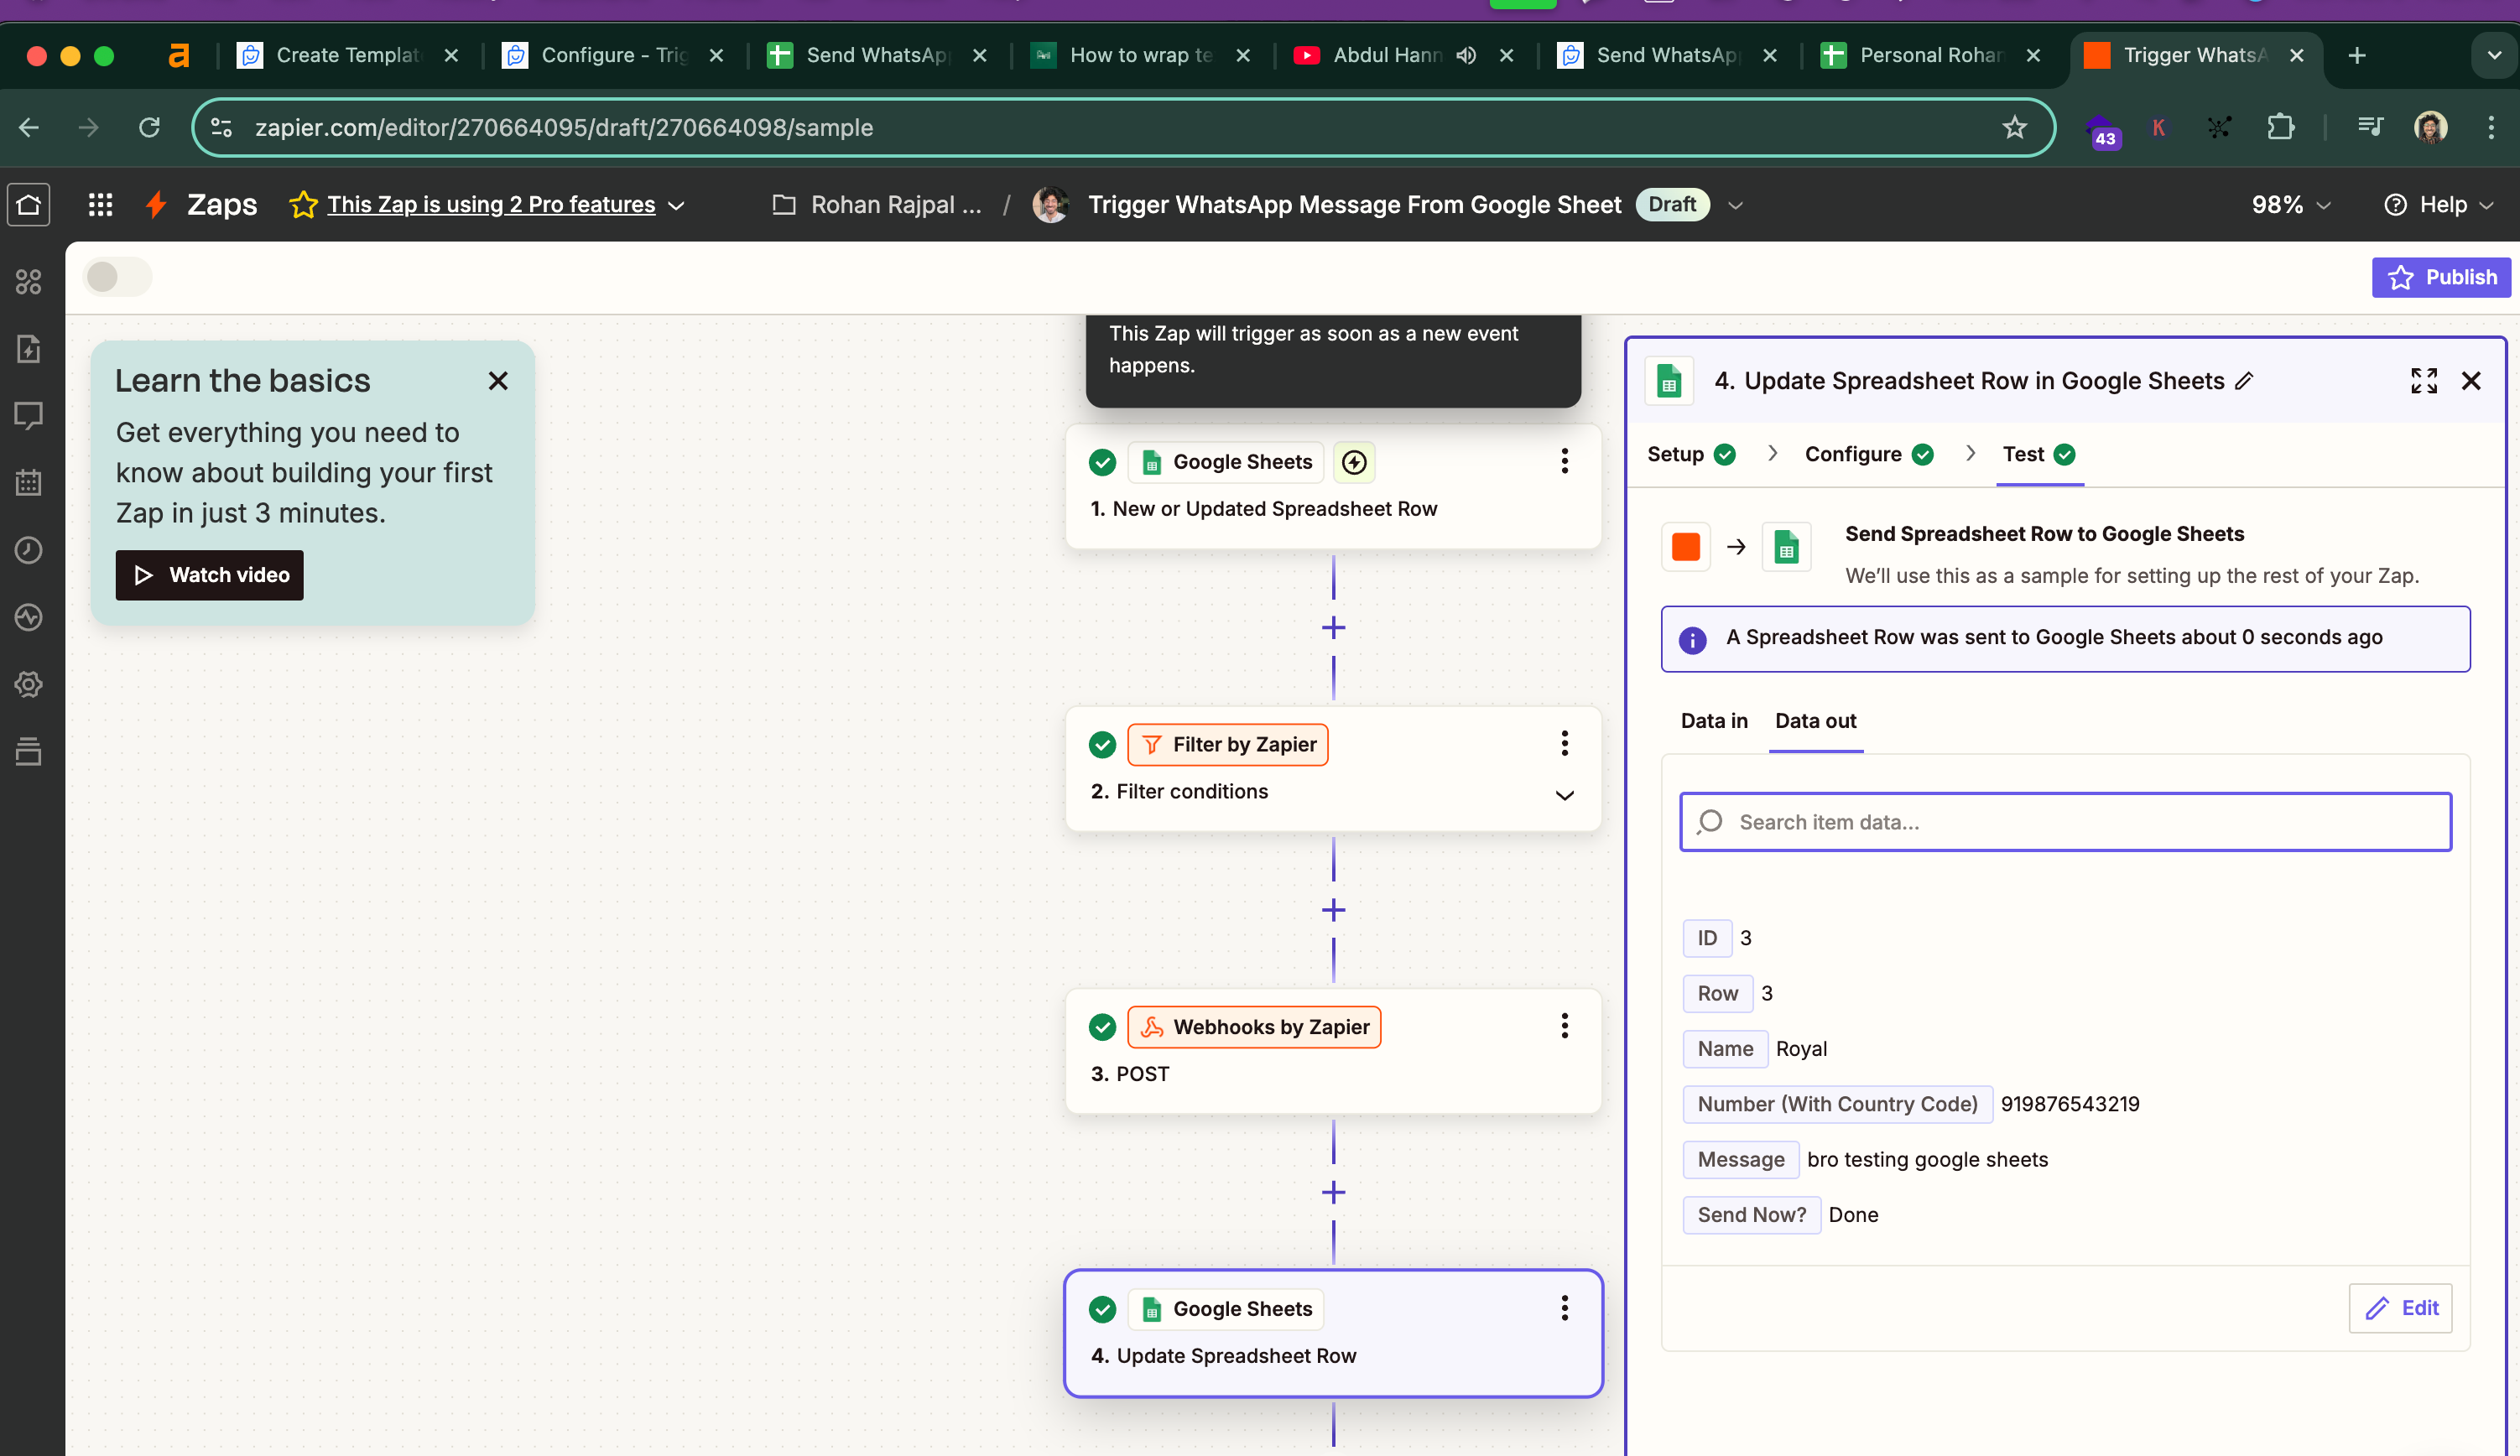
Make sure to PUBLISH the Zap for it to work automatically.
This requires a bit of an effort to set up, I know. But the convenience of edition from Google Sheets, and it's instantly triggering a WhatsApp message, is super productive. If you can any doubts, reach out to us via the chat widget on the bottom left!
